Epson CX6000 Quick Reference Guide - Page 14
Inserting the Card - won t print
 |
UPC - 010343858992
View all Epson CX6000 manuals
Add to My Manuals
Save this manual to your list of manuals |
Page 14 highlights
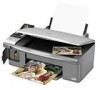
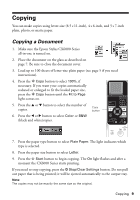
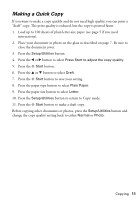
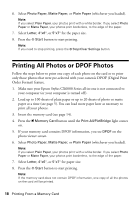
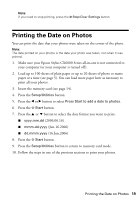
Inserting the Card 1. Make sure the Epson Stylus CX6000 Series all-in-one is turned on. Note: When you print directly from a memory card, it is best if the CX6000 Series is not connected to your computer (or your computer should be turned off). If you see a message on your computer screen when you insert a card in the CX6000 Series, just cancel the operation and close the screen. 2. Open the memory card door. 3. Make sure the memory card access light is off and that no cards are in any of the slots. Then insert your card into the correct slot (see page 13 for details). The memory card access light flashes and then stays on. Insert just one card at a time (it won't go in all the way) Left slot Right slot Memory card access light 4. Close the memory card door. Now you can: ■ View your photos on the photo viewer screen and print them (page 15) ■ Print an index sheet so you can select which photos to print (see page 16) ■ Print all the photos on the card (see page 18) ■ Print photos pre-selected on your camera using DPOF (see page 18) ■ Print the date your photos were taken on the photos (see page 19) 14 Printing From a Memory Card
-
 1
1 -
2
-
3
-
4
-
5
-
6
-
7
-
8
-
 9
9 -
 10
10 -
 11
11 -
 12
12 -
 13
13 -
 14
14 -
 15
15 -
 16
16 -
 17
17 -
 18
18 -
 19
19 -
20
-
21
-
22
-
23
-
24
-
25
-
26
-
27
-
28
-
29
-
30
-
31
-
32
-
33
-
34
-
35
-
36
-
37
-
38
-
39
-
40
-
41
-
42
-
43
-
44
-
45
-
46
-
47
-
48
-
49
-
50
-
51
-
52
-
53
-
54
-
55
-
56
 |
 |