Epson CX6000 Quick Reference Guide - Page 19
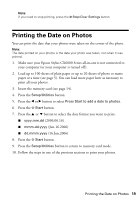
Printing the Date on Photos
 |
UPC - 010343858992
View all Epson CX6000 manuals
Add to My Manuals
Save this manual to your list of manuals |
Page 19 highlights
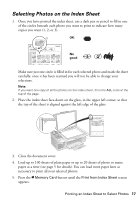
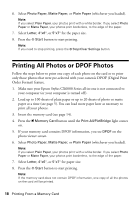
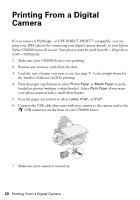
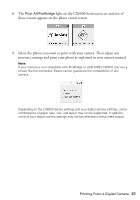
Note: If you need to stop printing, press the y Stop/Clear Settings button. Printing the Date on Photos You can print the date that your photos were taken on the corner of the photo. Note: The date printed on your photos is the date your photo was taken, not when it was printed. 1. Make sure your Epson Stylus CX6000 Series all-in-one is not connected to your computer (or your computer is turned off ). 2. Load up to 100 sheets of plain paper or up to 20 sheets of photo or matte paper at a time (see page 5). You can load more paper later as necessary to print all your photos. 3. Insert the memory card (see page 14). 4. Press the Setup/Utilities button. 5. Press the l or r button to select Press Start to add a date to photos. 6. Press the x Start button. 7. Press the u or d button to select the date format you want to print. ■ yyyy.mm.dd (2006.06.16) ■ mmm.dd.yyyy (Jun.16.2006) ■ dd.mmm.yyyy (16.Jun.2006) 8. Press the x Start button. 9. Press the Setup/Utilities button to return to memory card mode. 10. Follow the steps in one of the previous sections to print your photos. Printing the Date on Photos 19
-
 1
1 -
2
-
3
-
4
-
5
-
6
-
7
-
8
-
9
-
10
-
11
-
12
-
13
-
 14
14 -
 15
15 -
 16
16 -
 17
17 -
 18
18 -
 19
19 -
 20
20 -
 21
21 -
 22
22 -
 23
23 -
 24
24 -
25
-
26
-
27
-
28
-
29
-
30
-
31
-
32
-
33
-
34
-
35
-
36
-
37
-
38
-
39
-
40
-
41
-
42
-
43
-
44
-
45
-
46
-
47
-
48
-
49
-
50
-
51
-
52
-
53
-
54
-
55
-
56
 |
 |