Epson CX6000 Quick Reference Guide - Page 21
these screens appears on the photo viewer screen. - manual
 |
UPC - 010343858992
View all Epson CX6000 manuals
Add to My Manuals
Save this manual to your list of manuals |
Page 21 highlights
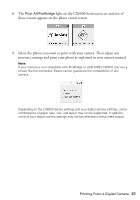
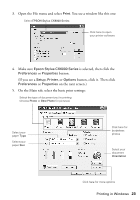
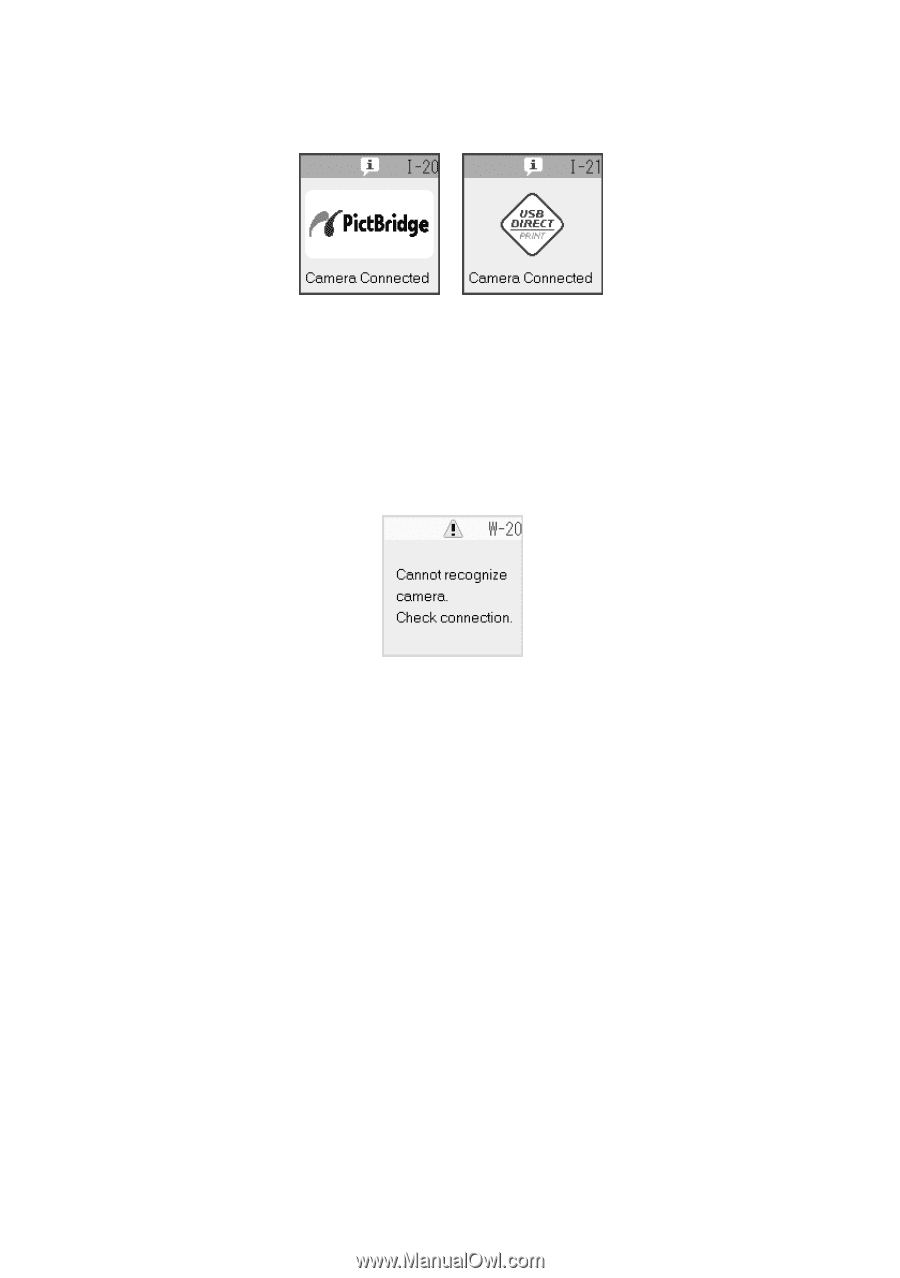
8. The Print All/PictBridge light on the CX6000 Series turns on and one of these screens appears on the photo viewer screen. 9. Select the photos you want to print with your camera. Then adjust any necessary settings and print your photo as explained in your camera manual. Note: If your camera is not compatible with PictBridge or USB DIRECT-PRINT, you see a screen like the one below. Epson cannot guarantee the compatibility of any camera. Depending on the CX6000 Series settings and your digital camera settings, some combinations of paper type, size, and layout may not be supported. In addition, some of your digital camera settings may not be reflected in the printed output. Printing From a Digital Camera 21
-
 1
1 -
2
-
3
-
4
-
5
-
6
-
7
-
8
-
9
-
10
-
11
-
12
-
13
-
14
-
15
-
 16
16 -
 17
17 -
 18
18 -
 19
19 -
 20
20 -
 21
21 -
 22
22 -
 23
23 -
 24
24 -
 25
25 -
 26
26 -
27
-
28
-
29
-
30
-
31
-
32
-
33
-
34
-
35
-
36
-
37
-
38
-
39
-
40
-
41
-
42
-
43
-
44
-
45
-
46
-
47
-
48
-
49
-
50
-
51
-
52
-
53
-
54
-
55
-
56
 |
 |
Printing From a Digital Camera
21
8.
The
Print All/PictBridge
light on the CX6000 Series turns on and one of
these screens appears on the photo viewer screen.
9.
Select the photos you want to print with your camera. Then adjust any
necessary settings and print your photo as explained in your camera manual.
Note:
If your camera is not compatible with PictBridge or USB DIRECT-PRINT, you see a
screen like the one below. Epson cannot guarantee the compatibility of any
camera.
Depending on the CX6000 Series settings and your digital camera settings, some
combinations of paper type, size, and layout may not be supported. In addition,
some of your digital camera settings may not be reflected in the printed output.