Epson ET-2550 User Manual - Page 136
Printing from a Memory Card, Viewing and Printing Individual Photos
 |
View all Epson ET-2550 manuals
Add to My Manuals
Save this manual to your list of manuals |
Page 136 highlights
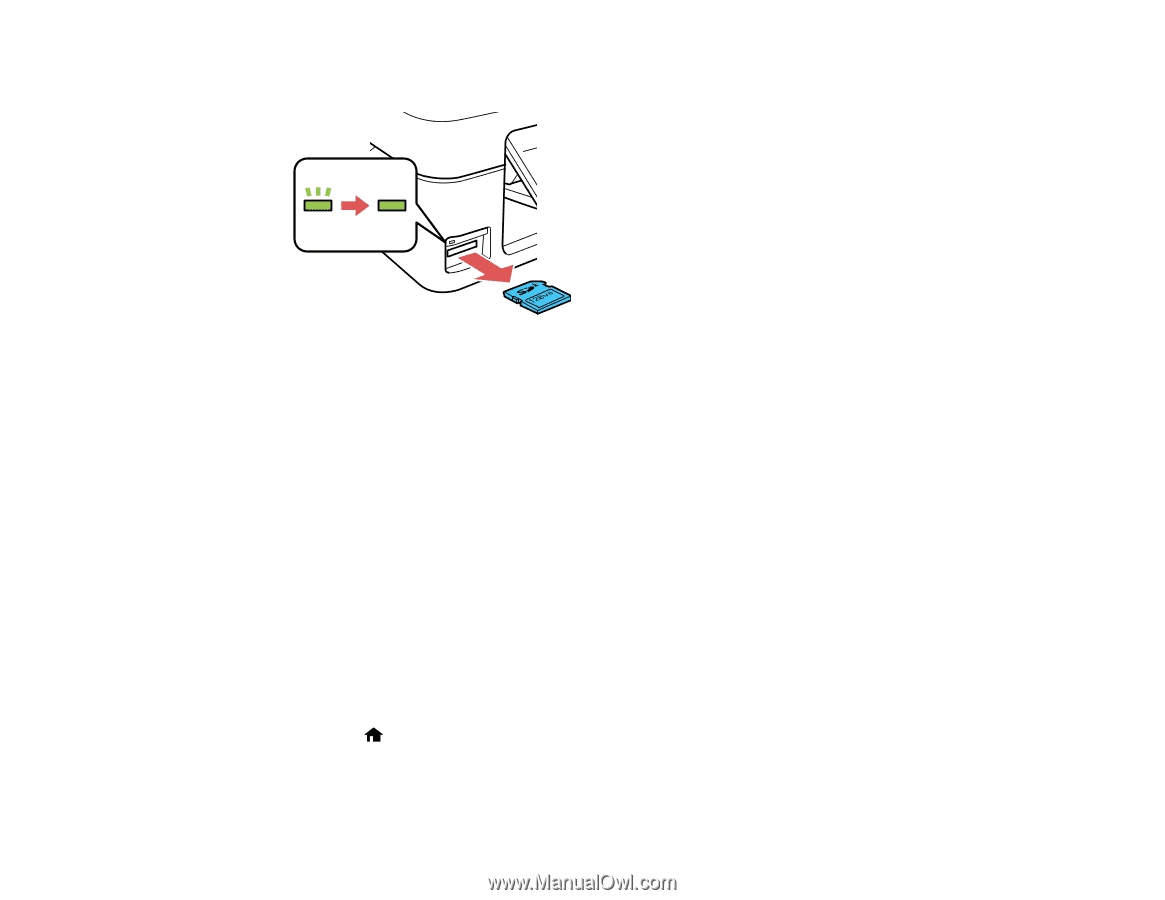
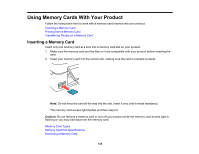
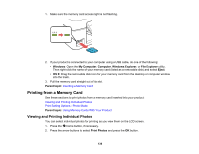
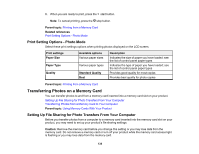
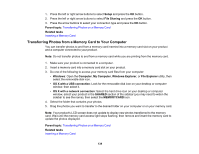
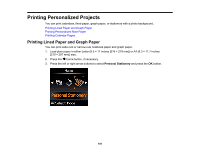
1. Make sure the memory card access light is not flashing. 2. If your product is connected to your computer using a USB cable, do one of the following: • Windows: Open the My Computer, Computer, Windows Explorer, or File Explorer utility. Then right-click the name of your memory card (listed as a removable disk) and select Eject. • OS X: Drag the removable disk icon for your memory card from the desktop or computer window into the trash. 3. Pull the memory card straight out of its slot. Parent topic: Inserting a Memory Card Printing from a Memory Card See these sections to print photos from a memory card inserted into your product: Viewing and Printing Individual Photos Print Setting Options - Photo Mode Parent topic: Using Memory Cards With Your Product Viewing and Printing Individual Photos You can select individual photos for printing as you view them on the LCD screen. 1. Press the home button, if necessary. 2. Press the arrow buttons to select Print Photos and press the OK button. 136
-
 1
1 -
2
-
3
-
4
-
5
-
6
-
7
-
8
-
9
-
10
-
11
-
12
-
13
-
14
-
15
-
16
-
17
-
18
-
19
-
20
-
21
-
22
-
23
-
24
-
25
-
26
-
27
-
28
-
29
-
30
-
31
-
32
-
33
-
34
-
35
-
36
-
37
-
38
-
39
-
40
-
41
-
42
-
43
-
44
-
45
-
46
-
47
-
48
-
49
-
50
-
51
-
52
-
53
-
54
-
55
-
56
-
57
-
58
-
59
-
60
-
61
-
62
-
63
-
64
-
65
-
66
-
67
-
68
-
69
-
70
-
71
-
72
-
73
-
74
-
75
-
76
-
77
-
78
-
79
-
80
-
81
-
82
-
83
-
84
-
85
-
86
-
87
-
88
-
89
-
90
-
91
-
92
-
93
-
94
-
95
-
96
-
97
-
98
-
99
-
100
-
101
-
102
-
103
-
104
-
105
-
106
-
107
-
108
-
109
-
110
-
111
-
112
-
113
-
114
-
115
-
116
-
117
-
118
-
119
-
120
-
121
-
122
-
123
-
124
-
125
-
126
-
127
-
128
-
129
-
130
-
 131
131 -
 132
132 -
 133
133 -
 134
134 -
 135
135 -
 136
136 -
 137
137 -
 138
138 -
 139
139 -
 140
140 -
 141
141 -
142
-
143
-
144
-
145
-
146
-
147
-
148
-
149
-
150
-
151
-
152
-
153
-
154
-
155
-
156
-
157
-
158
-
159
-
160
-
161
-
162
-
163
-
164
-
165
-
166
-
167
-
168
-
169
-
170
-
171
-
172
-
173
-
174
-
175
-
176
-
177
-
178
-
179
-
180
-
181
-
182
-
183
-
184
-
185
-
186
-
187
-
188
-
189
-
190
-
191
-
192
-
193
-
194
-
195
-
196
-
197
-
198
-
199
-
200
-
201
-
202
-
203
-
204
-
205
-
206
-
207
-
208
-
209
-
210
-
211
-
212
-
213
-
214
-
215
-
216
-
217
-
218
-
219
-
220
-
221
-
222
-
223
-
224
-
225
-
226
-
227
-
228
-
229
-
230
-
231
-
232
 |
 |