Epson Ensemble HD 6500 Installation Guide - Page 15
Locating the Screen
 |
View all Epson Ensemble HD 6500 manuals
Add to My Manuals
Save this manual to your list of manuals |
Page 15 highlights
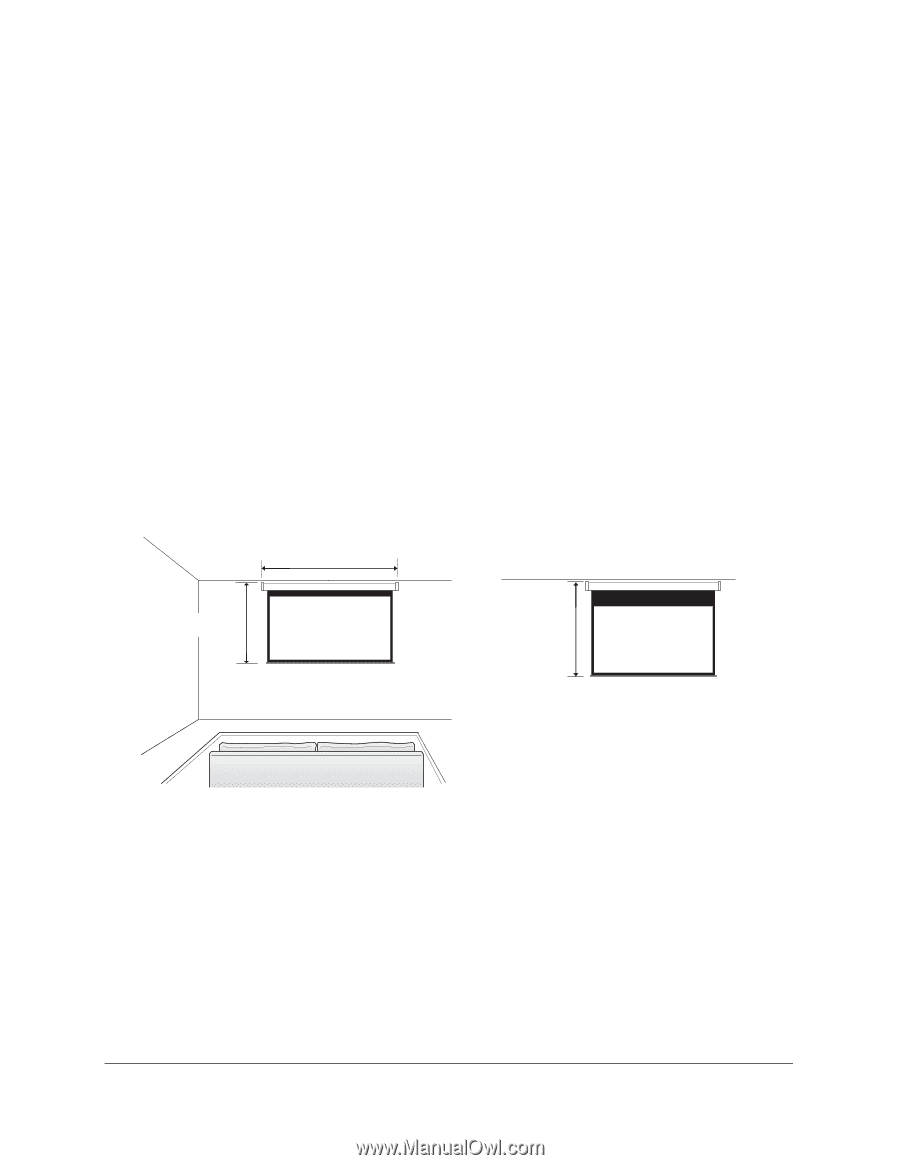
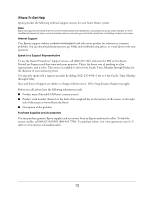
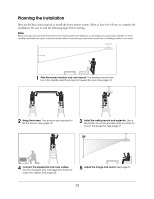
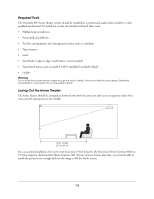
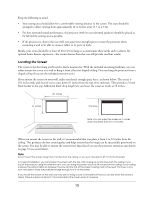
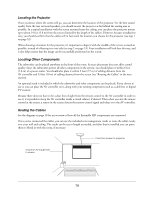
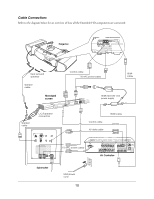
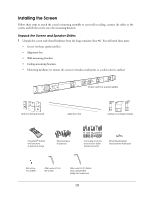
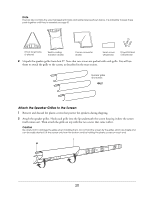
Keep the following in mind: • Your seating area should allow for a comfortable viewing distance to the screen. The seats should be arranged to allow viewing from approximately 12 to 16 feet away (3.7 to 4.9 m). • For best surround-sound performance, the projector (with its rear surround speakers) should be placed as far behind the seating area as possible. • If the projector is close to the rear wall, you must leave enough space to rotate the projector when mounting it and to be able to connect cables to its ports in back. Ideally, your room should be at least 16 feet (4.9 m) long to accommodate these needs and to achieve the optimal home theater experience-but rooms shorter than that can still provide excellent results. Locating the Screen The screen is the first thing you'll need to find a location for. With the included mounting hardware, you can either mount the screen on a wall or hang it from a flat (not sloped) ceiling. (You can hang the projector from a sloped ceiling if you use the included extension arm.) If you mount the screen on your wall, make sure there's enough space for it, as shown below. The screen is 101 inches wide and factory-set to come down 61 inches from the top of its enclosure. This provides a 3-inch black border at the top. Additional black drop length lets you lower the screen as much as 70 inches. 101 inches 61 inches 70 inches Note: You can adjust the screen so it comes down anywhere from 61 to 70 inches. When you mount the screen on the wall, it's recommended that you place it from 2 to 22 inches from the ceiling. This produces the best sound quality and helps ensure that the image can be successfully positioned on the screen. You may be able to mount the screen lower than that if you use the projector extension arm shown on page 31 (see note below). Note Do not mount the screen closer than 2 inches from the ceiling, or you won't be able to lift it onto the brackets. In a typical installation, you can position the screen with the top of its housing up to 22 inches from the ceiling. If you mount the projector using the extension arm, you can hang the screen as low as 29 inches from the ceiling. If your ceiling is sloped, the vertical distance between the lens and the top of the screen housing must not exceed 15 inches, or you won't be able to lower the projected image enough to fit it on the screen. If you mount the screen on the wall, you may wish to hang a work of art behind it that you can see when the screen is raised. There is a space of about 2 1/2 inches behind the screen when it's lowered. 15
-
 1
1 -
2
-
3
-
4
-
5
-
6
-
7
-
8
-
9
-
 10
10 -
 11
11 -
 12
12 -
 13
13 -
 14
14 -
 15
15 -
 16
16 -
 17
17 -
 18
18 -
 19
19 -
 20
20 -
21
-
22
-
23
-
24
-
25
-
26
-
27
-
28
-
29
-
30
-
31
-
32
-
33
-
34
-
35
-
36
-
37
-
38
-
39
-
40
-
41
-
42
-
43
-
44
-
45
-
46
-
47
-
48
-
49
-
50
-
51
-
52
-
53
-
54
-
55
-
56
-
57
-
58
-
59
-
60
-
61
-
62
-
63
-
64
-
65
-
66
-
67
-
68
-
69
-
70
-
71
 |
 |