Epson Ensemble HD 6500 Installation Guide - Page 16
Locating the Projector, Locating Other Components, Routing the Cables, TV receiver.
 |
View all Epson Ensemble HD 6500 manuals
Add to My Manuals
Save this manual to your list of manuals |
Page 16 highlights
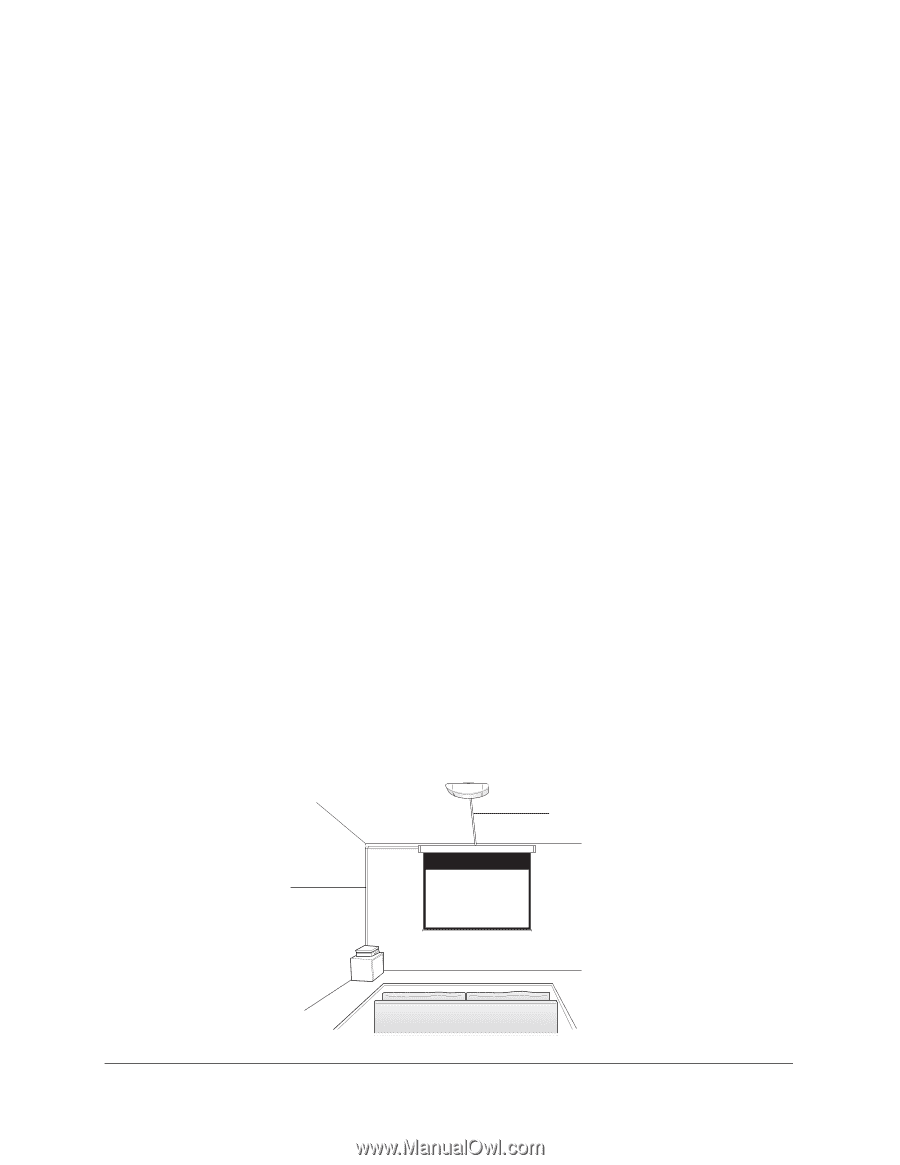
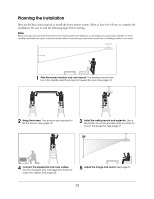
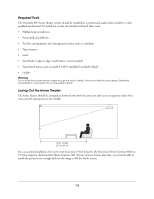
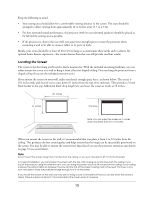
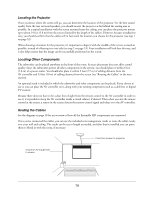
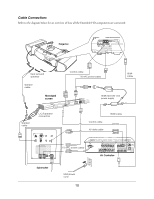
Locating the Projector Once you know where the screen will go, you can determine the location of the projector. For the best sound quality from the rear surround speakers, you should mount the projector as far behind the seating area as possible. In a typical installation with the screen mounted near the ceiling, you can place the projector mount up to about 19 feet (5.8 m) from the screen (limited by the length of the cables). However, because installations vary, you should confirm that the cables will in fact reach the location you choose for the projector (see step 1 on page 32). When choosing a location for the projector, it's important to align it with the middle of the screen as much as possible, instead of offsetting it to one side (see step 2 on page 33). Your installation will look best this way, and it also helps ensure that the image can be successfully positioned on the screen. Locating Other Components The subwoofer can be placed anywhere in the front of the room. Its exact placement does not affect sound quality. Since the subwoofer powers all other components in the system, you should place it within 6 feet (1.8 m) of a power outlet. You should also place it within 9 feet (2.7 m) of cabling distance from the AV controller and 33 feet (10 m) of cabling distance from the screen (see "Routing the Cables" in the next section). An optional stand is included in which the subwoofer and other components can be placed. If you choose to use it, you can place the AV controller on it, along with your existing components such as a cable box or digital TV receiver. Because there does not have to be a clear line-of-sight from the remote control to the AV controller in order to use it, it is possible to keep the AV controller inside a closed cabinet, if desired. Then when you aim the remote control at the screen, a sensor in the screen detects the remote control signal and relays it to the AV controller. Routing the Cables See the diagram on page 18 for an overview of how all the Ensemble HD components are connected. Once you've connected the cables, you can use the included wire management tracks to route the cables neatly over your wall and ceiling. The tracks can be cut to length as needed, and after they're installed you can paint them to blend in with the room, if necessary. Track from screen to projector Track from AV equipment to screen 16
-
 1
1 -
2
-
3
-
4
-
5
-
6
-
7
-
8
-
9
-
10
-
 11
11 -
 12
12 -
 13
13 -
 14
14 -
 15
15 -
 16
16 -
 17
17 -
 18
18 -
 19
19 -
 20
20 -
 21
21 -
22
-
23
-
24
-
25
-
26
-
27
-
28
-
29
-
30
-
31
-
32
-
33
-
34
-
35
-
36
-
37
-
38
-
39
-
40
-
41
-
42
-
43
-
44
-
45
-
46
-
47
-
48
-
49
-
50
-
51
-
52
-
53
-
54
-
55
-
56
-
57
-
58
-
59
-
60
-
61
-
62
-
63
-
64
-
65
-
66
-
67
-
68
-
69
-
70
-
71
 |
 |