Epson Ensemble HD 6500 Installation Guide - Page 43
Connecting and Routing the Cables, Unpack the Wire Management Tracks
 |
View all Epson Ensemble HD 6500 manuals
Add to My Manuals
Save this manual to your list of manuals |
Page 43 highlights
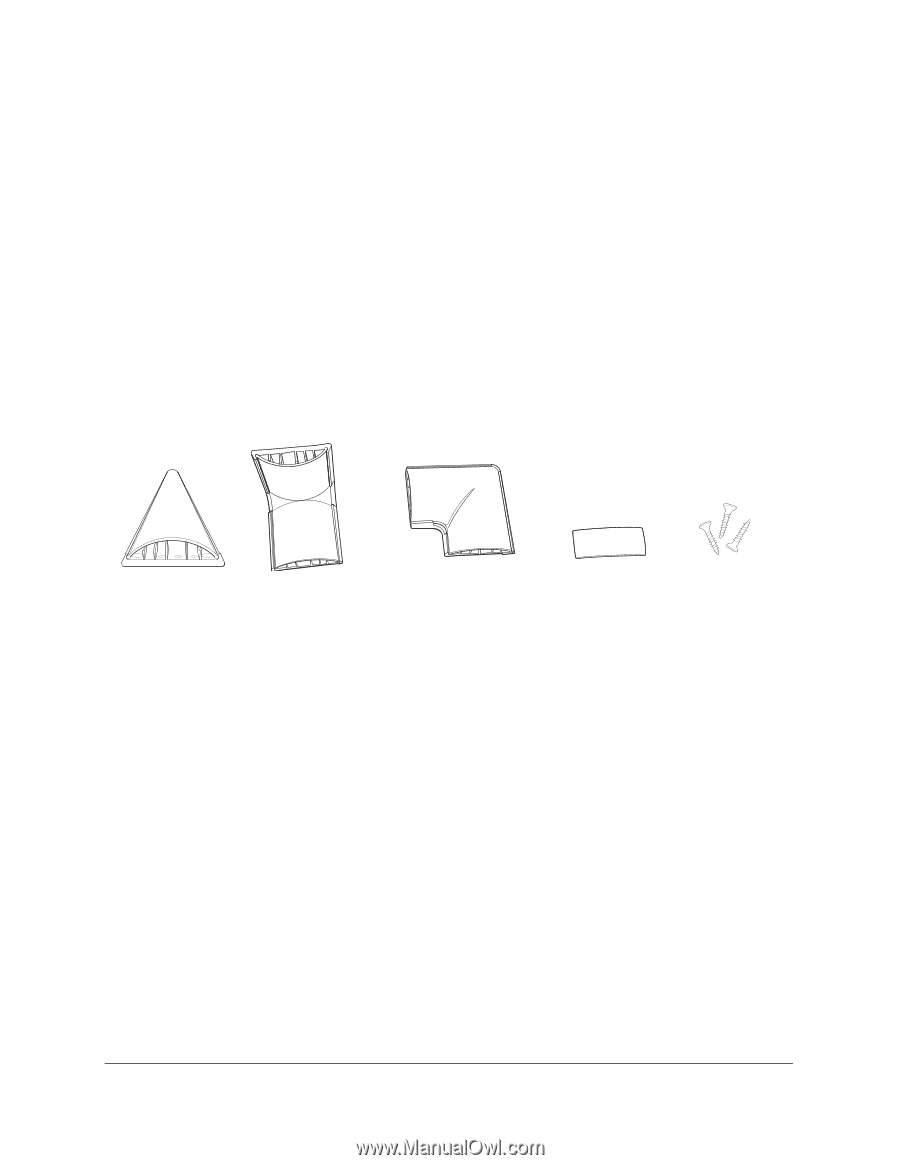
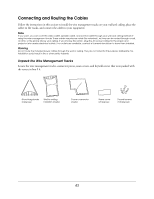
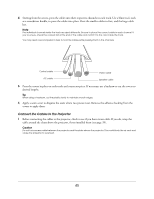
Connecting and Routing the Cables Follow the instructions in this section to install the wire management tracks on your wall and ceiling, place the cables in the tracks, and connect the cables to your equipment. Note If you want, you can route the video cable, speaker cable, and control cable through your wall and ceiling instead of using the wire management tracks. These cables are plenum-rated (fire retardant), so they can be routed through a wall, an attic, or the space above your ceiling. If you choose this option, plug the AC power cables for the screen and projector into nearby electrical outlets. If no outlets are available, contact a licensed electrician to have them installed. Warning Do not route the included power cables through the wall or ceiling. They are not rated for this purpose. Deliberate misinstallation could result in fire or other safety hazards. Unpack the Wire Management Tracks Locate the wire management tracks, connector pieces, seam covers, and drywall screws that were packed with the screen in box # 4. 8-foot-long tracks (6 pieces) Wall-to-ceiling transition (2 sets) Corner connector (3 sets) Seam cover (20 pieces) Drywall screws (100 pieces) 43
-
 1
1 -
2
-
3
-
4
-
5
-
6
-
7
-
8
-
9
-
10
-
11
-
12
-
13
-
14
-
15
-
16
-
17
-
18
-
19
-
20
-
21
-
22
-
23
-
24
-
25
-
26
-
27
-
28
-
29
-
30
-
31
-
32
-
33
-
34
-
35
-
36
-
37
-
 38
38 -
 39
39 -
 40
40 -
 41
41 -
 42
42 -
 43
43 -
 44
44 -
 45
45 -
 46
46 -
 47
47 -
 48
48 -
49
-
50
-
51
-
52
-
53
-
54
-
55
-
56
-
57
-
58
-
59
-
60
-
61
-
62
-
63
-
64
-
65
-
66
-
67
-
68
-
69
-
70
-
71
 |
 |