Epson Ensemble HD 6500 Installation Guide - Page 23
If the middle bracket aligns with the center of a stud see drawing below
 |
View all Epson Ensemble HD 6500 manuals
Add to My Manuals
Save this manual to your list of manuals |
Page 23 highlights
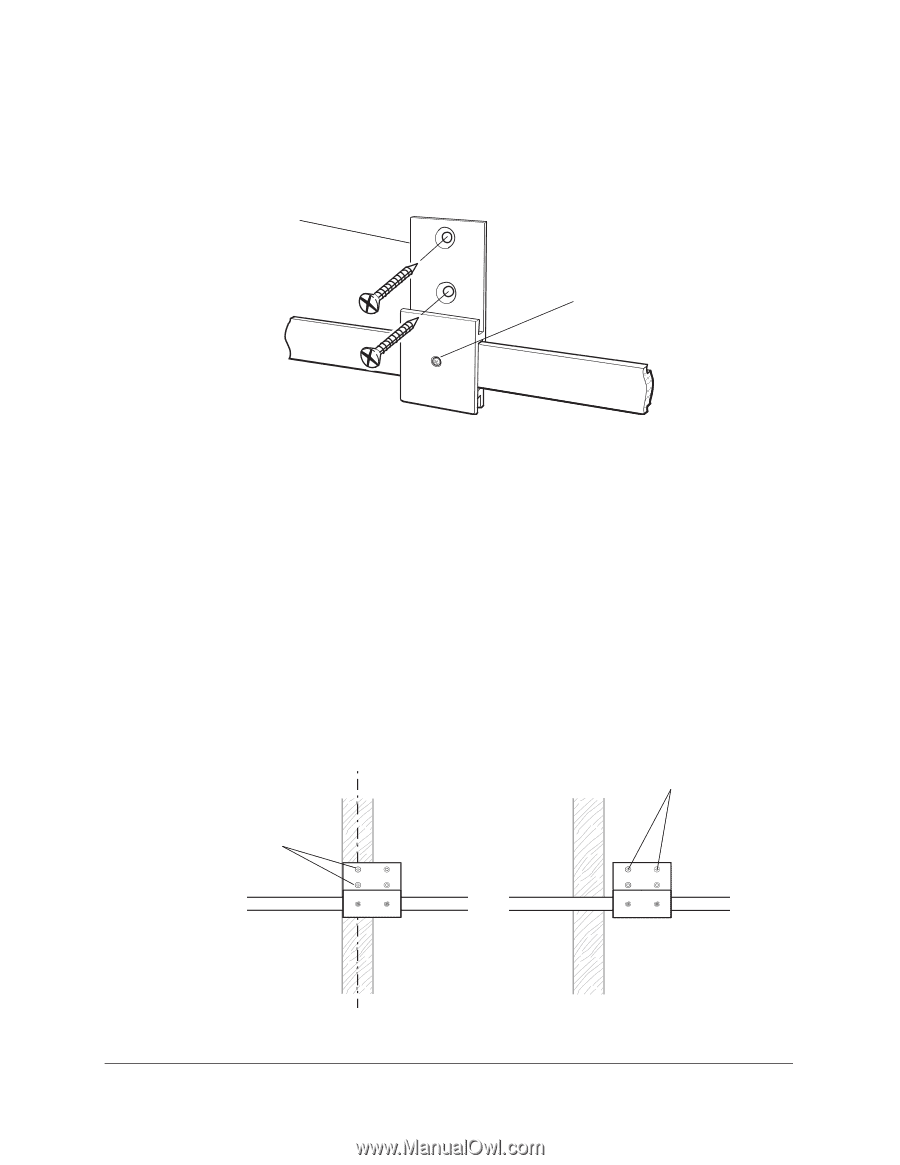
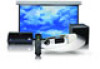
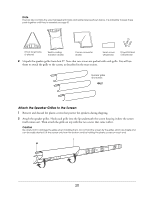
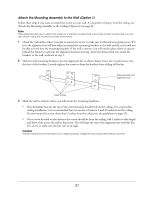
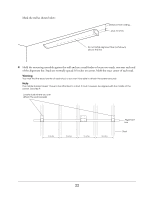
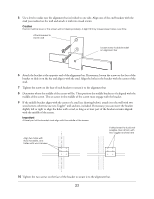
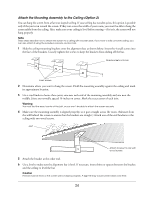
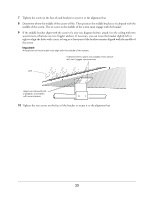
5 Use a level to make sure the alignment bar isn't tilted to one side. Align one of the end brackets with the stud you marked on the wall and attach it with two wood screws. Caution The bar must be level, or the screen will not deploy properly. A slight tilt may cause screen failure over time. Attach bracket to stud in wall Loosen screw to slide bracket on alignment bar 6 Attach the bracket at the opposite end of the alignment bar. If necessary, loosen the screw on the face of the bracket to slide it on the bar and align it with the stud. Align the holes in the bracket with the center of the stud. 7 Tighten the screw on the face of each bracket to secure it to the alignment bar. 8 Determine where the middle of the screen will be. Then position the middle bracket so it's aligned with the middle of the screen. The set screw in the middle of the screen must engage with the bracket. 9 If the middle bracket aligns with the center of a stud (see drawing below), attach it to the wall with two wood screws; otherwise use two Toggler® wall anchors, included. If necessary, you can move the bracket slightly left or right to align the holes with a stud, as long as at least part of the bracket remains aligned with the middle of the screen. Important At least part of the bracket must align with the middle of the screen. Align two holes with stud, if possible, and fasten with wood screws If attachment to stud is not possible, then attach with two Toggler anchors here 10 Tighten the two screws on the face of the bracket to secure it to the alignment bar. 23
-
 1
1 -
2
-
3
-
4
-
5
-
6
-
7
-
8
-
9
-
10
-
11
-
12
-
13
-
14
-
15
-
16
-
17
-
 18
18 -
 19
19 -
 20
20 -
 21
21 -
 22
22 -
 23
23 -
 24
24 -
 25
25 -
 26
26 -
 27
27 -
 28
28 -
29
-
30
-
31
-
32
-
33
-
34
-
35
-
36
-
37
-
38
-
39
-
40
-
41
-
42
-
43
-
44
-
45
-
46
-
47
-
48
-
49
-
50
-
51
-
52
-
53
-
54
-
55
-
56
-
57
-
58
-
59
-
60
-
61
-
62
-
63
-
64
-
65
-
66
-
67
-
68
-
69
-
70
-
71
 |
 |