Epson Ensemble HD 6500 Installation Guide - Page 68
Connecting Another Subwoofer, User's Guide
 |
View all Epson Ensemble HD 6500 manuals
Add to My Manuals
Save this manual to your list of manuals |
Page 68 highlights
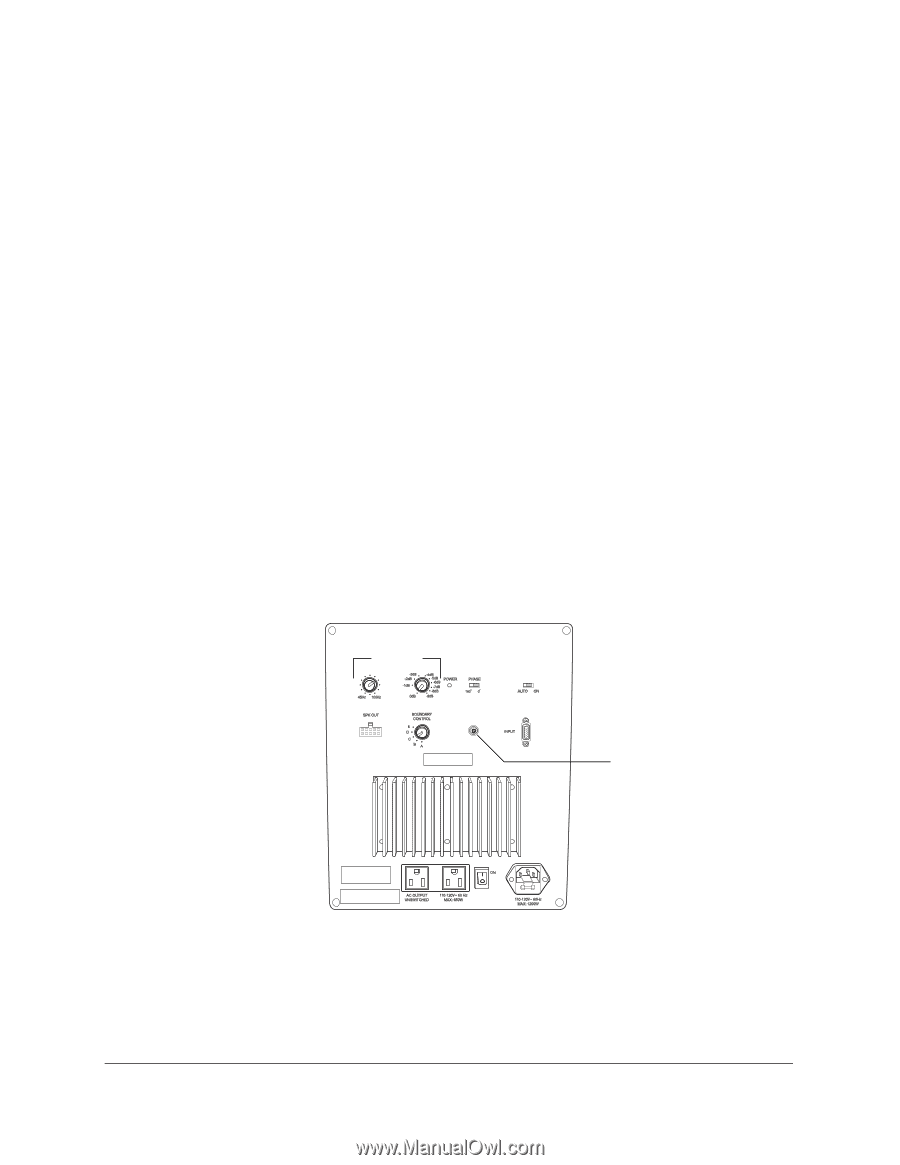
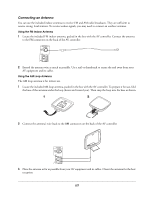
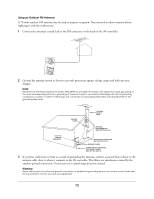
6 Press the u or d button to select the type of device you've connected, then press the SEL (Select) button. (The names in this step correspond to the categories of devices found in the code tables.) 7 Point the remote control at the component, then enter the first three-digit code number from the code table. (You do not have to press SEL or ENT to enter the code.) After you enter a three-digit code, look at the component to see if it has turned off. Continue to enter code numbers until the component turns off. 8 When the component turns off, save the code number you entered by selecting the SAVE option on the LCD screen. 9 Press the MAIN button twice to exit the SETUP menu. 10 Test the Ensemble HD remote control to make sure it has all the functions you need. When you open the new component's menu, you should see all the functions needed to operate it. If any commands are missing, you can copy them from the component's original remote control. For instructions, see the section on using advanced remote control features in the User's Guide. Note Refer to the manual that came with your component for instructions on using the commands to operate it. Connecting Another Subwoofer To increase the bass presence in extra-large rooms, you can connect an additional powered subwoofer to the system. Set the added subwoofer's bypass switch to bypass its built-in crossover (if it doesn't have a bypass switch, set its crossover frequency to the maximum). Use an RCA-style audio cable and connect it to the SUB OUT port on the back of the Ensemble HD subwoofer: BASS CONTOUR CONTROL FREQ 61 82 47 98 99 LEVEL PWR ON MODE SUB OUT Connect additional powered subwoofer here MASTER POWER 68
-
 1
1 -
2
-
3
-
4
-
5
-
6
-
7
-
8
-
9
-
10
-
11
-
12
-
13
-
14
-
15
-
16
-
17
-
18
-
19
-
20
-
21
-
22
-
23
-
24
-
25
-
26
-
27
-
28
-
29
-
30
-
31
-
32
-
33
-
34
-
35
-
36
-
37
-
38
-
39
-
40
-
41
-
42
-
43
-
44
-
45
-
46
-
47
-
48
-
49
-
50
-
51
-
52
-
53
-
54
-
55
-
56
-
57
-
58
-
59
-
60
-
61
-
62
-
 63
63 -
 64
64 -
 65
65 -
 66
66 -
 67
67 -
 68
68 -
 69
69 -
 70
70 -
 71
71
 |
 |