Epson Ensemble HD 6500 Installation Guide - Page 54
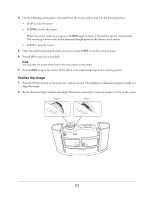
projector enclosure., When you're done positioning the image on the screen
 |
View all Epson Ensemble HD 6500 manuals
Add to My Manuals
Save this manual to your list of manuals |
Page 54 highlights
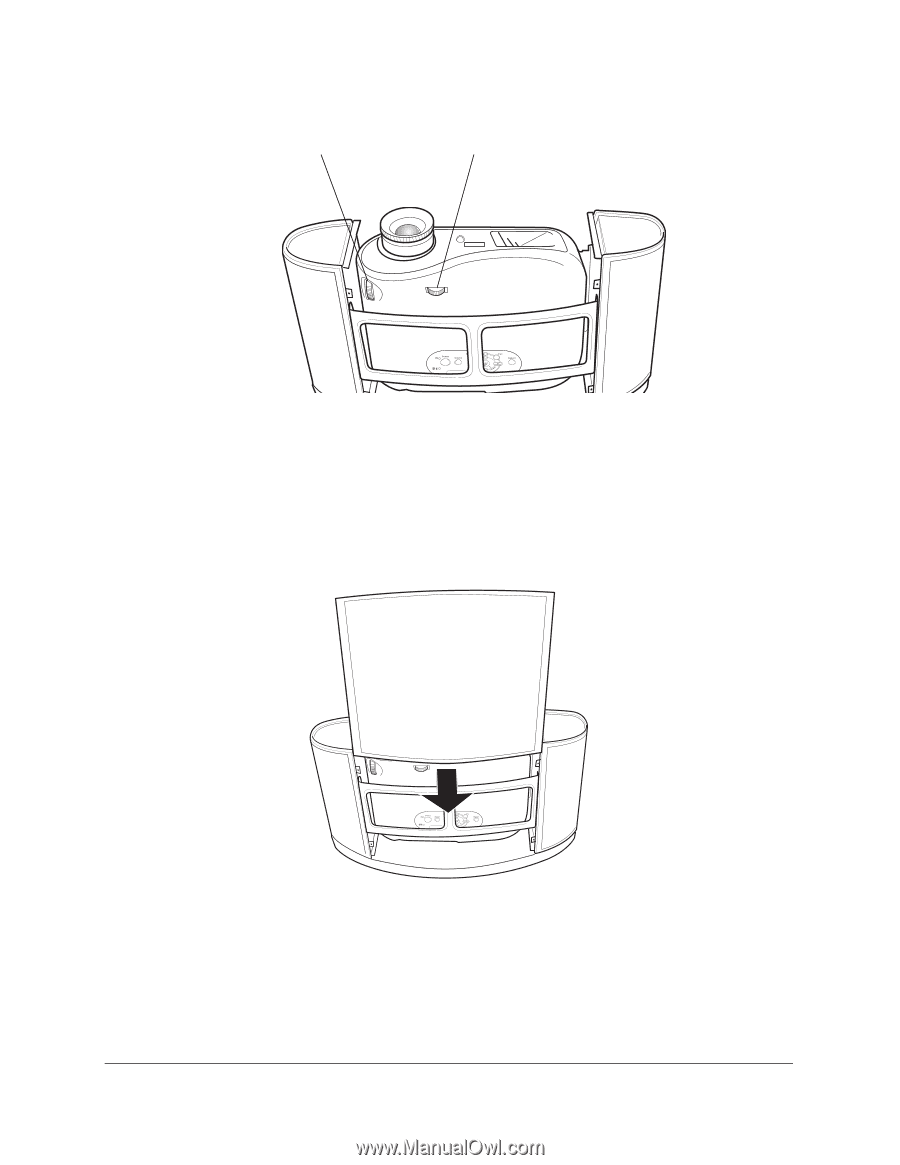
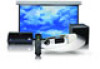
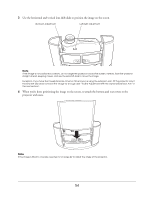
3 Use the horizontal and vertical lens shift dials to position the image on the screen. Up/down adjustment Left/right adjustment Note If the image is not positioned correctly, do not angle the projector toward the screen. Instead, face the projector straight ahead, keeping it level, and use the lens shift dials to move the image. Exception: If you have the PowerLite Home Cinema 720 and you're using the extension arm, tilt the projector only if the lens shift dial does not lower the image far enough (see "Incline Adjustment With the Optional Extension Arm" in the next section). 4 When you're done positioning the image on the screen, re-attach the bottom and rear covers to the projector enclosure. Note If the image is tilted to one side, see step 12 on page 42 to adjust the angle of the projector. 54
-
 1
1 -
2
-
3
-
4
-
5
-
6
-
7
-
8
-
9
-
10
-
11
-
12
-
13
-
14
-
15
-
16
-
17
-
18
-
19
-
20
-
21
-
22
-
23
-
24
-
25
-
26
-
27
-
28
-
29
-
30
-
31
-
32
-
33
-
34
-
35
-
36
-
37
-
38
-
39
-
40
-
41
-
42
-
43
-
44
-
45
-
46
-
47
-
48
-
 49
49 -
 50
50 -
 51
51 -
 52
52 -
 53
53 -
 54
54 -
 55
55 -
 56
56 -
 57
57 -
 58
58 -
 59
59 -
60
-
61
-
62
-
63
-
64
-
65
-
66
-
67
-
68
-
69
-
70
-
71
 |
 |