Epson Ensemble HD 720 Installation Guide - Page 29
Lift the Screen onto the Mounting Brackets
 |
View all Epson Ensemble HD 720 manuals
Add to My Manuals
Save this manual to your list of manuals |
Page 29 highlights
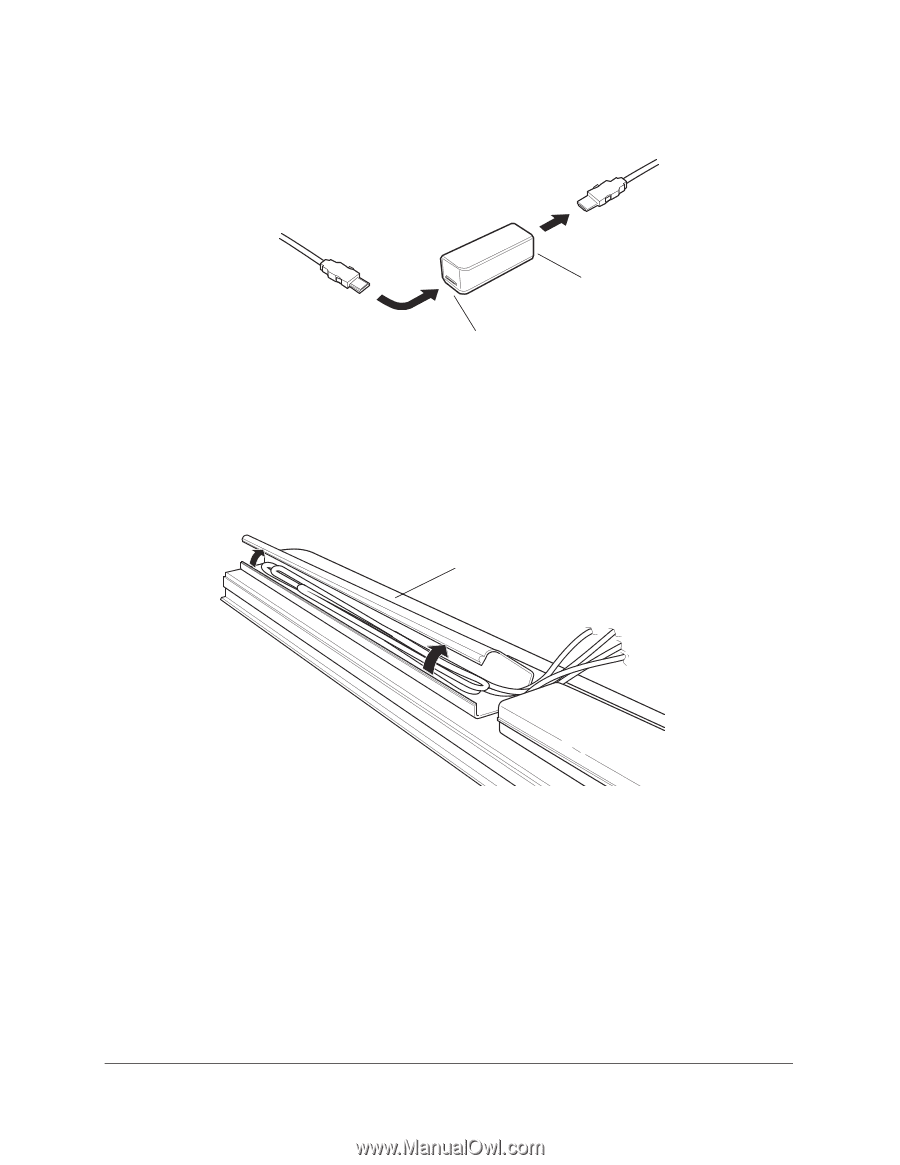
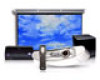
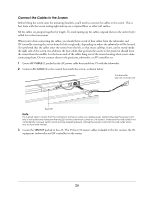
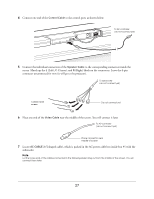
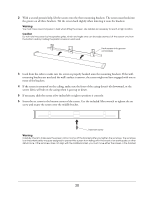
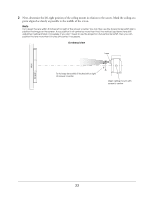
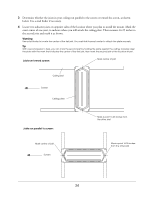
13 Connect the Video Cable to the OUTPUT end of the HDMI repeater. Then connect the INPUT end of the HDMI repeater to the other video cable that you already placed near the screen (see page 27). To AV controller To projector input output 14 Connect the power supply for the HDMI repeater to the power inlet on the repeater. 15 Secure the cables inside the screen under the molded plastic cable covers. Flex the covers upward to lift them slightly, then slip the cables underneath. The cables going to the projector should exit from the break in the covers near the middle. Let them hang over the front of the screen. Tip If you anticipate having a lot of excess cable near the projector, you may be able to tuck some of the cable under the long cable cover shown below. Store excess cable under the long cable cover Cables to projector Lift the Screen onto the Mounting Brackets Note You may wish to attach the wire management tracks to your wall and ceiling first (see "Connecting and Routing the Cables" on page 43). It is easier to attach the tracks near the screen before the screen has been mounted. Return to this section later once the tracks are in place. 1 Before lifting the screen, make sure no loose cables hang out from the back of the screen. Make sure all the cables inside the screen are secured under the cable covers so they won't get pinched against the wall or mounting brackets when you mount the screen. 29
-
 1
1 -
2
-
3
-
4
-
5
-
6
-
7
-
8
-
9
-
10
-
11
-
12
-
13
-
14
-
15
-
16
-
17
-
18
-
19
-
20
-
21
-
22
-
23
-
 24
24 -
 25
25 -
 26
26 -
 27
27 -
 28
28 -
 29
29 -
 30
30 -
 31
31 -
 32
32 -
 33
33 -
 34
34 -
35
-
36
-
37
-
38
-
39
-
40
-
41
-
42
-
43
-
44
-
45
-
46
-
47
-
48
-
49
-
50
-
51
-
52
-
53
-
54
-
55
-
56
-
57
-
58
-
59
-
60
-
61
-
62
-
63
-
64
-
65
-
66
-
67
-
68
-
69
-
70
-
71
 |
 |