Epson Ensemble HD 720 Installation Guide - Page 55
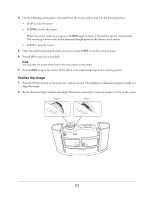
button on the projector's, Use the projector's Keystone setting to square up the image. Press
 |
View all Epson Ensemble HD 720 manuals
Add to My Manuals
Save this manual to your list of manuals |
Page 55 highlights
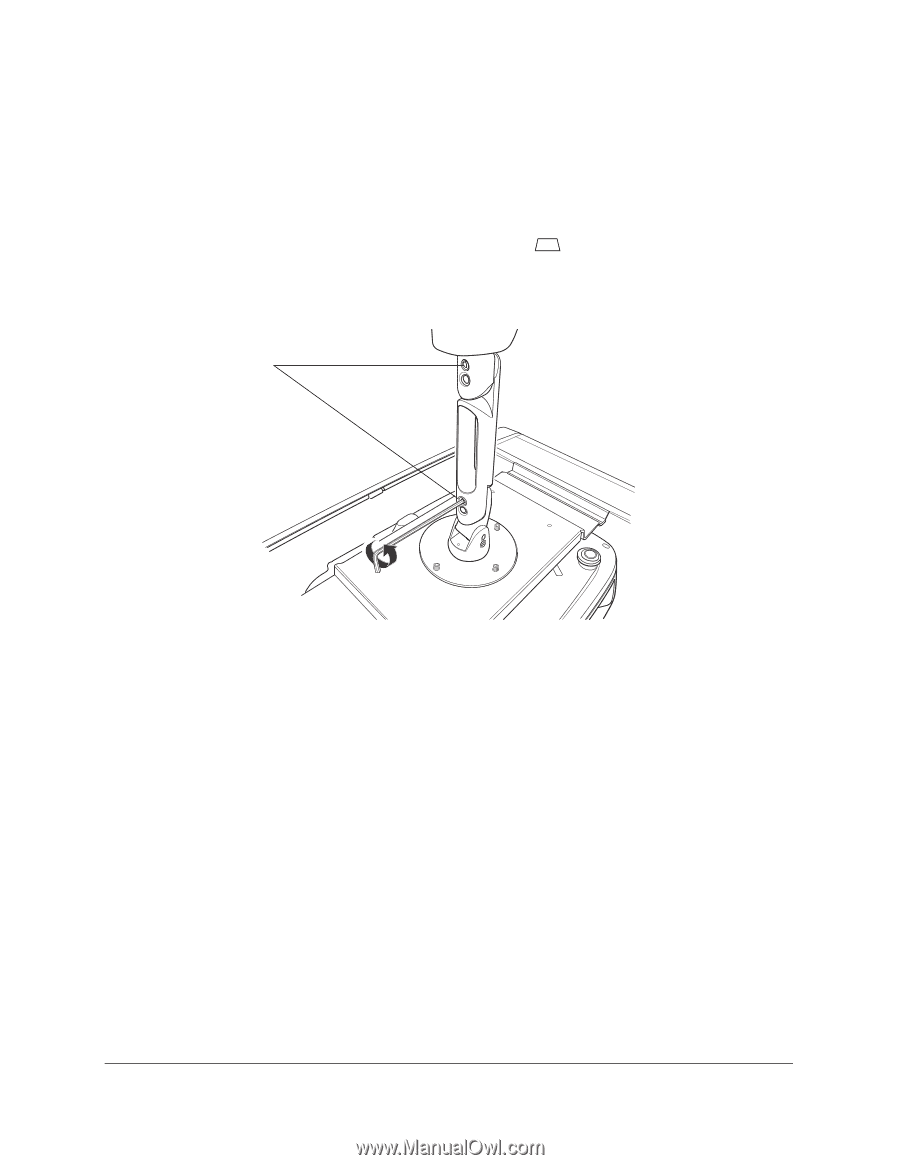
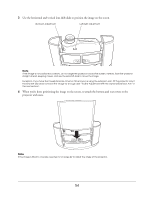
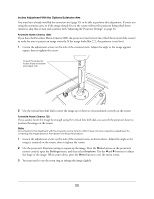
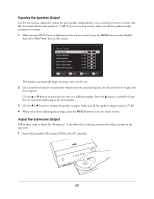
Incline Adjustment With the Optional Extension Arm You must have already installed the extension arm (page 35) to be able to perform this adjustment. If you're not using the extension arm, or if the image already fits on the screen without the projector being tilted down toward it, skip this section and continue with "Adjusting the Projector Settings" on page 56. PowerLite Home Cinema 1080: If you have the PowerLite Home Cinema 1080, the projector must be level (not tilted down toward the screen) in order for you to project an image correctly. If the image looks like , the projector is not level. 1 Loosen the adjustment screws on the side of the extension arm. Adjust the angle so the image appears square, then re-tighten the screws. To level the projector, loosen these set screws and adjust arm 2 Use the vertical lens shift dial to move the image up or down so it's positioned correctly on the screen. PowerLite Home Cinema 720: If you cannot lower the image far enough using the vertical lens shift dial, you can tilt the projector down to position the image on the screen. Note Do not perform this adjustment with the PowerLite Home Cinema 1080. It does not have a keystone adjustment for correcting the image distortion that results from tilting the projector. 1 Loosen the adjustment screws on the side of the extension arm, as shown above. Adjust the angle so the image is centered on the screen, then re-tighten the screws. 2 Use the projector's Keystone setting to square up the image. Press the Menu button on the projector's remote control, open the Settings menu, and then select Keystone. Use the l and r buttons to adjust the shape of the image. When you're done, press the Menu button to exit the menu screen. 3 You may need to use the zoom ring to enlarge the image slightly. 55
-
 1
1 -
2
-
3
-
4
-
5
-
6
-
7
-
8
-
9
-
10
-
11
-
12
-
13
-
14
-
15
-
16
-
17
-
18
-
19
-
20
-
21
-
22
-
23
-
24
-
25
-
26
-
27
-
28
-
29
-
30
-
31
-
32
-
33
-
34
-
35
-
36
-
37
-
38
-
39
-
40
-
41
-
42
-
43
-
44
-
45
-
46
-
47
-
48
-
49
-
 50
50 -
 51
51 -
 52
52 -
 53
53 -
 54
54 -
 55
55 -
 56
56 -
 57
57 -
 58
58 -
 59
59 -
 60
60 -
61
-
62
-
63
-
64
-
65
-
66
-
67
-
68
-
69
-
70
-
71
 |
 |