Epson Ensemble HD 720 Installation Guide - Page 66
one remote control.
 |
View all Epson Ensemble HD 720 manuals
Add to My Manuals
Save this manual to your list of manuals |
Page 66 highlights
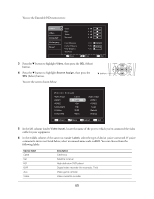
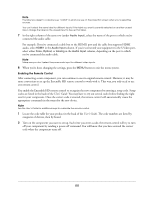
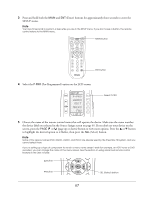
Note The label you assign to a device (e.g. "CABLE") is what you see on the projection screen when you're selecting sources. You can't select the same label for different inputs. If the label you want is currently selected on another unused input, change the label on the unused input to free up that label. 7 In the right column of the same row (under Audio Input), select the name of the port to which you've connected the audio cable. For example: If you've connected a cable box to the HDMI1 port and the cable box supports HDMI audio, select HDMI1 in the Audio Input column. If you've connected your equipment to the S-Video port, select either Coax, Optical, or Analog in the Audio Input column, depending on the port to which you've connected the audio cable. Note Make sure you don't select the same audio input for different video inputs. 8 When you're done changing the settings, press the MENU button to exit the menu system. Enabling the Remote Control After connecting a new component, you can continue to use its original remote control. However, it may be more convenient to set up the Ensemble HD remote control to work with it. That way, you only need to use one remote control. You enable the Ensemble HD remote control to recognize the new component by entering a setup code. Setup codes are listed in the back of the User's Guide. You may have to try out several codes before finding the right one for your component. Once the correct code is entered, the remote control will automatically create the appropriate commands in the menu for the new device. Note See the User's Guide for additional ways to customize the remote control. 1 Locate the code table for your product in the back of the User's Guide. The code numbers are listed by categories of devices, then by brand. 2 Turn on the component you want to set up. Each time you enter a code, the remote control will try to turn off your component by sending a power-off command. You will know that you have entered the correct code when the component turns off. 66
-
 1
1 -
2
-
3
-
4
-
5
-
6
-
7
-
8
-
9
-
10
-
11
-
12
-
13
-
14
-
15
-
16
-
17
-
18
-
19
-
20
-
21
-
22
-
23
-
24
-
25
-
26
-
27
-
28
-
29
-
30
-
31
-
32
-
33
-
34
-
35
-
36
-
37
-
38
-
39
-
40
-
41
-
42
-
43
-
44
-
45
-
46
-
47
-
48
-
49
-
50
-
51
-
52
-
53
-
54
-
55
-
56
-
57
-
58
-
59
-
60
-
 61
61 -
 62
62 -
 63
63 -
 64
64 -
 65
65 -
 66
66 -
 67
67 -
 68
68 -
 69
69 -
 70
70 -
 71
71
 |
 |
