Epson Ensemble HD 720 Installation Guide - Page 30
screen fabric will rub on the casing when it goes up or down., If necessary
 |
View all Epson Ensemble HD 720 manuals
Add to My Manuals
Save this manual to your list of manuals |
Page 30 highlights
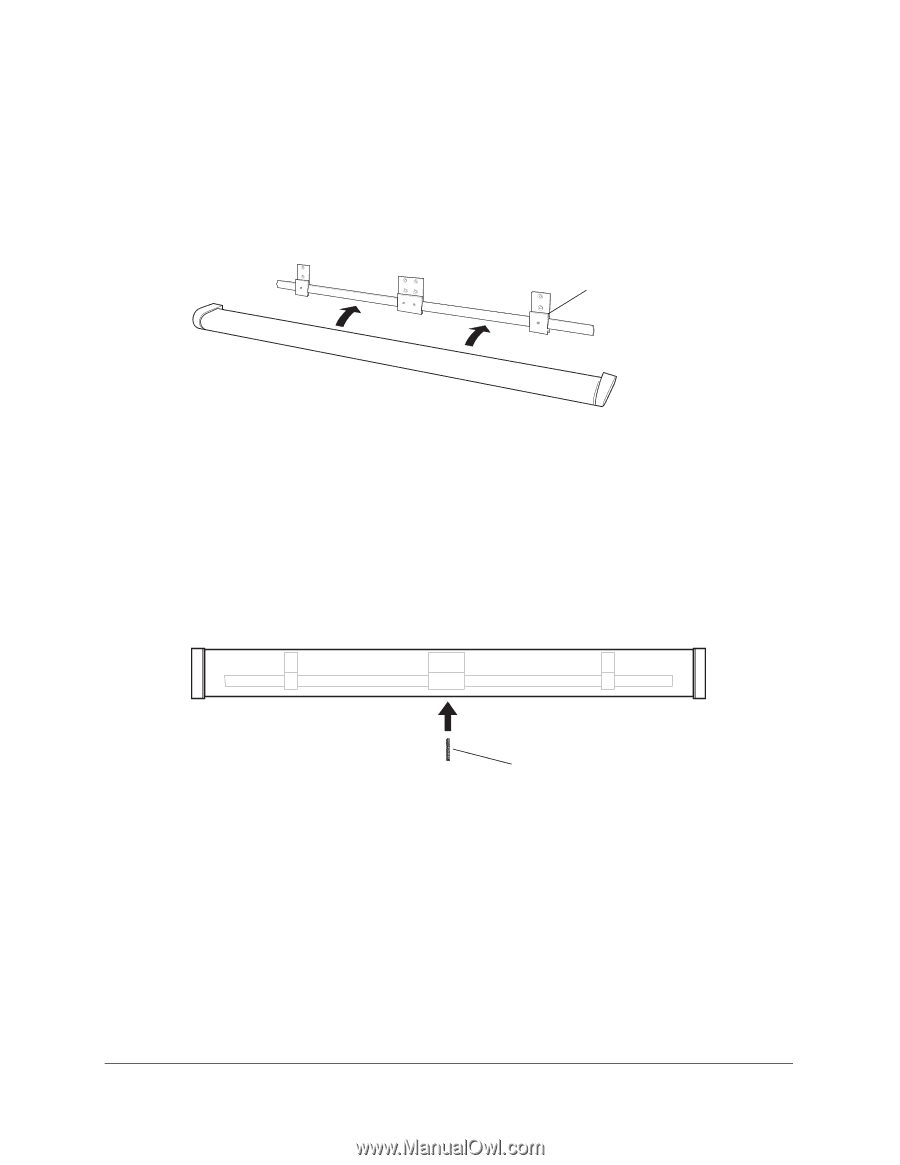
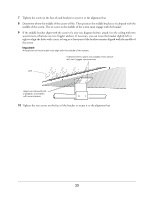
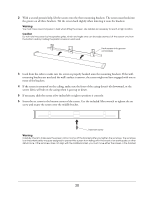
2 With a second person's help, lift the screen onto the three mounting brackets. The screen must hook into the groove on all three brackets. Tilt the screen back slightly when lowering it onto the brackets. Warning You must have a second person's help when lifting the screen. Use ladders as necessary to reach a high location. Caution Do not hold the screen by the speaker grilles, which are fragile and can be easily dented. Lift the screen only from the bottom and by holding the plastic covers on each end. Hook screen into groove on brackets 3 Look from the sides to make sure the screen is properly hooked onto the mounting brackets. If the wallmounting brackets are used and the wall's surface is uneven, the screen might not have engaged with one or more of the brackets. 4 If the screen is mounted on the ceiling, make sure the front of the casing doesn't tilt downward, or the screen fabric will rub on the casing when it goes up or down. 5 If necessary, slide the screen a few inches left or right to position it correctly. 6 Insert the set screw in the bottom center of the screen. Use the included Allen wrench to tighten the set screw and secure the screen onto the middle bracket. Insert set screw Warning Carefully check to make sure the screen cannot come off the brackets after you tighten the set screw. The set screw is an important safety measure designed to prevent the screen from falling off in the event of an earthquake or other disturbance. If the set screw does not align with the middle bracket, you must move either the screen or the bracket. 30
-
 1
1 -
2
-
3
-
4
-
5
-
6
-
7
-
8
-
9
-
10
-
11
-
12
-
13
-
14
-
15
-
16
-
17
-
18
-
19
-
20
-
21
-
22
-
23
-
24
-
 25
25 -
 26
26 -
 27
27 -
 28
28 -
 29
29 -
 30
30 -
 31
31 -
 32
32 -
 33
33 -
 34
34 -
 35
35 -
36
-
37
-
38
-
39
-
40
-
41
-
42
-
43
-
44
-
45
-
46
-
47
-
48
-
49
-
50
-
51
-
52
-
53
-
54
-
55
-
56
-
57
-
58
-
59
-
60
-
61
-
62
-
63
-
64
-
65
-
66
-
67
-
68
-
69
-
70
-
71
 |
 |