Epson Ensemble HD 720 Installation Guide - Page 40
faces the correct direction. You may need to loosen the two, necessary
 |
View all Epson Ensemble HD 720 manuals
Add to My Manuals
Save this manual to your list of manuals |
Page 40 highlights
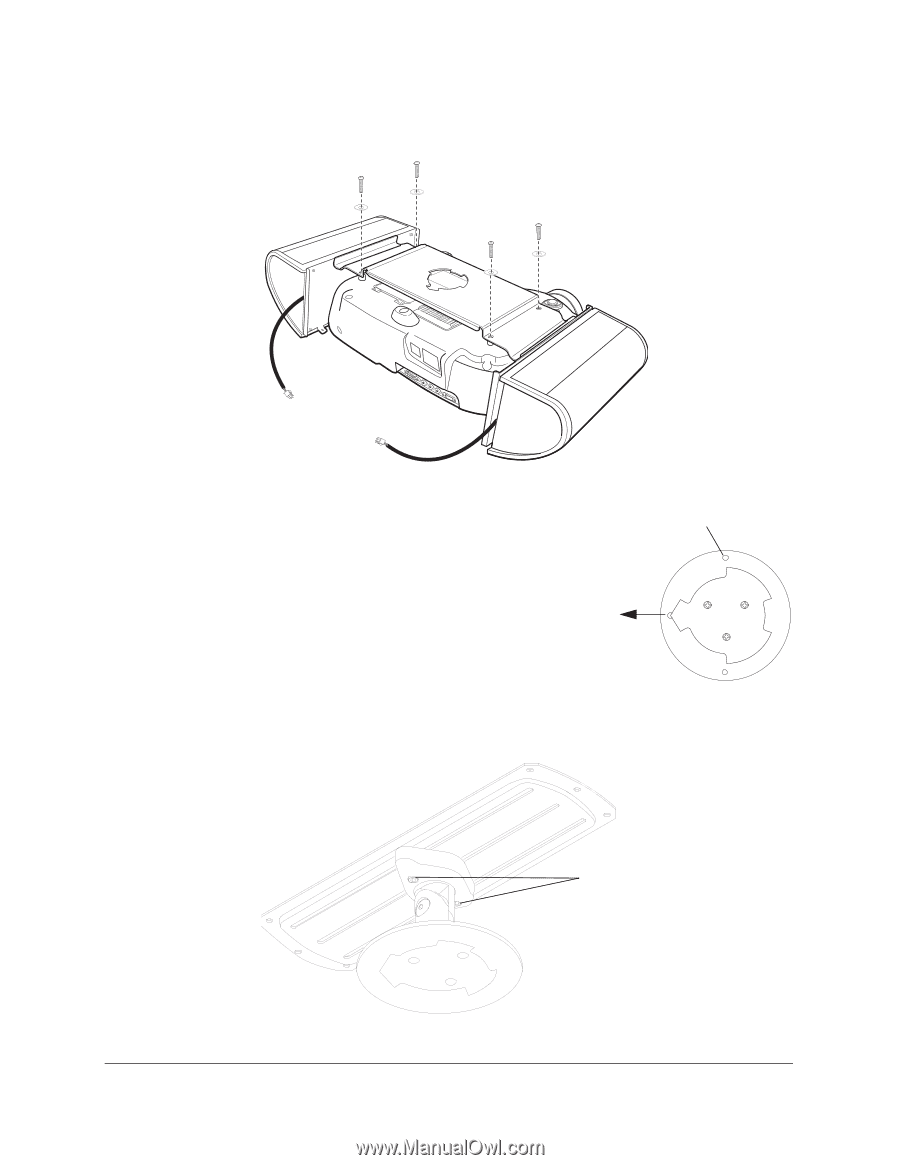
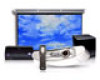
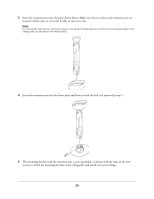
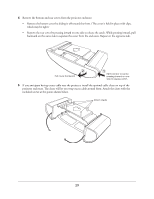
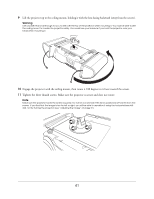
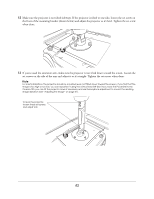
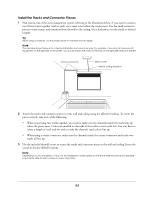
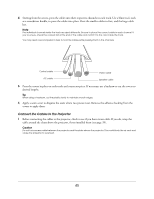
6 Turn the projector upside-down and slide it into the enclosure. Make sure the projector ports are on the same side as the speaker cables, as shown. Attach the projector with the four screws and washers as shown. 7 Check the part of the ceiling mount where you will attach the projector (the round plate on the bottom). Make sure the three thumb screws are loosened enough so that they don't protrude through the bottom of the round plate. If any of the screws protrude, you won't be able to attach the projector. Also, make sure the pointed part faces toward the screen. If necessary, grasp the mounting bracket and rotate it so that it faces the correct direction. (You may need to loosen the two bolts at the top to rotate the assembly, shown in step 8.) 8 Securely tighten the two bolts at the top of the mounting bracket. When they're tight, the round plate at the bottom of the mount cannot be rotated. Make sure thumb screws do not protrude through bottom of plate Point this part toward the screen Tighten both bolts at the top 40
-
 1
1 -
2
-
3
-
4
-
5
-
6
-
7
-
8
-
9
-
10
-
11
-
12
-
13
-
14
-
15
-
16
-
17
-
18
-
19
-
20
-
21
-
22
-
23
-
24
-
25
-
26
-
27
-
28
-
29
-
30
-
31
-
32
-
33
-
34
-
 35
35 -
 36
36 -
 37
37 -
 38
38 -
 39
39 -
 40
40 -
 41
41 -
 42
42 -
 43
43 -
 44
44 -
 45
45 -
46
-
47
-
48
-
49
-
50
-
51
-
52
-
53
-
54
-
55
-
56
-
57
-
58
-
59
-
60
-
61
-
62
-
63
-
64
-
65
-
66
-
67
-
68
-
69
-
70
-
71
 |
 |