Epson LX-90 User Manual - IBM PC Jr. 8690 PIC for LX-90 - Page 9
Connecting the Printer to Your PCjr, Control Panel, I-l. Test patterns
 |
View all Epson LX-90 manuals
Add to My Manuals
Save this manual to your list of manuals |
Page 9 highlights
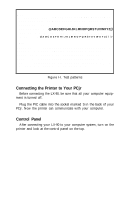
Draft /0123456789::? @ABCDEFGHIJKLMNOPQRSTUVWXY 0 1 2 3 4 5 6 7 8 9 ABCDEFGHIJKLMNOPQRSTUVWXYZ 123456789:;? @ABCDEFGHIJKLMNOPQRSTUVWXYZ[ 23456789:;? @ABCDEFGHIJKLMNOPQRSTUVWXYZ[\ .3456789:;? @ABCDEFGHIJKLMNOPQRSTUUVWXYZ[\] 456789:;? @ A B C D E F G H I J K L M N O P Q R S T U V W X Y Z [ \ ] ' NLQ 3456789:;?@ABCDEFGHIJKLMNOPQRSTUVWXYZ[\] 456789:;?@ABCDEFGHIJKLMNOPQRSTUVWXYZ[\]ˆ 56789:;?@ABCDEFGHIJKLMNOPQRSTUVWXYZ[\]ˆ6789:;?@ABCDEFGHIJKLMNOPQRSTUVWXYZ[\]ˆ-' 789:;?@ABCDEFGHIJKLMNOPQRSTUVWXYZ[\I^-'a 89:;?@ABCDEFGHIJKLMNOPQRSTUVWXYZ[\l A-'ab Figure I-l. Test patterns Connecting the Printer to Your PCjr Before connecting the LX-90, be sure that all your computer equipment is turned off. Plug the PIC cable into the socket marked S in the back of your PCjr. Now the printer can communicate with your computer. Control Panel After connecting your LX-90 to your computer system, turn on the printer and look at the control panel on the top.
-
 1
1 -
2
-
3
-
 4
4 -
 5
5 -
 6
6 -
 7
7 -
 8
8 -
 9
9 -
 10
10 -
 11
11 -
 12
12 -
 13
13 -
 14
14 -
15
-
16
-
17
-
18
-
19
-
20
-
21
-
22
-
23
-
24
-
25
-
26
-
27
-
28
-
29
-
30
-
31
-
32
-
33
-
34
-
35
-
36
-
37
-
38
-
39
-
40
-
41
-
42
-
43
-
44
-
45
-
46
-
47
-
48
-
49
-
50
-
51
-
52
-
53
-
54
-
55
-
56
-
57
-
58
-
59
-
60
-
61
-
62
-
63
-
64
-
65
-
66
-
67
-
68
-
69
-
70
-
71
-
72
-
73
-
74
-
75
-
76
-
77
-
78
-
79
-
80
-
81
-
82
-
83
-
84
-
85
-
86
-
87
-
88
-
89
-
90
-
91
-
92
-
93
-
94
-
95
-
96
-
97
-
98
-
99
-
100
 |
 |
