Epson PhotoPC 750Z User Setup Information - Page 12
Installing Batteries, Be sure to charge the batteries completely to make them last
 |
View all Epson PhotoPC 750Z manuals
Add to My Manuals
Save this manual to your list of manuals |
Page 12 highlights
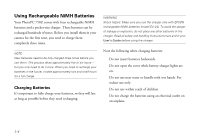
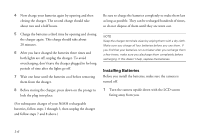
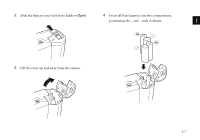
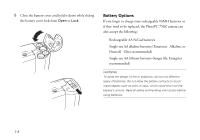
4 Now charge your batteries again by opening and then closing the charger. The second charge should take about two and a half hours. 5 Charge the batteries a third time by opening and closing the charger again. This charge should take about 20 minutes. 6 After you have charged the batteries three times and both lights are off, unplug the charger. To avoid overcharging, don't leave the charger plugged in for long periods of time after the lights go off. 7 Wait one hour until the batteries cool before removing them from the charger. 8 Before storing the charger, press down on the prongs to lock the plug into place. (For subsequent charges of your NiMH rechargeable batteries, follow steps 1 through 3, then unplug the charger and follow steps 7 and 8 above.) Be sure to charge the batteries completely to make them last as long as possible. They can be recharged hundreds of times, so do not dispose of them until they are worn out. NOTE Keep the charger terminals clean by wiping them with a dry cloth. Make sure you charge all four batteries before you use them. If you find that your batteries run out faster after you recharge them a few times, make sure you discharge them completely before recharging. If this doesn't help, replace the batteries. Installing Batteries Before you install the batteries, make sure the camera is turned off. 1 Turn the camera upside down with the LCD screen facing away from you. 1-6
-
 1
1 -
2
-
3
-
4
-
5
-
6
-
 7
7 -
 8
8 -
 9
9 -
 10
10 -
 11
11 -
 12
12 -
 13
13 -
 14
14 -
 15
15 -
 16
16 -
 17
17 -
18
-
19
-
20
-
21
-
22
-
23
-
24
-
25
-
26
-
27
-
28
-
29
-
30
-
31
-
32
-
33
-
34
-
35
-
36
-
37
-
38
-
39
-
40
-
41
-
42
-
43
-
44
-
45
-
46
-
47
-
48
-
49
-
50
-
51
-
52
-
53
 |
 |
