Epson PhotoPC 750Z User Setup Information - Page 19
Making Macintosh Diskettes, Installing the Image Expert CE Demo
 |
View all Epson PhotoPC 750Z manuals
Add to My Manuals
Save this manual to your list of manuals |
Page 19 highlights
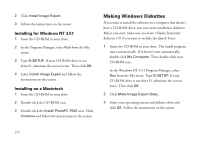
Making Macintosh Diskettes 4 Drag the Disk 1 icon onto the Image Expert 1 icon. If If you want to install the software on a computer that doesn't you are asked to confirm the copy, click Yes. 2 have a CD-ROM drive, you can use either Disk Copy 6.2 or the DropImage program on your CD-ROM to make diskettes. Before you start, make sure you have 10 blank, formatted diskettes. 5 When the copy finishes, drag both icons to the trash. Your Macintosh ejects the diskette. 6 Repeat steps 2 to 5 for each disk image file. To use Disk Copy 6.2, double-click the file named Make Floppies and follow the instructions on the screen. The Image Expert disk image files are located in the Disk Images folder on the CD-ROM. Or, use the DropImage program: 1 Open the Disk Images folder on your CD-ROM. 2 Drag the file Disk1.image onto DropImage 1.0. An icon for Disk 1 appears on your desktop. 3 Insert a blank, formatted diskette in your drive and change its name to Image Expert 1. Installing the Image Expert CE Demo Included on your PhotoPC 750Z CD-ROM is a demo version of Image Expert CE: a convenient, easy-to-use imaging application for your Windows CE 2.0-based Handheld PC (H/PC). Image Expert CE offers truly mobile imaging in a small, lightweight package. You can view and organize JPEG images from your camera on your H/PC as well as annotate them. You can share images with others as a slideshow on the built-in display or an external monitor, via email, beaming them from one H/PC to another, or by auto synchronizing your H/PC to your desktop system. A B 2-3
-
 1
1 -
2
-
3
-
4
-
5
-
6
-
7
-
8
-
9
-
10
-
11
-
12
-
13
-
 14
14 -
 15
15 -
 16
16 -
 17
17 -
 18
18 -
 19
19 -
 20
20 -
 21
21 -
 22
22 -
 23
23 -
 24
24 -
25
-
26
-
27
-
28
-
29
-
30
-
31
-
32
-
33
-
34
-
35
-
36
-
37
-
38
-
39
-
40
-
41
-
42
-
43
-
44
-
45
-
46
-
47
-
48
-
49
-
50
-
51
-
52
-
53
 |
 |