Epson PhotoPC 750Z User Setup Information - Page 18
Installing for Windows NT 3.51, Installing on a Macintosh, Making Windows Diskettes
 |
View all Epson PhotoPC 750Z manuals
Add to My Manuals
Save this manual to your list of manuals |
Page 18 highlights
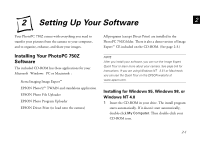
2 Click Install Image Expert. 3 Follow the instructions on the screen. Installing for Windows NT 3.51 1 Insert the CD-ROM in your drive. 2 In the Program Manager, select Run from the File menu. 3 Type D:\SETUP. If your CD-ROM drive is not drive D, substitute the correct letter. Then click OK. 4 Select Install Image Expert and follow the instructions on the screen. Installing on a Macintosh 1 Insert the CD-ROM in your drive. 2 Double-click the CD-ROM icon. 3 Double-click the Install PhotoPC 750Z icon. Click Continue and follow the instructions on the screen. Making Windows Diskettes If you want to install the software on a computer that doesn't have a CD-ROM drive, you can create installation diskettes. Before you start, make sure you have 7 blank, formatted diskettes (19 if you want to include the Quick Tour). 1 Insert the CD-ROM in your drive. The install program starts automatically. If it doesn't start automatically, double-click My Computer. Then double-click your CD-ROM icon. In the Windows NT 3.51 Program Manager, select Run from the File menu. Type D:\SETUP. If your CD-ROM drive is not drive D, substitute the correct letter. Then click OK. 2 Click Make Image Expert Disks. 3 Select your operating system and diskette drive and click OK. Follow the instructions on the screen. 2-2
-
 1
1 -
2
-
3
-
4
-
5
-
6
-
7
-
8
-
9
-
10
-
11
-
12
-
 13
13 -
 14
14 -
 15
15 -
 16
16 -
 17
17 -
 18
18 -
 19
19 -
 20
20 -
 21
21 -
 22
22 -
 23
23 -
24
-
25
-
26
-
27
-
28
-
29
-
30
-
31
-
32
-
33
-
34
-
35
-
36
-
37
-
38
-
39
-
40
-
41
-
42
-
43
-
44
-
45
-
46
-
47
-
48
-
49
-
50
-
51
-
52
-
53
 |
 |