Epson PowerLite 713c User Manual - Page 29
Focusing and Zooming Your Image, Adjusting the Height of Your Image, caution
 |
View all Epson PowerLite 713c manuals
Add to My Manuals
Save this manual to your list of manuals |
Page 29 highlights
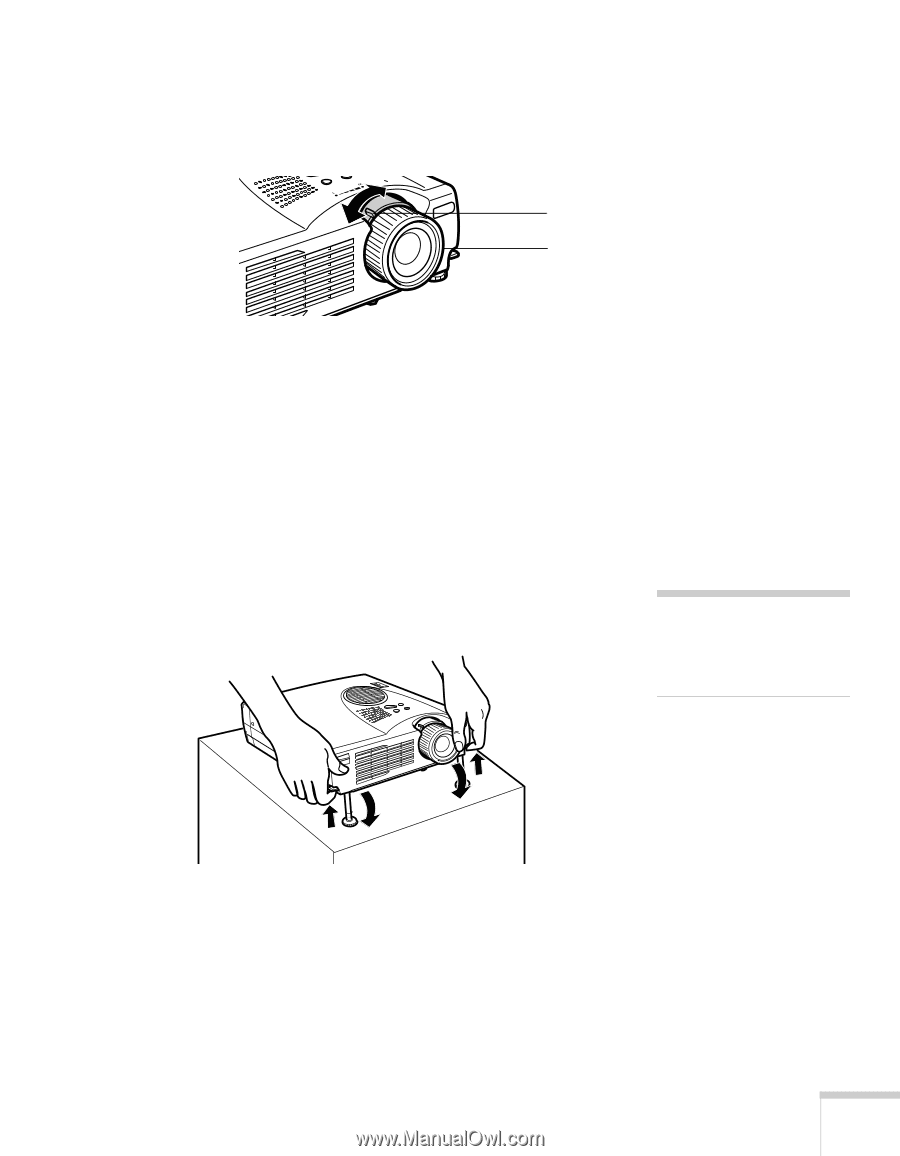
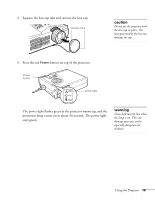
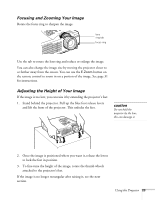
Focusing and Zooming Your Image Rotate the focus ring to sharpen the image. lens ring tab focus ring Use the tab to rotate the lens ring and reduce or enlarge the image. You can also change the image size by moving the projector closer to or farther away from the screen. You can use the E-Zoom button on the remote control to zoom in on a portion of the image. See page 31 for instructions. Adjusting the Height of Your Image If the image is too low, you can raise it by extending the projector's feet. 1. Stand behind the projector. Pull up the blue foot release levers and lift the front of the projector. This unlocks the feet. caution Do not hold the projector by the lens; this can damage it. 2. Once the image is positioned where you want it, release the levers to lock the feet in position. 3. To fine-tune the height of the image, rotate the thumb wheels attached to the projector's feet. If the image is no longer rectangular after raising it, see the next section. Using the Projector 23
-
 1
1 -
2
-
3
-
4
-
5
-
6
-
7
-
8
-
9
-
10
-
11
-
12
-
13
-
14
-
15
-
16
-
17
-
18
-
19
-
20
-
21
-
22
-
23
-
 24
24 -
 25
25 -
 26
26 -
 27
27 -
 28
28 -
 29
29 -
 30
30 -
 31
31 -
 32
32 -
 33
33 -
 34
34 -
35
-
36
-
37
-
38
-
39
-
40
-
41
-
42
-
43
-
44
-
45
-
46
-
47
-
48
-
49
-
50
-
51
-
52
-
53
-
54
-
55
-
56
-
57
-
58
-
59
-
60
-
61
-
62
-
63
-
64
-
65
-
66
-
67
-
68
-
69
-
70
-
71
-
72
-
73
-
74
-
75
-
76
-
77
-
78
-
79
-
80
-
81
-
82
-
83
-
84
-
85
-
86
-
87
-
88
-
89
-
90
-
91
-
92
-
93
-
94
-
95
-
96
-
97
-
98
-
99
-
100
-
101
-
102
-
103
-
104
-
105
 |
 |