Epson RX595 Quick Reference Guide - Page 13
To copy borderless photos on 4 × 6-inch Epson Premium Photo Paper Glossy, to crop it, if necessary.
 |
UPC - 010343866157
View all Epson RX595 manuals
Add to My Manuals
Save this manual to your list of manuals |
Page 13 highlights
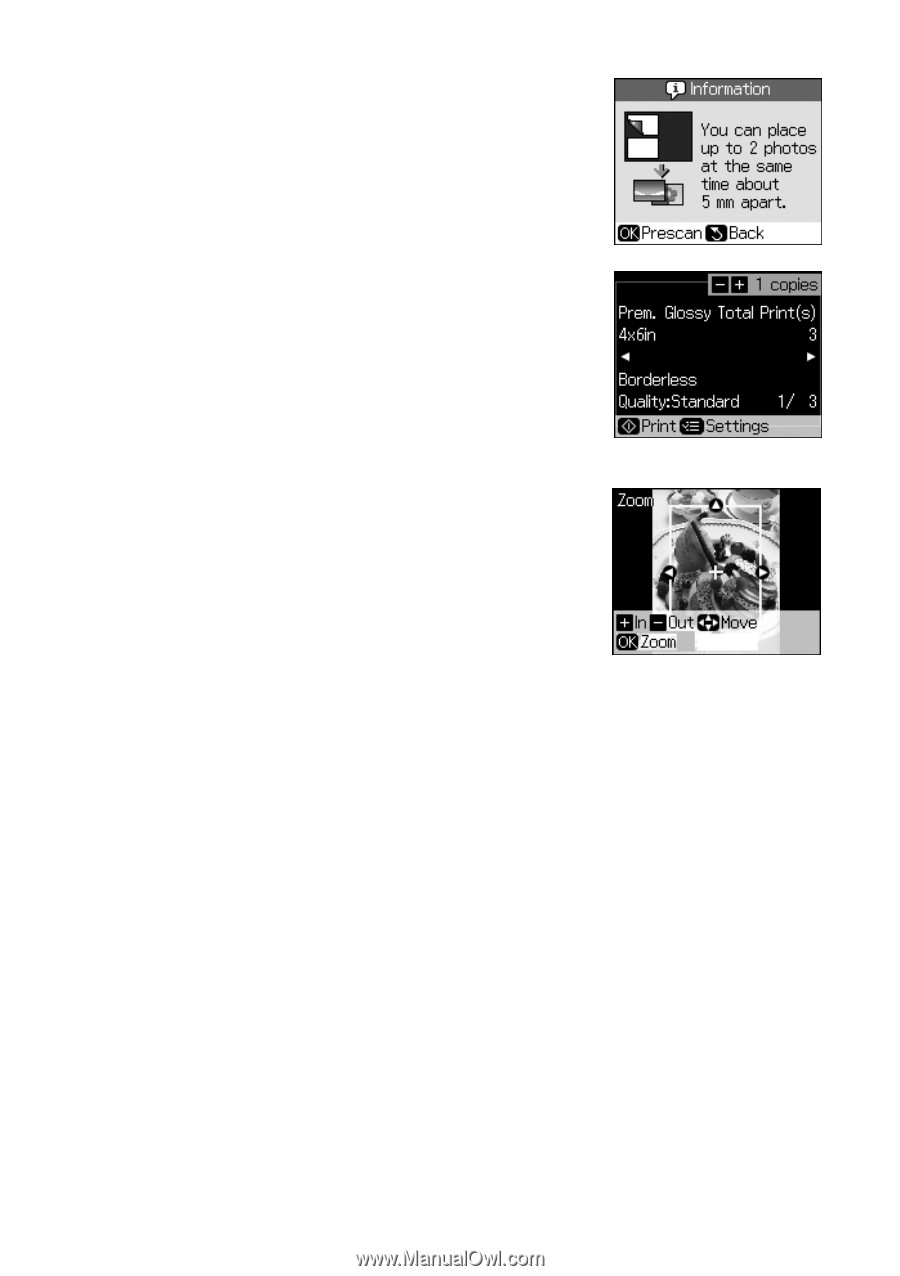
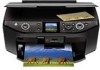
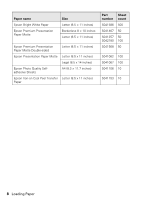
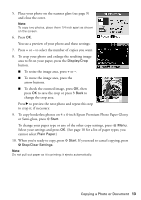
5. Place your photo on the scanner glass (see page 9) and close the cover. Note: To copy two photos, place them 1/4-inch apart as shown on the screen. 6. Press OK. You see a preview of your photo and these settings: 7. Press + or - to select the number of copies you want. 8. To crop your photo and enlarge the resulting image area to fit on your paper, press the Display/Crop button. ■ To resize the image area, press + or -. ■ To move the image area, press the arrow buttons. ■ To check the zoomed image, press OK, then press OK to save the crop or press y Back to change the crop area. Press r to preview the next photo and repeat this step to crop it, if necessary. 9. To copy borderless photos on 4 × 6-inch Epson Premium Photo Paper Glossy or Semi-gloss, press x Start. To change your paper type or any of the other copy settings, press x Menu. Select your settings and press OK. (See page 10 for a list of paper types; you cannot select Plain Paper.) 10. When you're ready to copy, press x Start. If you need to cancel copying, press y Stop/Clear Settings. Note: Do not pull out paper as it is printing; it ejects automatically. Copying a Photo or Document 13
-
 1
1 -
2
-
3
-
4
-
5
-
6
-
7
-
 8
8 -
 9
9 -
 10
10 -
 11
11 -
 12
12 -
 13
13 -
 14
14 -
 15
15 -
 16
16 -
 17
17 -
 18
18 -
19
-
20
-
21
-
22
-
23
-
24
-
25
-
26
-
27
-
28
-
29
-
30
-
31
-
32
-
33
-
34
-
35
-
36
-
37
-
38
-
39
-
40
-
41
-
42
-
43
-
44
-
45
-
46
-
47
-
48
 |
 |