Epson RX595 Quick Reference Guide - Page 22
tab and select settings as necessary., For more printing options, click
 |
UPC - 010343866157
View all Epson RX595 manuals
Add to My Manuals
Save this manual to your list of manuals |
Page 22 highlights
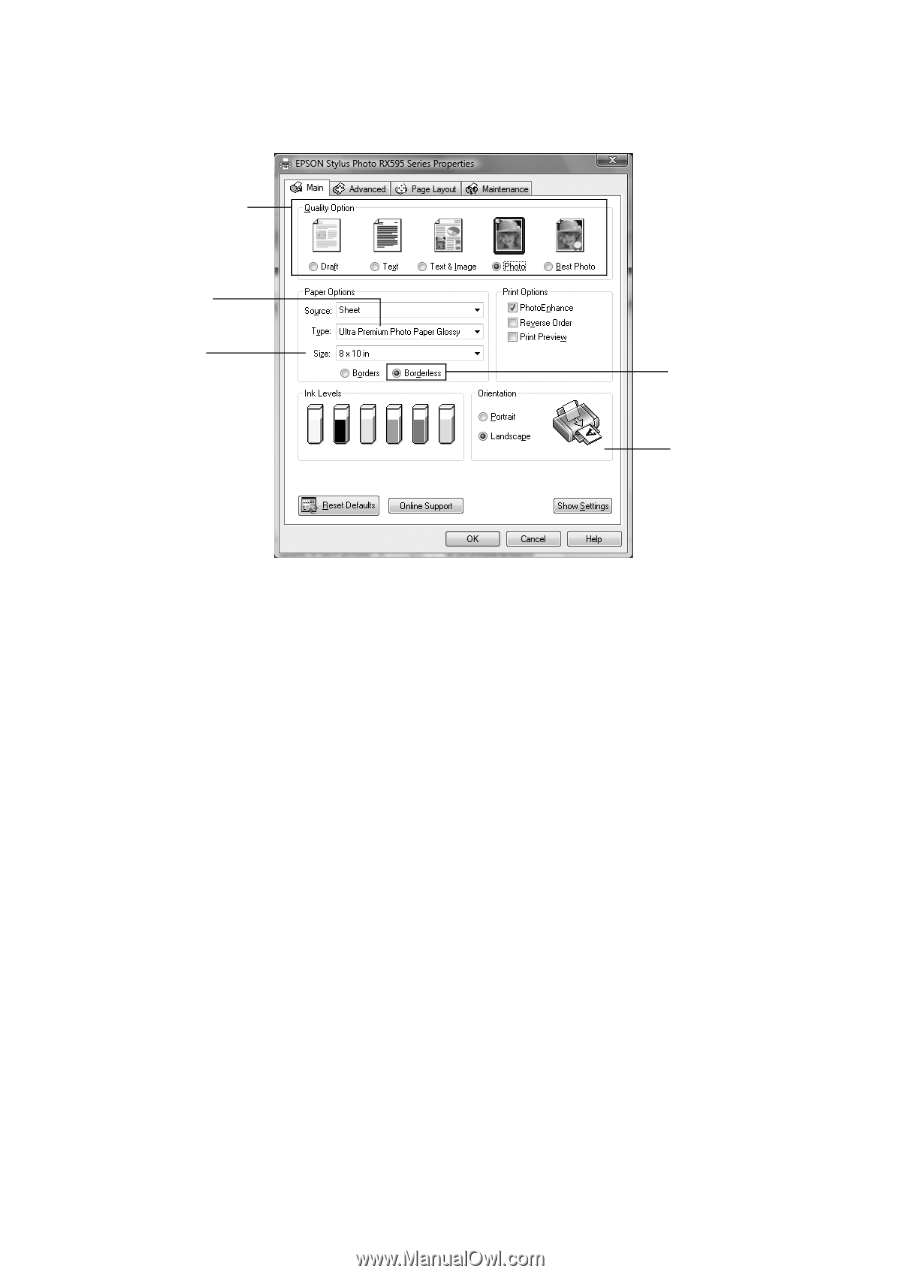
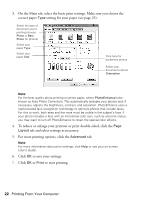
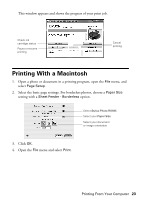
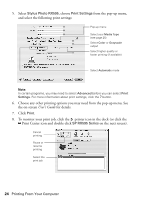
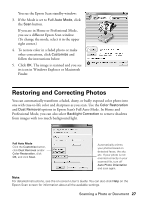
3. On the Main tab, select the basic print settings. Make sure you choose the correct paper Type setting for your paper (see page 25). Select the type of document you're printing (choose Photo or Best Photo for photos) Select your paper Type Select your paper Size Click here for borderless photos Select your document or photo Orientation Note: For the best quality photo printing on photo paper, select PhotoEnhance (also known as Auto Photo Correction). This automatically analyzes your photos and, if necessary, adjusts the brightness, contrast, and saturation. PhotoEnhance uses a sophisticated face recognition technology to optimize photos that include faces. For this to work, both eyes and the nose must be visible in the subject's face. If your photo includes a face with an intentional color cast, such as a bronze statue, you may want to turn off PhotoEnhance to retain the special color effects. 4. To reduce or enlarge your printout or print double-sided, click the Page Layout tab and select settings as necessary. 5. For more printing options, click the Advanced tab. Note: For more information about print settings, click Help or see your on-screen User's Guide. 6. Click OK to save your settings. 7. Click OK or Print to start printing. 22 Printing From Your Computer
-
 1
1 -
2
-
3
-
4
-
5
-
6
-
7
-
8
-
9
-
10
-
11
-
12
-
13
-
14
-
15
-
16
-
 17
17 -
 18
18 -
 19
19 -
 20
20 -
 21
21 -
 22
22 -
 23
23 -
 24
24 -
 25
25 -
 26
26 -
 27
27 -
28
-
29
-
30
-
31
-
32
-
33
-
34
-
35
-
36
-
37
-
38
-
39
-
40
-
41
-
42
-
43
-
44
-
45
-
46
-
47
-
48
 |
 |