Epson Stylus C60 Printer Basics - Page 25
to import it. If, Select your photo, or click
 |
View all Epson Stylus C60 manuals
Add to My Manuals
Save this manual to your list of manuals |
Page 25 highlights
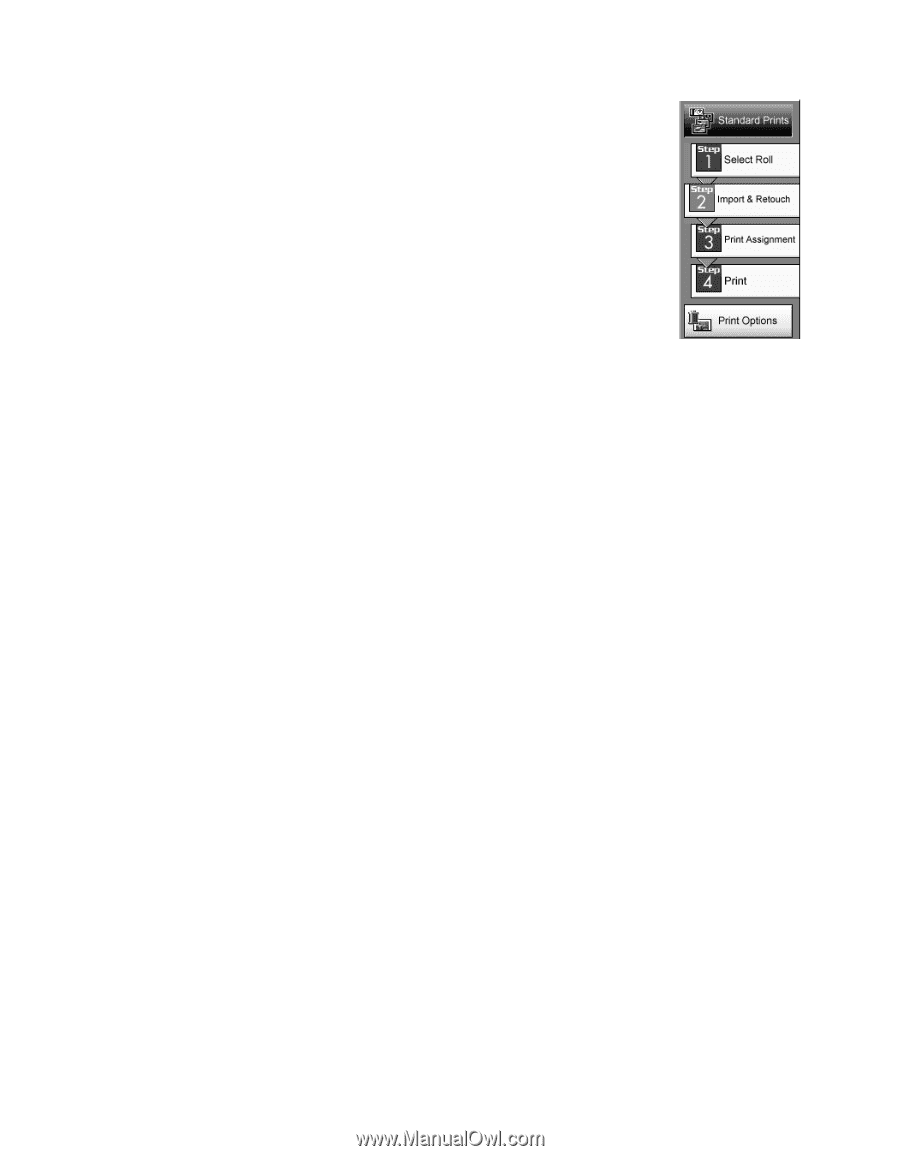
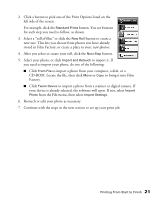
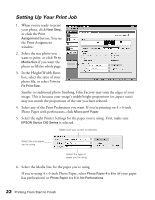
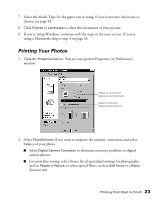
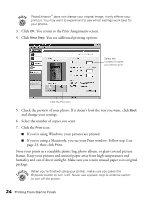
2. Click a button to pick one of the Print Options listed on the left side of the screen. For example, click the Standard Prints button. You see buttons for each step you need to follow, as shown. 3. Select a "roll of film" or click the New Roll button to create a new one. This lets you choose from photos you have already stored in Film Factory, or create a place to store new photos. 4. After you select or create your roll, click the Next Step button. 5. Select your photo, or click Import and Retouch to import it. If you need to import your photo, do one of the following: I Click From File to import a photo from your computer, a disk, or a CD-ROM. Locate the file, then click Move or Copy to bring it into Film Factory. I Click Twain Device to import a photo from a scanner or digital camera. If your device is already selected, the software will open. If not, select Import Photo from the File menu, then select Import Settings. 6. Retouch or edit your photo as necessary. 7. Continue with the steps in the next section to set up your print job. Printing From Start to Finish 21
-
 1
1 -
2
-
3
-
4
-
5
-
6
-
7
-
8
-
9
-
10
-
11
-
12
-
13
-
14
-
15
-
16
-
17
-
18
-
19
-
 20
20 -
 21
21 -
 22
22 -
 23
23 -
 24
24 -
 25
25 -
 26
26 -
 27
27 -
 28
28 -
 29
29 -
 30
30 -
31
-
32
-
33
-
34
-
35
-
36
-
37
-
38
-
39
-
40
-
41
-
42
-
43
-
44
-
45
-
46
-
47
-
48
-
49
-
50
-
51
-
52
-
53
-
54
-
55
-
56
-
57
-
58
-
59
-
60
-
61
-
62
-
63
-
64
 |
 |