Epson XP-446 Users Guide - Page 125
Setting Name, Destination Name, Notebook, File Type, Options, Copy the images to a local folder
 |
View all Epson XP-446 manuals
Add to My Manuals
Save this manual to your list of manuals |
Page 125 highlights
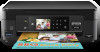
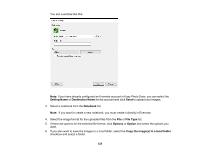
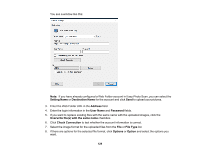
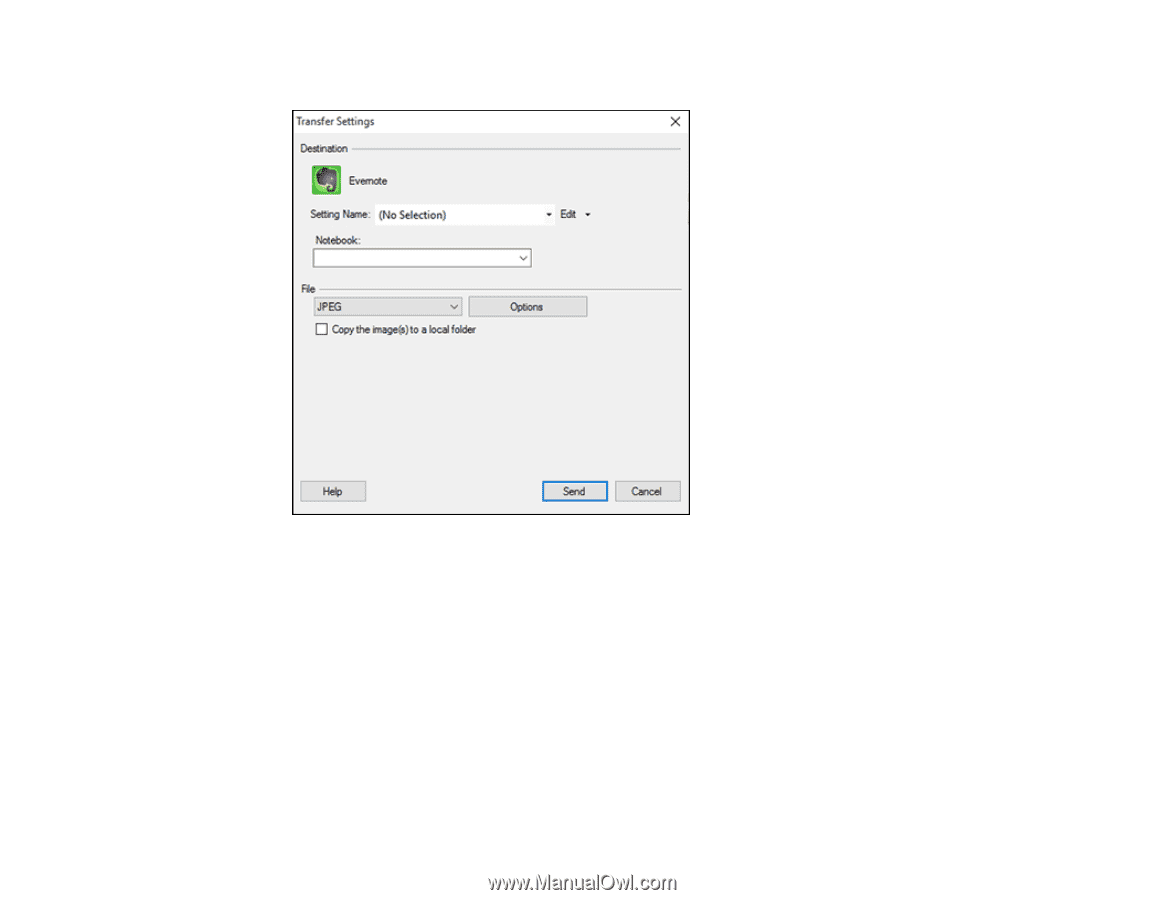
You see a window like this: Note: If you have already configured an Evernote account in Easy Photo Scan, you can select the Setting Name or Destination Name for the account and click Send to upload your images. 3. Select a notebook from the Notebook list. Note: If you want to create a new notebook, you must create it directly in Evernote. 4. Select the image format for the uploaded files from the File or File Type list. 5. If there are options for the selected file format, click Options or Option and select the options you want. 6. If you also want to save the images to a local folder, select the Copy the image(s) to a local folder checkbox and select a folder. 125
-
 1
1 -
2
-
3
-
4
-
5
-
6
-
7
-
8
-
9
-
10
-
11
-
12
-
13
-
14
-
15
-
16
-
17
-
18
-
19
-
20
-
21
-
22
-
23
-
24
-
25
-
26
-
27
-
28
-
29
-
30
-
31
-
32
-
33
-
34
-
35
-
36
-
37
-
38
-
39
-
40
-
41
-
42
-
43
-
44
-
45
-
46
-
47
-
48
-
49
-
50
-
51
-
52
-
53
-
54
-
55
-
56
-
57
-
58
-
59
-
60
-
61
-
62
-
63
-
64
-
65
-
66
-
67
-
68
-
69
-
70
-
71
-
72
-
73
-
74
-
75
-
76
-
77
-
78
-
79
-
80
-
81
-
82
-
83
-
84
-
85
-
86
-
87
-
88
-
89
-
90
-
91
-
92
-
93
-
94
-
95
-
96
-
97
-
98
-
99
-
100
-
101
-
102
-
103
-
104
-
105
-
106
-
107
-
108
-
109
-
110
-
111
-
112
-
113
-
114
-
115
-
116
-
117
-
118
-
119
-
 120
120 -
 121
121 -
 122
122 -
 123
123 -
 124
124 -
 125
125 -
 126
126 -
 127
127 -
 128
128 -
 129
129 -
 130
130 -
131
-
132
-
133
-
134
-
135
-
136
-
137
-
138
-
139
-
140
-
141
-
142
-
143
-
144
-
145
-
146
-
147
-
148
-
149
-
150
-
151
-
152
-
153
-
154
-
155
-
156
-
157
-
158
-
159
-
160
-
161
-
162
-
163
-
164
-
165
-
166
-
167
-
168
-
169
-
170
-
171
-
172
-
173
-
174
-
175
-
176
-
177
-
178
-
179
-
180
-
181
-
182
-
183
-
184
-
185
-
186
-
187
-
188
-
189
-
190
-
191
-
192
-
193
-
194
-
195
-
196
-
197
-
198
-
199
-
200
-
201
-
202
-
203
-
204
-
205
-
206
-
207
-
208
-
209
-
210
-
211
-
212
-
213
-
214
-
215
-
216
-
217
-
218
-
219
-
220
-
221
-
222
-
223
-
224
-
225
-
226
-
227
-
228
-
229
-
230
-
231
-
232
-
233
-
234
-
235
-
236
-
237
-
238
-
239
-
240
-
241
-
242
-
243
-
244
-
245
-
246
-
247
-
248
-
249
-
250
-
251
 |
 |
125
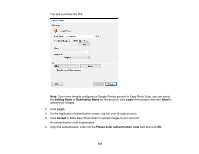
You see a window like this:
Note:
If you have already configured an Evernote account in Easy Photo Scan, you can select the
Setting Name
or
Destination Name
for the account and click
Send
to upload your images.
3.
Select a notebook from the
Notebook
list.
Note:
If you want to create a new notebook, you must create it directly in Evernote.
4.
Select the image format for the uploaded files from the
File
or
File Type
list.
5.
If there are options for the selected file format, click
Options
or
Option
and select the options you
want.
6.
If you also want to save the images to a local folder, select the
Copy the image(s) to a local folder
checkbox and select a folder.