Gigabyte GSmart MW702 User Manual - GSmart MW702 English Version - Page 49
Using E-mail, Select Start > Messaging > Menu > Options >
 |
View all Gigabyte GSmart MW702 manuals
Add to My Manuals
Save this manual to your list of manuals |
Page 49 highlights
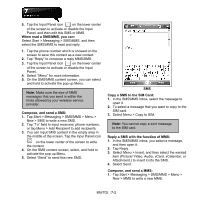
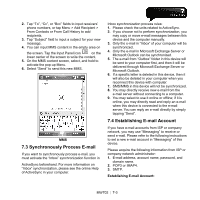
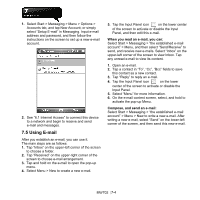
1. Select Start > Messaging > Menu > Options > Accounts tab, and tap New Account; or simply select "Setup E-mail" in Messaging. Input e-mail address and password, and then follow the instructions on the screen to set up a new e-mail account. 2. See "6.1 Internet Access" to connect this device to a network and begin to receive and send e-mail and messages. 7.5 Using E-mail After you establish an e-mail, you can use it. The main steps are as follows: 1. Tap "Inbox" on the upper-left corner of the screen to choose a folder. 2. Tap "Received" on the upper-right corner of the screen to choose e-mail arrangement. 3. Tap and hold on the e-mail to open the pop-up menu. 4. Select Menu > New to create a new e-mail. 5. Tap the Input Panel icon on the lower center of the screen to activate or disable the Input Panel, and then edit this e-mail. When you read an e-mail, you can: Select Start > Messaging > "the established e-mail account" > Menu, and then select "Send/Receive" to send, and receive new e-mails. Select "Inbox" on the upper-left corner of the screen to view Inbox. Tap any unread e-mail to view its content. 1. Open an e-mail. 2. Tap a contact in "To", "Cc", "Bcc" fields to save this contact as a new contact. 3. Tap "Reply" to reply an e-mail. 4. Tap the Input Panel icon on the lower center of the screen to activate or disable the Input Panel. 5. Select "Menu" for more information. 6. On the e-mail content screen, select, and hold to activate the pop-up Menu. Compose, and send an e-mail: Select Start > Messaging > "the established e-mail account" > Menu > New to write a new e-mail. After writing a new e-mail, select "Send" on the lower-left corner of the screen, and then send this new e-mail. MW702│7-4
-
 1
1 -
2
-
3
-
4
-
5
-
6
-
7
-
8
-
9
-
10
-
11
-
12
-
13
-
14
-
15
-
16
-
17
-
18
-
19
-
20
-
21
-
22
-
23
-
24
-
25
-
26
-
27
-
28
-
29
-
30
-
31
-
32
-
33
-
34
-
35
-
36
-
37
-
38
-
39
-
40
-
41
-
42
-
43
-
 44
44 -
 45
45 -
 46
46 -
 47
47 -
 48
48 -
 49
49 -
 50
50 -
 51
51 -
 52
52 -
 53
53 -
 54
54 -
55
-
56
-
57
-
58
-
59
-
60
-
61
-
62
-
63
-
64
-
65
-
66
-
67
-
68
-
69
-
70
-
71
-
72
-
73
-
74
 |
 |
