HP 1012 HP LaserJet 1010 series printer - User Guide - Page 84
Changing the printer separation pad, Unplug the power cord from the printer
 |
View all HP 1012 manuals
Add to My Manuals
Save this manual to your list of manuals |
Page 84 highlights
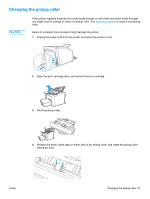
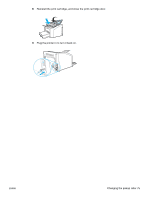
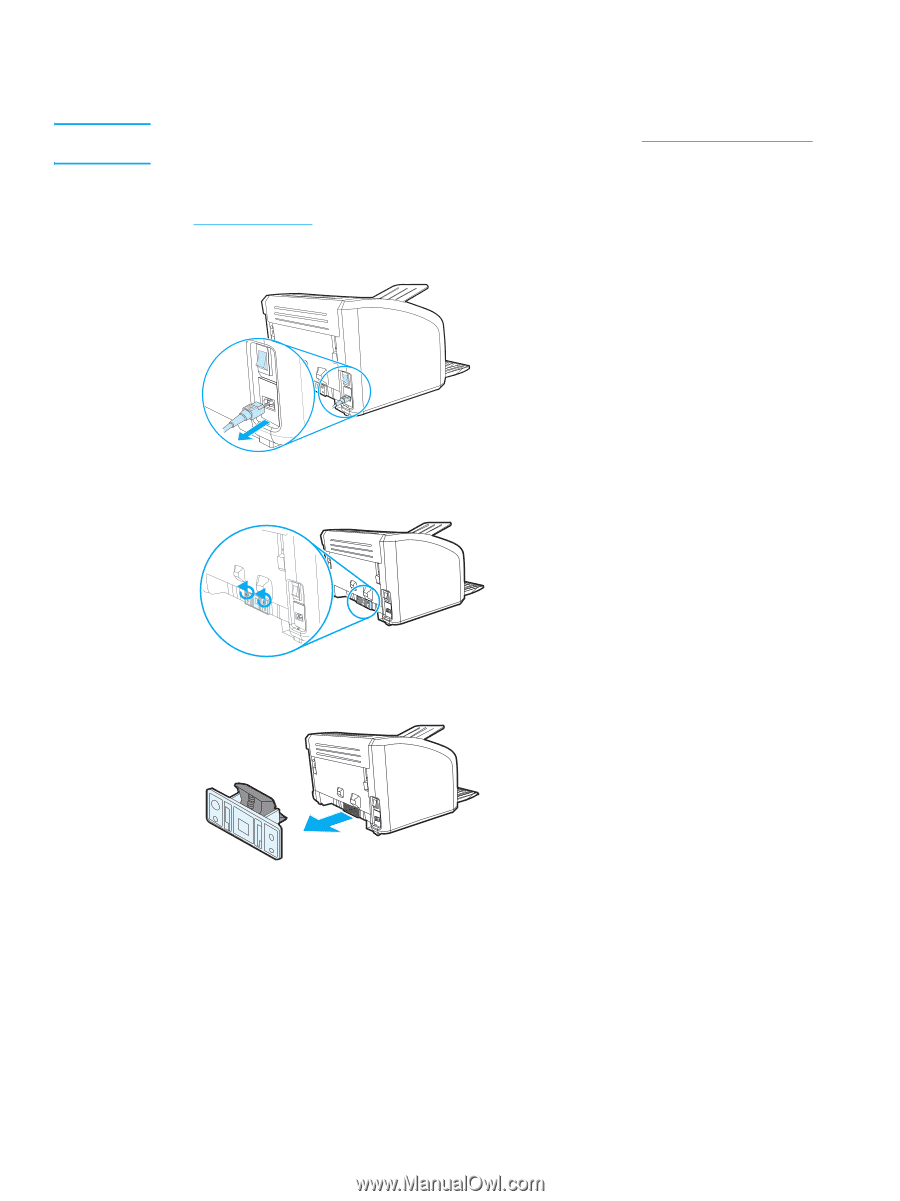
Changing the printer separation pad Note Before you change the separation pad, clean the pickup roller. See Cleaning the pickup roller for instructions. If your input tray feeds more than one page at a time, you might need to change the printer separation pad. Recurring feed problems indicate that the printer separation pad is worn. See Ordering supplies to order a new printer separation pad. 1 Unplug the power cord from the printer, and allow the printer to cool. 2 At the back of the printer, unscrew the two screws holding the separation pad in place. 3 Remove the separation pad. 76 Chapter 6 ENWW
-
 1
1 -
2
-
3
-
4
-
5
-
6
-
7
-
8
-
9
-
10
-
11
-
12
-
13
-
14
-
15
-
16
-
17
-
18
-
19
-
20
-
21
-
22
-
23
-
24
-
25
-
26
-
27
-
28
-
29
-
30
-
31
-
32
-
33
-
34
-
35
-
36
-
37
-
38
-
39
-
40
-
41
-
42
-
43
-
44
-
45
-
46
-
47
-
48
-
49
-
50
-
51
-
52
-
53
-
54
-
55
-
56
-
57
-
58
-
59
-
60
-
61
-
62
-
63
-
64
-
65
-
66
-
67
-
68
-
69
-
70
-
71
-
72
-
73
-
74
-
75
-
76
-
77
-
78
-
 79
79 -
 80
80 -
 81
81 -
 82
82 -
 83
83 -
 84
84 -
 85
85 -
 86
86 -
 87
87 -
 88
88 -
 89
89 -
90
-
91
-
92
-
93
-
94
-
95
-
96
-
97
-
98
-
99
-
100
-
101
-
102
-
103
-
104
-
105
-
106
-
107
-
108
-
109
-
110
-
111
-
112
-
113
-
114
-
115
-
116
-
117
-
118
-
119
-
120
-
121
-
122
 |
 |
76
Chapter 6
ENWW
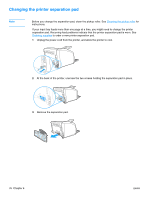
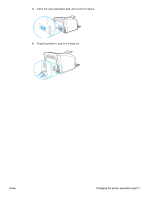
Changing the printer separation pad
Note
Before you change the separation pad, clean the pickup roller. See
Cleaning the pickup roller
for
instructions.
If your input tray feeds more than one page at a time, you might need to change the printer
separation pad. Recurring feed problems indicate that the printer separation pad is worn. See
Ordering supplies
to order a new printer separation pad.
1
Unplug the power cord from the printer, and allow the printer to cool.
2
At the back of the printer, unscrew the two screws holding the separation pad in place.
3
Remove the separation pad.