HP 2500c HP 2500C/C+/CM Professional Series Color Printer - (English) User's G - Page 11
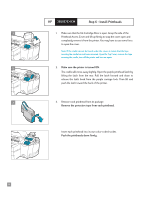
Step 5 - Install Ink Cartridges
 |
View all HP 2500c manuals
Add to My Manuals
Save this manual to your list of manuals |
Page 11 highlights
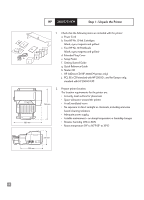
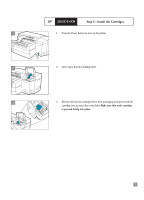
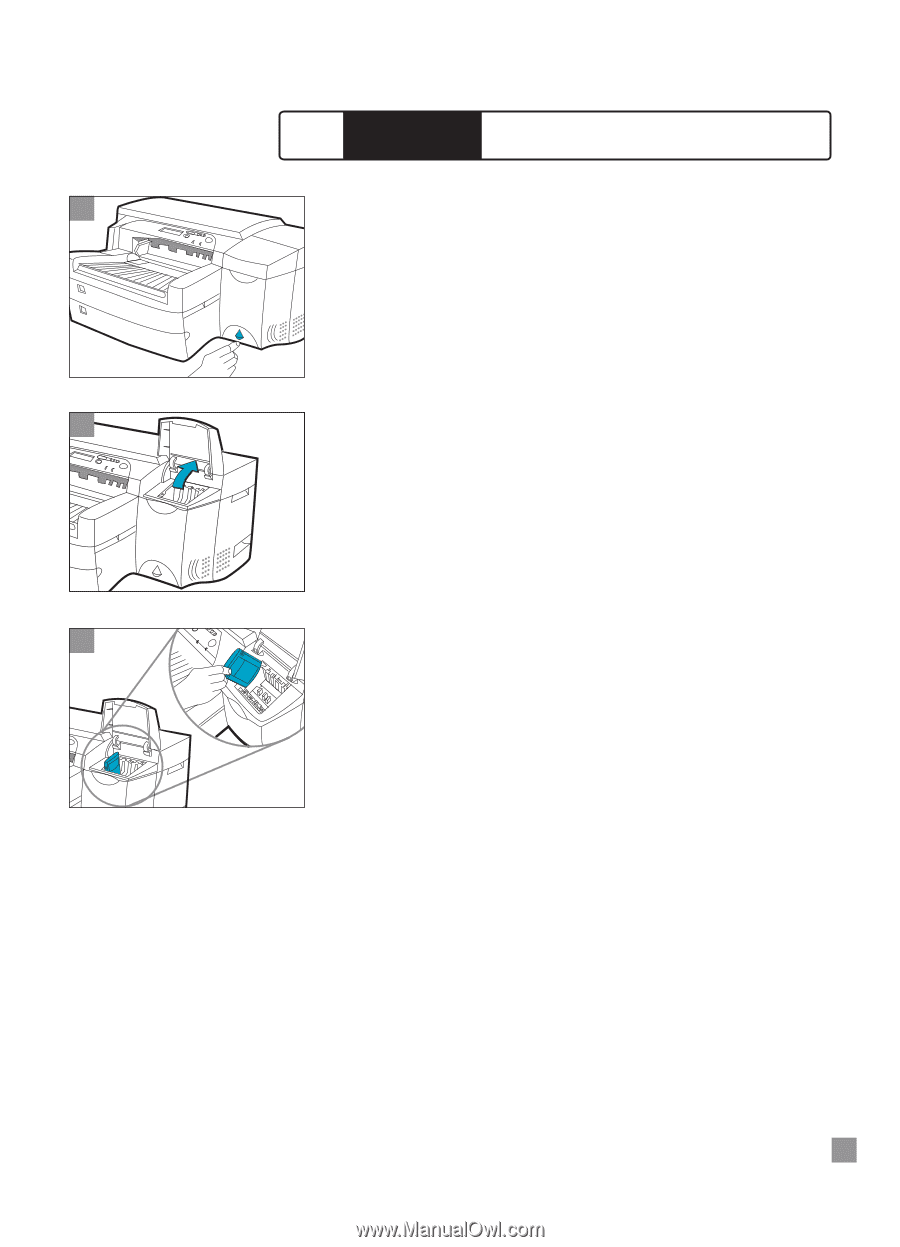
HP 2500C/C+/CM Step 5 - Install Ink Cartridges 1 1. Press the Power button to turn on the printer. 2 2. Lift to open the Ink Cartridge door. 3 3. Remove all four ink cartridges from their packaging and insert each ink cartridge into its own color-coded slot. Make sure that each cartridge is pressed firmly into place. 7
-
 1
1 -
2
-
3
-
4
-
5
-
 6
6 -
 7
7 -
 8
8 -
 9
9 -
 10
10 -
 11
11 -
 12
12 -
 13
13 -
 14
14 -
 15
15 -
 16
16 -
17
-
18
-
19
-
20
-
21
-
22
-
23
-
24
-
25
-
26
-
27
-
28
-
29
-
30
-
31
-
32
-
33
-
34
-
35
-
36
-
37
-
38
-
39
-
40
-
41
-
42
-
43
-
44
-
45
-
46
-
47
-
48
-
49
-
50
-
51
-
52
-
53
-
54
-
55
-
56
-
57
-
58
-
59
-
60
-
61
-
62
-
63
-
64
-
65
-
66
 |
 |
3
1
7
1.
Press the Power button to turn on the printer.
2.
Lift to open the Ink Cartridge door.
3.
Remove all four ink cartridges from their packaging and insert each ink
cartridge into its own color-coded slot.
Make sure that each cartridge
is pressed firmly into place.
2500C/C+/CM
HP
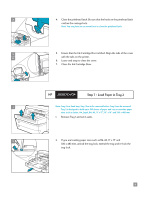
Step 5 - Install Ink Cartridges
2