HP 2500c HP 2500C/C+/CM Professional Series Color Printer - (English) User's G - Page 30
CHECK TOTAL RAM SIZE appears and press [SELECT]. The LCD
 |
View all HP 2500c manuals
Add to My Manuals
Save this manual to your list of manuals |
Page 30 highlights
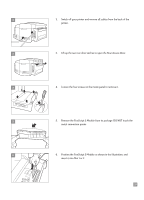
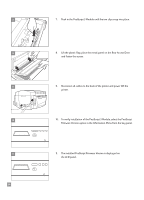
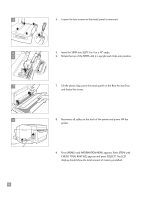
4 5 6 7 8 26 4. Loosen the four screws on the metal panel to remove it. 5. Insert the SIMM into SLOT 3 or 4 at a 45° angle. 6. Rotate the top of the SIMM until it is upright and clicks into position. 7. Lift the plastic flap, place the metal panel on the Rear Access Door and fasten the screws. 8. Reconnect all cables to the back of the printer and power ON the printer. 9. Press [MENU] until INFORMATION MENU appears. Press [ITEM] until CHECK TOTAL RAM SIZE appears and press [SELECT]. The LCD display should show the total amount of memory installed.
-
 1
1 -
2
-
3
-
4
-
5
-
6
-
7
-
8
-
9
-
10
-
11
-
12
-
13
-
14
-
15
-
16
-
17
-
18
-
19
-
20
-
21
-
22
-
23
-
24
-
 25
25 -
 26
26 -
 27
27 -
 28
28 -
 29
29 -
 30
30 -
 31
31 -
 32
32 -
 33
33 -
 34
34 -
 35
35 -
36
-
37
-
38
-
39
-
40
-
41
-
42
-
43
-
44
-
45
-
46
-
47
-
48
-
49
-
50
-
51
-
52
-
53
-
54
-
55
-
56
-
57
-
58
-
59
-
60
-
61
-
62
-
63
-
64
-
65
-
66
 |
 |
8
7
5
6
4
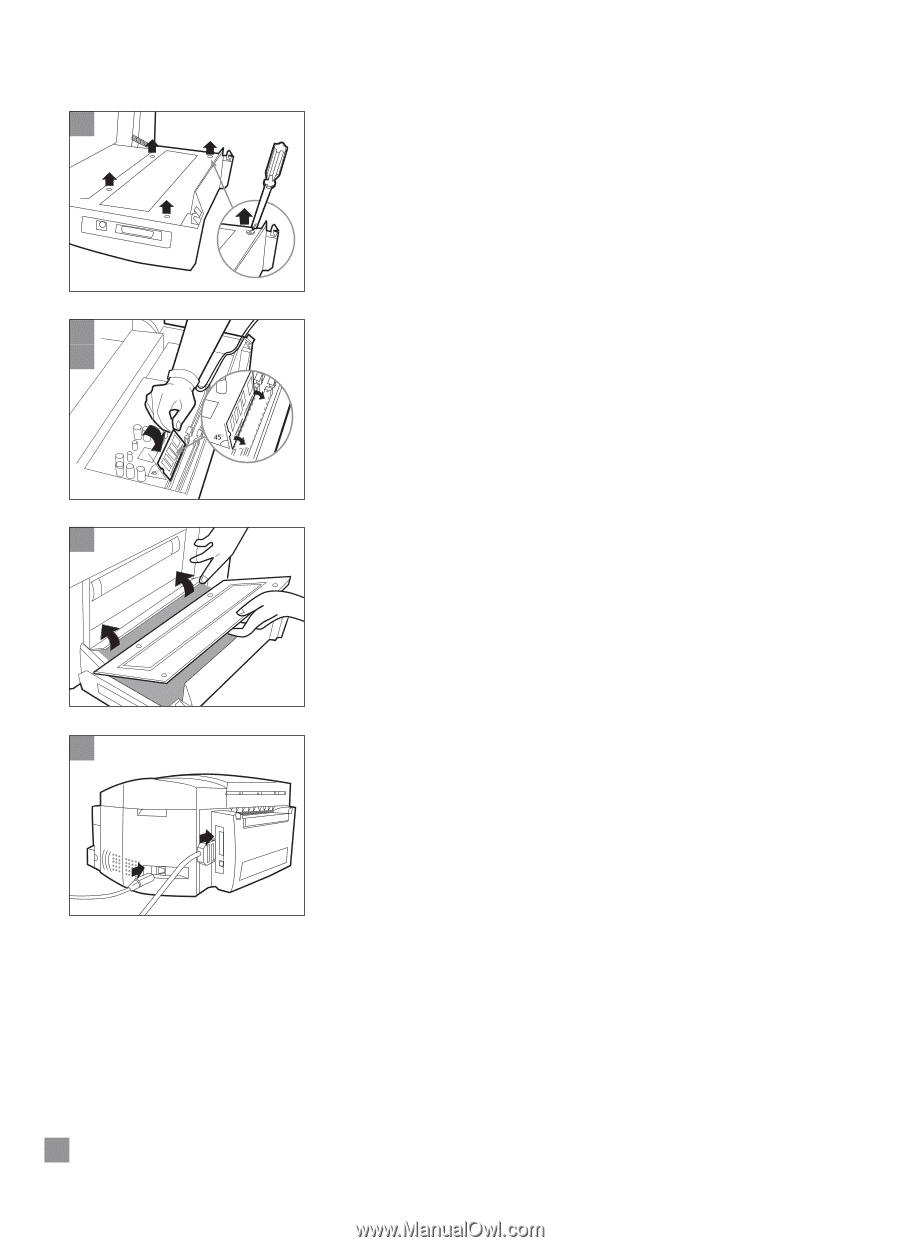
4.
Loosen the four screws on the metal panel to remove it.
5.
Insert the SIMM into SLOT 3 or 4 at a 45° angle.
6.
Rotate the top of the SIMM until it is upright and clicks into position.
7.
Lift the plastic flap, place the metal panel on the Rear Access Door
and fasten the screws.
8.
Reconnect all cables to the back of the printer and power ON the
printer.
9.
Press [MENU] until INFORMATION MENU appears. Press [ITEM] until
CHECK TOTAL RAM SIZE appears and press [SELECT]. The LCD
display should show the total amount of memory installed.
26