HP 2500c HP 2500C/C+/CM Professional Series Color Printer - (English) User's G - Page 21
Replacing Printheads, Open the Ink Cartridge Door.
 |
View all HP 2500c manuals
Add to My Manuals
Save this manual to your list of manuals |
Page 21 highlights
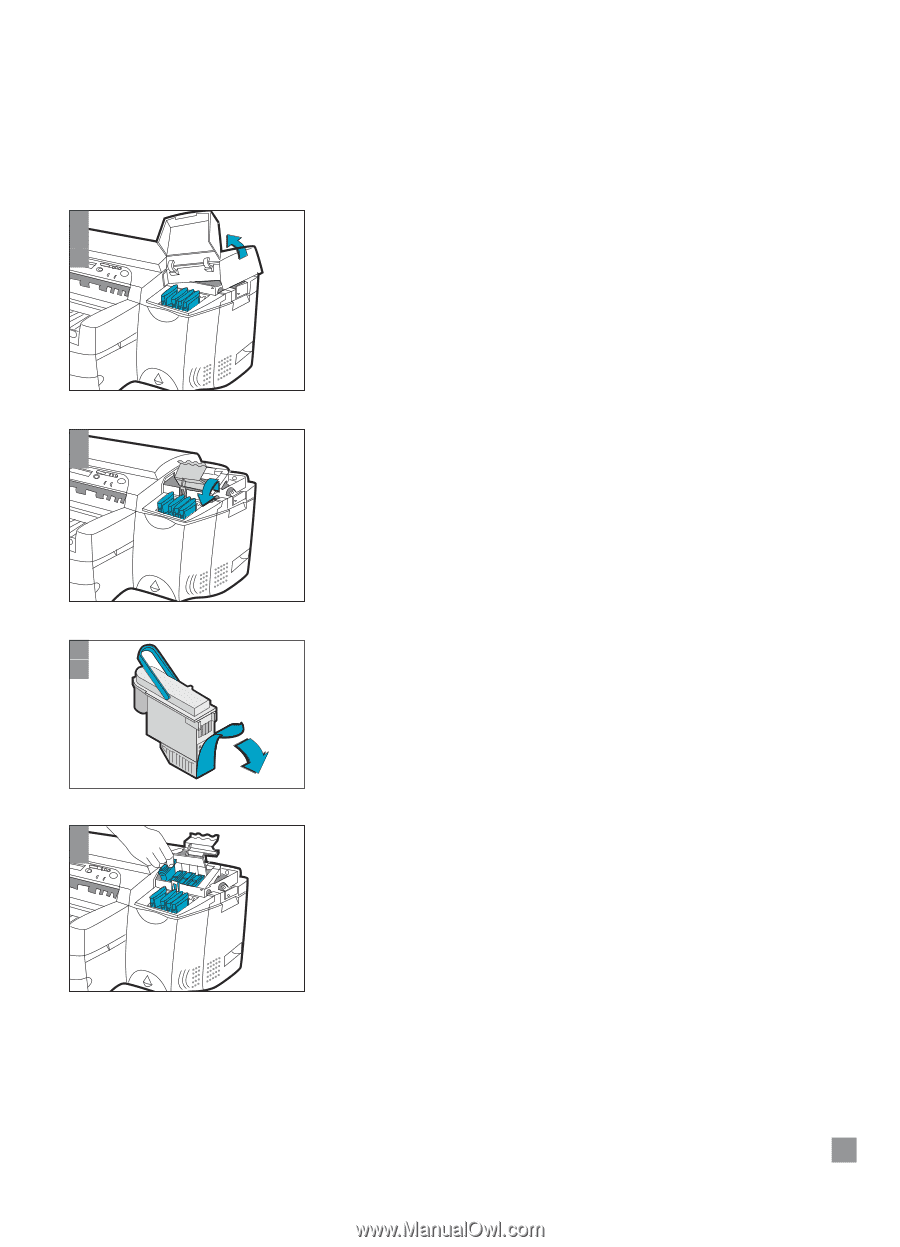
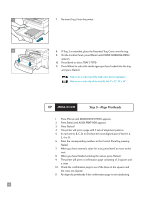
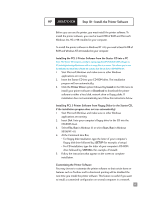
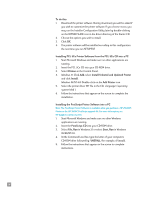
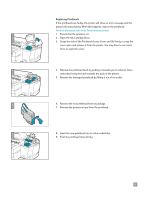
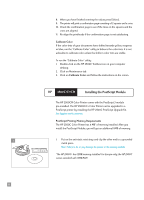
Replacing Printheads If the printheads are faulty, the printer will show an error message and the printer will stop printing. When this happens, replace the printhead. For more information, refer to the Troubleshooting section. 1 1. Ensure that the printer is on. 2 2. Open the Ink Cartridge Door. 3 3. Grasp the side of the Printhead Access Cover and lift firmly to snap the cover open and remove it from the printer. You may have to use some force to open the cover. 4 4. Release the printhead latch by pulling it towards you to unhook. Once 5 unhooked, bring the latch towards the back of the printer. 5. Remove the damaged printhead by lifting it out of its socket. 6 6. Remove the new printhead from its package. 7 7. Remove the protective tape from the printhead. 8 8. Insert the new printhead into its color-coded slot. 9 9. Push the printhead down firmly. 17
-
 1
1 -
2
-
3
-
4
-
5
-
6
-
7
-
8
-
9
-
10
-
11
-
12
-
13
-
14
-
15
-
 16
16 -
 17
17 -
 18
18 -
 19
19 -
 20
20 -
 21
21 -
 22
22 -
 23
23 -
 24
24 -
 25
25 -
 26
26 -
27
-
28
-
29
-
30
-
31
-
32
-
33
-
34
-
35
-
36
-
37
-
38
-
39
-
40
-
41
-
42
-
43
-
44
-
45
-
46
-
47
-
48
-
49
-
50
-
51
-
52
-
53
-
54
-
55
-
56
-
57
-
58
-
59
-
60
-
61
-
62
-
63
-
64
-
65
-
66
 |
 |