HP 2500c HP 2500C/C+/CM Professional Series Color Printer - (English) User's G - Page 16
Step 9 - Align Printheads
 |
View all HP 2500c manuals
Add to My Manuals
Save this manual to your list of manuals |
Page 16 highlights
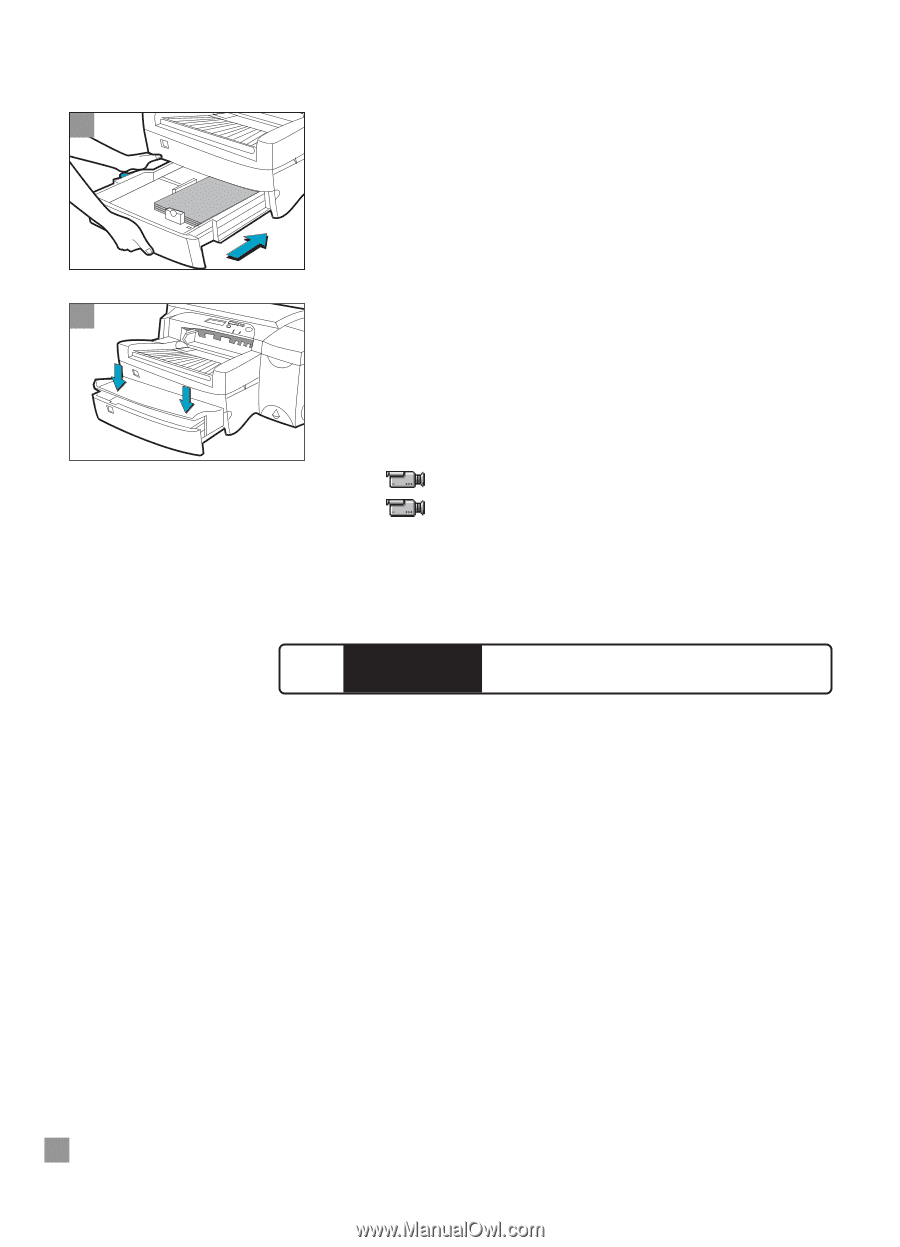
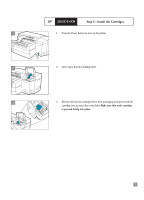
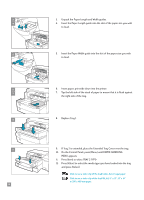
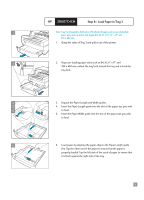
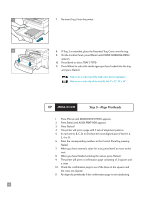
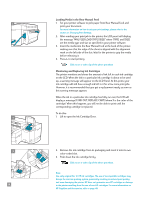
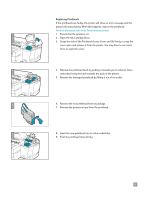
7 8 12 7. Re-insert Tray 3 into the printer. 8. If Tray 3 is extended, place the Extended Tray Cover over the tray. 9. On the Control Panel, press [Menu] until PAPER HANDLING MENU appears. 10. Press [Item] to select TRAY 3 TYPE= 11. Press [Value] to select the media type you have loaded into the tray and press [Select]. Click to see a video clip of the load Letter, A4 or Legal paper. Click to see a video clip of the load B4, A3, 11" x 17", 13" x 19" HP 2500C/C+/CM Step 9 - Align Printheads 1. Press [Menu] until DIAGNOSTICS MENU appears. 2. Press [Item] until ALIGN PRNT-HDS appears. 3. Press [Select] 4. The printer will print a page with 5 sets of alignment patterns. 5. In each set (A, B, C, D, or E) select the most aligned pair of lines (1, 2, 3, 4 or 5). 6. Enter the corresponding numbers in the Control Panel by pressing [Value]. 7. When you have entered a value for a set, press [Item] to move to the next. 8. When you have finished entering the values, press [Select]. 9. The printer will print a confirmation page consisting of 2 squares and a cross. 10. Check the confirmation page to see if the lines on the squares and the cross are aligned. 11. Re-align the printheads if the confirmation page is not satisfactory.
-
 1
1 -
2
-
3
-
4
-
5
-
6
-
7
-
8
-
9
-
10
-
 11
11 -
 12
12 -
 13
13 -
 14
14 -
 15
15 -
 16
16 -
 17
17 -
 18
18 -
 19
19 -
 20
20 -
 21
21 -
22
-
23
-
24
-
25
-
26
-
27
-
28
-
29
-
30
-
31
-
32
-
33
-
34
-
35
-
36
-
37
-
38
-
39
-
40
-
41
-
42
-
43
-
44
-
45
-
46
-
47
-
48
-
49
-
50
-
51
-
52
-
53
-
54
-
55
-
56
-
57
-
58
-
59
-
60
-
61
-
62
-
63
-
64
-
65
-
66
 |
 |