HP 6310 User Guide - Page 14
To open the HP Photosmart Software on a Windows computer - ink
 |
UPC - 882780472747
View all HP 6310 manuals
Add to My Manuals
Save this manual to your list of manuals |
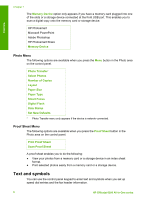
Page 14 highlights
Overview HP Photosmart Studio window. Regardless, the entry point serves as the launching pad for the software and services. To open the HP Photosmart Software on a Windows computer 1. Do one of the following: - On the Windows desktop, double-click the HP Solution Center icon. - In the system tray at the far right of the Windows taskbar, double-click the HP Digital Imaging Monitor icon. - On the taskbar, click Start, point to Programs or All Programs, select HP, and then click HP Solution Center. 2. If you have more than one HP device installed, select the HP All-in-One tab. Note On a Windows computer, the features available in the HP Solution Center vary depending on the devices you have installed. The HP Solution Center is customized to display icons associated with the selected device. If the selected device is not equipped with a particular feature, then the icon for that feature does not display in the HP Solution Center. Tip If the HP Solution Center on your computer does not contain any icons, an error might have occurred during the software installation. To correct this, use the Control Panel in Windows to completely uninstall the HP Photosmart Software; then reinstall the software. For more information, see the onscreen Help that came with the HP All-in-One. To open the HP Photosmart Mac Software on a Mac 1. Click the HP Photosmart Studio icon in the Dock. The HP Photosmart Studio window appears, where you can manage, edit, and share photos. Note On a Mac, the features available in the HP Photosmart Mac software vary depending on the chosen device. 2. In the HP Photosmart Studio task bar, click Devices. The HP Device Manager window appears. 3. In the Select Device area, click the icon for the HP All-in-One. From here, you can scan, make copies, and perform maintenance procedures such as checking the ink levels for the print cartridges. User Guide 11
-
 1
1 -
2
-
3
-
4
-
5
-
6
-
7
-
8
-
 9
9 -
 10
10 -
 11
11 -
 12
12 -
 13
13 -
 14
14 -
 15
15 -
 16
16 -
 17
17 -
 18
18 -
 19
19 -
20
-
21
-
22
-
23
-
24
-
25
-
26
-
27
-
28
-
29
-
30
-
31
-
32
-
33
-
34
-
35
-
36
-
37
-
38
-
39
-
40
-
41
-
42
-
43
-
44
-
45
-
46
-
47
-
48
-
49
-
50
-
51
-
52
-
53
-
54
-
55
-
56
-
57
-
58
-
59
-
60
-
61
-
62
-
63
-
64
-
65
-
66
-
67
-
68
-
69
-
70
-
71
-
72
-
73
-
74
-
75
-
76
-
77
-
78
-
79
-
80
-
81
-
82
-
83
-
84
-
85
-
86
-
87
-
88
-
89
-
90
-
91
-
92
-
93
-
94
-
95
-
96
-
97
-
98
-
99
-
100
-
101
-
102
-
103
-
104
-
105
-
106
-
107
-
108
-
109
-
110
-
111
-
112
-
113
-
114
-
115
-
116
-
117
-
118
-
119
-
120
-
121
-
122
-
123
-
124
-
125
-
126
-
127
-
128
-
129
-
130
-
131
-
132
-
133
-
134
-
135
-
136
-
137
-
138
-
139
-
140
-
141
-
142
-
143
-
144
-
145
-
146
-
147
-
148
-
149
-
150
-
151
-
152
-
153
-
154
-
155
-
156
-
157
-
158
-
159
-
160
-
161
-
162
-
163
-
164
-
165
-
166
-
167
 |
 |
