HP 9085mfp HP 9085mfp - (English) Quick Reference Guide - Page 26
Using the optional finisher features, To staple, To punch holes
 |
View all HP 9085mfp manuals
Add to My Manuals
Save this manual to your list of manuals |
Page 26 highlights
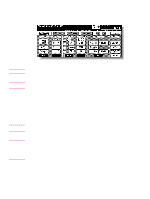
Using the optional finisher features To staple 1 Close the RADF securely, and press AUTO RESET. 2 Touch Staple-Sort on the Basic Screen. 3 Touch Output Appli. 4 Touch the desired staple position key. 5 Touch Special Original. 6 Touch the desired original set. 7 Select additional copy conditions, as desired 8 Enter the desired print quality. 9 Position the originals. 10 Press START. To punch holes 1 Touch OUTPUT APPLI. on the Basic Screen The Output Mode popup menu will be displayed. 2 Touch MAIN TRAY, if it is not highlighted. 3 Touch PUNCH. The Punch Position popup menu will be displayed. 4 Touch the desired punch position key on the screen to highlight it. 5 Touch OK on the Punch Position popup menu to restore the Output Mode popup menu. 6 Touch OK on the Output Mode popup menu to complete the setting and return to the Basic Screen. The selection made in punch position will be displayed in the OUTPUT icon area. 7 Specify the original set direction. Touch SPECIAL ORIGINAL on the Basic Screen to display the Special Original popup menu. Touch the desired original set direction key, and touch OK to return to the Basic Screen. 8 Select additional copying features, as required. 9 Enter the desired print quantity from the control panel keypad. 10 Position the originals in the document feeder. 11 Press START. CAUTION When the finisher output tray capacity is exceeded because of the print quantity selected, remove the copied sets as they exit; otherwise, mishandled paper will occur. 22 2 Copying ENWW
-
 1
1 -
2
-
3
-
4
-
5
-
6
-
7
-
8
-
9
-
10
-
11
-
12
-
13
-
14
-
15
-
16
-
17
-
18
-
19
-
20
-
 21
21 -
 22
22 -
 23
23 -
 24
24 -
 25
25 -
 26
26 -
 27
27 -
 28
28 -
 29
29 -
 30
30 -
 31
31 -
32
-
33
-
34
-
35
-
36
-
37
-
38
-
39
-
40
-
41
-
42
-
43
-
44
-
45
-
46
-
47
-
48
-
49
-
50
-
51
-
52
-
53
-
54
-
55
-
56
-
57
-
58
-
59
-
60
-
61
-
62
-
63
-
64
 |
 |
