HP Business Inkjet 1000 HP Business Inkjet 1000 - User Guide - Page 11
Completing a hardware-first installation - download
 |
View all HP Business Inkjet 1000 manuals
Add to My Manuals
Save this manual to your list of manuals |
Page 11 highlights
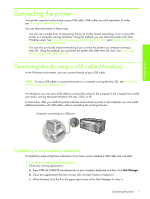
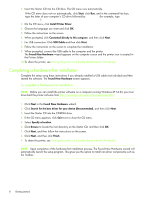
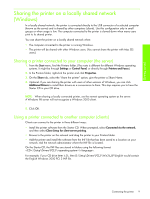
2. Insert the Starter CD into the CD drive. The CD menu runs automatically. If the CD menu does not run automatically, click Start, click Run, and in the command line box, type the letter of your computer's CD drive followed by:\AUTORUN (for example, type D:\AUTORUN). 3. On the CD menu, click Install Printer Driver. 4. Choose the language you want and click OK. 5. Follow the instructions on the screen. 6. When prompted, click Connected directly to this computer, and then click Next. 7. For USB connection: Click USB Cable and then click Next. 8. Follow the instructions on the screen to complete the installation. 9. When prompted, connect the USB cable to the computer and the printer. The Found New Hardware wizard appears on the computer screen and the printer icon is created in the Printers folder. 10.To share the printer, see Sharing the printer on a locally shared network (Windows). Completing a hardware-first installation Complete the setup using these instructions if you already installed a USB cable (not included) and then started the software. The Found New Hardware screen appears. To complete a hardware-first installation NOTE: Before you can install the printer software on a computer running Windows XP 64-bit, you must download the printer software from http://www.hp.com/support/businessinkjet1000. 1. Click Next in the Found New Hardware wizard. 2. Click Search for the best driver for your device (Recommended), and then click Next. 3. Insert the Starter CD into the CD-ROM drive. 4. If the CD menu appears, click Exit twice to close the CD menu. 5. Select Specify a location. 6. Click Browse to locate the root directory on the Starter CD, and then click OK. 7. Click Next, and then follow the instructions on the screen. 8. Click Next, and then click Finish. 9. To share the printer, see Sharing the printer on a locally shared network (Windows). NOTE: Upon completion of the hardware-first installation process, The Found New Hardware wizard will automatically launch the setup program. This gives you the option to install non-driver components such as the Toolbox. 8 Getting started
-
 1
1 -
2
-
3
-
4
-
5
-
 6
6 -
 7
7 -
 8
8 -
 9
9 -
 10
10 -
 11
11 -
 12
12 -
 13
13 -
 14
14 -
 15
15 -
 16
16 -
17
-
18
-
19
-
20
-
21
-
22
-
23
-
24
-
25
-
26
-
27
-
28
-
29
-
30
-
31
-
32
-
33
-
34
-
35
-
36
-
37
-
38
-
39
-
40
-
41
-
42
-
43
-
44
-
45
-
46
-
47
-
48
-
49
-
50
-
51
-
52
-
53
-
54
-
55
-
56
-
57
-
58
-
59
-
60
-
61
-
62
-
63
-
64
-
65
-
66
-
67
-
68
-
69
-
70
-
71
-
72
-
73
-
74
-
75
-
76
-
77
-
78
-
79
-
80
-
81
-
82
-
83
-
84
-
85
-
86
-
87
-
88
-
89
-
90
-
91
-
92
-
93
-
94
-
95
-
96
 |
 |