HP Business Inkjet 1000 HP Business Inkjet 1000 - User Guide - Page 14
Uninstalling the printing system software, Uninstalling software for Windows (all versions) - installation software
 |
View all HP Business Inkjet 1000 manuals
Add to My Manuals
Save this manual to your list of manuals |
Page 14 highlights
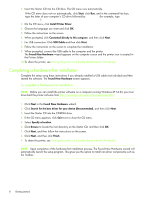
Getting started Uninstalling the printing system software Use the following steps to uninstall the printing system software. Uninstalling software for Windows (all versions) 1. Close any running applications. 2. From the Start menu, open the Control Panel. 3. Double-click Add/Remove Programs. 4. Select the printing software that you wish to remove. 5. Click the button for adding or removing software. 6. Follow the instructions on the screen to complete the removal of the printer software. NOTE: You must have administrator privileges to uninstall the printer software in Windows 2000 and Windows XP. If the software was not successfully installed, or the Uninstaller could not be found, run the scrubber utility from the Starter CD. See the steps below. Running the scrubber utility 1. Disconnect the printer from the computer. 2. On the computer, restart Windows. 3. Insert the Starter CD in the CD-ROM drive. 4. Locate the scrubber utility on the Starter CD-ROM and run the utility. • For Windows 98 and Windows Me, use the scrub9x.exe file located in the Utils\Scrubber\Win9x_Me folder. • For Windows 2000 and Windows XP, use the scrub2k.exe file located in the Utils\Scrubber\Win2k_XP folder. Uninstalling software for the Mac OS 1. Restart the computer. NOTE: If you do not restart the computer before you uninstall the software, some files are not removed from your computer when you run the Uninstall option. 2. Insert the Starter CD into the CD-ROM drive. 3. Double-click the CD icon on the desktop. 4. Double-click the installer icon and follow the instructions on the screen. 5. When the Main Installation dialog box appears, select Uninstall from the drop-down list located in the upper-left part of the dialog box. 6. Follow the instructions on the screen to remove the printer software. Uninstalling the printing system software 11
-
 1
1 -
2
-
3
-
4
-
5
-
6
-
7
-
8
-
 9
9 -
 10
10 -
 11
11 -
 12
12 -
 13
13 -
 14
14 -
 15
15 -
 16
16 -
 17
17 -
 18
18 -
 19
19 -
20
-
21
-
22
-
23
-
24
-
25
-
26
-
27
-
28
-
29
-
30
-
31
-
32
-
33
-
34
-
35
-
36
-
37
-
38
-
39
-
40
-
41
-
42
-
43
-
44
-
45
-
46
-
47
-
48
-
49
-
50
-
51
-
52
-
53
-
54
-
55
-
56
-
57
-
58
-
59
-
60
-
61
-
62
-
63
-
64
-
65
-
66
-
67
-
68
-
69
-
70
-
71
-
72
-
73
-
74
-
75
-
76
-
77
-
78
-
79
-
80
-
81
-
82
-
83
-
84
-
85
-
86
-
87
-
88
-
89
-
90
-
91
-
92
-
93
-
94
-
95
-
96
 |
 |