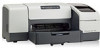
HP Business Inkjet 1000 HP Business Inkjet 1000 - User Guide - Page 29
Printing on transparencies, To load transparencies, To print transparencies (Windows)
 |
View all HP Business Inkjet 1000 manuals
Add to My Manuals
Save this manual to your list of manuals |
Page 29 highlights
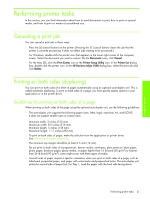
Printing on transparencies You can print transparencies from Tray 1. For best results, use HP Premium Plus Inkjet Transparency Film, which is specifically designed to work with the printer, or other transparency film that is designed for inkjet printers. To load transparencies 1. Remove all media from Tray 1. Insert the transparencies with the rough side down and the adhesive strip pointing forward. 2. Slide the width and length guides until they stop at the edge of the transparencies. Slide the tray back into its closed and locked position. To print transparencies (Windows) 1. On the File menu, click Print, and then click Properties. (The actual steps can vary; this is the most common method.) 2. On the Paper/Quality tab, under Print Quality, select Best in the drop-down menu. NOTE: Use Best mode to print transparencies. Because this mode provides a longer drying time, it ensures that the ink dries completely before the next page is delivered to the output tray. 3. Under Type is, select Transparency Films. 4. Under Size is, select the appropriate size for the transparency you are printing. 5. Change any other print settings, if necessary, and then click OK. 6. Send your job to print. 7. Remove each sheet of media as it prints and set aside to dry. Allowing wet media to stack up may cause smearing. To print transparencies (Mac OS) 1. On the File menu, click Page Setup. 2. In the Paper Size pull-down menu, select size, change any other settings, and click OK. 3. On the File menu, click Print. 4. On the Paper Type/Quality panel, select the Paper tab. 5. In the Paper Type pull-down menu, select the transparency type you are using. 6. In the Quality pull-down menu, select Best. NOTE: Use Best mode to print transparencies. This mode provides a longer drying time and ensures that the ink dries completely before the next page exits the printer. 7. Change any other print settings if necessary, and then click Print. 8. Remove each sheet of media as it prints and set aside to dry. Allowing wet media to stack up might cause smearing. 26 Using the printer
-
 1
1 -
2
-
3
-
4
-
5
-
6
-
7
-
8
-
9
-
10
-
11
-
12
-
13
-
14
-
15
-
16
-
17
-
18
-
19
-
20
-
21
-
22
-
23
-
 24
24 -
 25
25 -
 26
26 -
 27
27 -
 28
28 -
 29
29 -
 30
30 -
 31
31 -
 32
32 -
 33
33 -
 34
34 -
35
-
36
-
37
-
38
-
39
-
40
-
41
-
42
-
43
-
44
-
45
-
46
-
47
-
48
-
49
-
50
-
51
-
52
-
53
-
54
-
55
-
56
-
57
-
58
-
59
-
60
-
61
-
62
-
63
-
64
-
65
-
66
-
67
-
68
-
69
-
70
-
71
-
72
-
73
-
74
-
75
-
76
-
77
-
78
-
79
-
80
-
81
-
82
-
83
-
84
-
85
-
86
-
87
-
88
-
89
-
90
-
91
-
92
-
93
-
94
-
95
-
96
 |
 |