HP DesignJet T795 Using your printer - Page 24
Printer sharing considerations, Uninstall the printer software (Windows)
 |
View all HP DesignJet T795 manuals
Add to My Manuals
Save this manual to your list of manuals |
Page 24 highlights
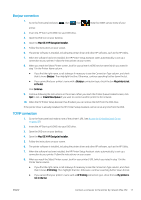
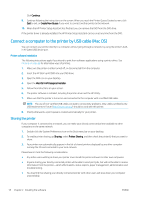
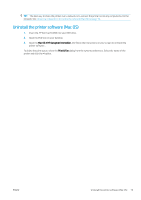
8. When prompted to do so, connect your computer to the printer with a certified USB cable. Ensure that the printer is turned on. 9. The printer drivers and the HP Utility are installed. TIP: If you would like to share the printer with other people connected to your network, press the Printer Properties button in the Ready to Install window, set Printer Name to the name under which the printer will be shared, then set Shared to Yes. Printer sharing considerations ● Any other users sharing your directly connected printer will be able to send print jobs, but will not be able to receive information from the printer-which affects alerts, status reports, paper management, administration and troubleshooting. ● Any other users sharing your directly connected printer will be unable to use the printer's own print preview facility, although the application's print preview will still be available. See Preview a print on page 54. TIP: The best way to share the printer over a network is to connect the printer not to any computer, but to the network. See Connect a computer to the printer by network (Windows) on page 14. Uninstall the printer software (Windows) 1. Insert the HP Start-up Kit DVD into your DVD drive. If the DVD does not start automatically, run the setup.exe program in the root folder of the DVD. 2. Press the Software Installation button. 3. Press the Modify Installation button, and follow the instructions on your screen to uninstall the printer software. Connect a computer to the printer by network (Mac OS) You can connect your printer to a network under Mac OS X by using the following methods: ● Bonjour ● TCP/IP NOTE: The printer does not support AppleTalk. The following instructions apply if you intend to print from software applications using a printer driver. See Printing on page 46 for alternative ways of printing. Before you begin, check your equipment: ● The printer should be set up and on. ● The Ethernet switch or router should be on and functioning correctly. ● The printer and the computer should be connected to the network (see Connect the printer to your network on page 13). Now you can proceed to install the printer software and connect to your printer. 16 Chapter 2 Installing the software ENWW
-
 1
1 -
2
-
3
-
4
-
5
-
6
-
7
-
8
-
9
-
10
-
11
-
12
-
13
-
14
-
15
-
16
-
17
-
18
-
 19
19 -
 20
20 -
 21
21 -
 22
22 -
 23
23 -
 24
24 -
 25
25 -
 26
26 -
 27
27 -
 28
28 -
 29
29 -
30
-
31
-
32
-
33
-
34
-
35
-
36
-
37
-
38
-
39
-
40
-
41
-
42
-
43
-
44
-
45
-
46
-
47
-
48
-
49
-
50
-
51
-
52
-
53
-
54
-
55
-
56
-
57
-
58
-
59
-
60
-
61
-
62
-
63
-
64
-
65
-
66
-
67
-
68
-
69
-
70
-
71
-
72
-
73
-
74
-
75
-
76
-
77
-
78
-
79
-
80
-
81
-
82
-
83
-
84
-
85
-
86
-
87
-
88
-
89
-
90
-
91
-
92
-
93
-
94
-
95
-
96
-
97
-
98
-
99
-
100
-
101
-
102
-
103
-
104
-
105
-
106
-
107
-
108
-
109
-
110
-
111
-
112
-
113
-
114
-
115
-
116
-
117
-
118
-
119
-
120
-
121
-
122
-
123
-
124
-
125
-
126
-
127
-
128
-
129
-
130
-
131
-
132
-
133
-
134
-
135
-
136
-
137
-
138
-
139
-
140
-
141
-
142
-
143
-
144
-
145
-
146
-
147
-
148
-
149
-
150
-
151
-
152
-
153
-
154
-
155
-
156
-
157
-
158
-
159
-
160
-
161
-
162
-
163
-
164
-
165
-
166
-
167
-
168
-
169
-
170
-
171
-
172
-
173
-
174
-
175
-
176
-
177
-
178
-
179
-
180
-
181
-
182
-
183
-
184
-
185
-
186
-
187
-
188
-
189
-
190
-
191
-
192
 |
 |
