HP DesignJet T795 Using your printer - Page 29
Introduction, Set up your Web-connected printer, Web Services manual configuration
 |
View all HP DesignJet T795 manuals
Add to My Manuals
Save this manual to your list of manuals |
Page 29 highlights
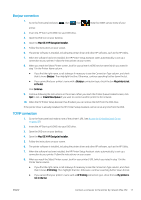
Introduction This chapter describes various printer settings that the printer administrator may wish to control as soon as a new printer is assembled and ready for use. Set up your Web-connected printer Your printer can connect to the Internet to benefit from various Web Services: ● Automatic firmware updates ● Use HP ePrint to print by email To set up your printer for Web Services, please follow these steps, explained in more detail below: 1. Make sure that your printer is correctly connected to the Internet. 2. Run the Connectivity Wizard: At the front panel, press wizard. , then , then Connectivity > Connectivity If you cannot find the Connectivity Wizard in the menu, please update your firmware and then try again. If the Wizard downloads new firmware, the printer may need to restart. TIP: When the Wizard displays your printer code and email address, you are recommended to make a note of them. 3. Optional step: If you are the printer administrator, log in at HP Connected (http://www.hpconnected.com; availability varies by product, country, and region) to customize your printer's email address or manage printer security for remote printing. Congratulations, you now have completed Web Services setup. HP ePrint is ready to use. For the latest information, support, and terms of use of HP Connected, see http://www.hpconnected.com (availability varies by product, country, and region). Web Services manual configuration The Connectivity Wizard (see Set up your Web-connected printer on page 21) is normally sufficient for Web Services configuration, but there are also facilities for manual configuration if you wish to use them. Configure the printer's Internet connection You can configure the printer's Internet connection from the Embedded Web Server or from the front panel. NOTE: If an administrator password has been set, it will be required to change these settings. Thus, the administrator can prevent the printer from being connected to the Internet, if desired. ● In the Embedded Web Server: select Setup > Internet connection. ● Using the front panel: press , then , then Connectivity > Internet connectivity. The following settings are available: ● Enable Internet connection: The default value is Yes. ● Proxy > Enable proxy: Enable or disable a proxy server. ● Proxy > Address: Enter the proxy address, empty by default. ENWW Introduction 21
-
 1
1 -
2
-
3
-
4
-
5
-
6
-
7
-
8
-
9
-
10
-
11
-
12
-
13
-
14
-
15
-
16
-
17
-
18
-
19
-
20
-
21
-
22
-
23
-
 24
24 -
 25
25 -
 26
26 -
 27
27 -
 28
28 -
 29
29 -
 30
30 -
 31
31 -
 32
32 -
 33
33 -
 34
34 -
35
-
36
-
37
-
38
-
39
-
40
-
41
-
42
-
43
-
44
-
45
-
46
-
47
-
48
-
49
-
50
-
51
-
52
-
53
-
54
-
55
-
56
-
57
-
58
-
59
-
60
-
61
-
62
-
63
-
64
-
65
-
66
-
67
-
68
-
69
-
70
-
71
-
72
-
73
-
74
-
75
-
76
-
77
-
78
-
79
-
80
-
81
-
82
-
83
-
84
-
85
-
86
-
87
-
88
-
89
-
90
-
91
-
92
-
93
-
94
-
95
-
96
-
97
-
98
-
99
-
100
-
101
-
102
-
103
-
104
-
105
-
106
-
107
-
108
-
109
-
110
-
111
-
112
-
113
-
114
-
115
-
116
-
117
-
118
-
119
-
120
-
121
-
122
-
123
-
124
-
125
-
126
-
127
-
128
-
129
-
130
-
131
-
132
-
133
-
134
-
135
-
136
-
137
-
138
-
139
-
140
-
141
-
142
-
143
-
144
-
145
-
146
-
147
-
148
-
149
-
150
-
151
-
152
-
153
-
154
-
155
-
156
-
157
-
158
-
159
-
160
-
161
-
162
-
163
-
164
-
165
-
166
-
167
-
168
-
169
-
170
-
171
-
172
-
173
-
174
-
175
-
176
-
177
-
178
-
179
-
180
-
181
-
182
-
183
-
184
-
185
-
186
-
187
-
188
-
189
-
190
-
191
-
192
 |
 |
