HP Designjet T520 HP Designjet T120 and T520 ePrinter Series - User's Guide - Page 36
Con network settings
 |
View all HP Designjet T520 manuals
Add to My Manuals
Save this manual to your list of manuals |
Page 36 highlights
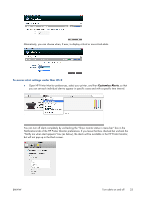
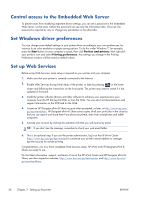
Configure network settings You can view and configure the network settings from the Embedded Web Server, the HP Utility or the front panel. ● From the Embedded Web Server: Select the Setup tab, then Networking. ● From the HP Utility: You can access the Embedded Web Server through the HP Utility. ● From the front panel: press , then Connectivity. The following options are available: ● Enable/Disable wireless turns the wireless connection on or off. ● Wireless setup wizard provides an easy way to connect to a wireless network. ● Wi-Fi protected setup allows you to set up a connection with a wireless network using WPS (pushbutton or pin) encryption. ● Network summary displays information about the wired or wireless network ● Print wireless network test runs diagnostic tests of wireless connectivity ● Print network configuration ● Advanced setup ◦ Select I/O timeout sets the time that the printer will wait for the driver to send a job to the printer once the connection has been opened. Values range from half a minute to half an hour. ◦ Link speed sets the speed at which data are transmitted over the network. The default is Automatic. ◦ IP settings allows you to view or change the IP address, subnet mask, default gateway, and DNS address. ◦ Hostname allows you to change the hostname. ● Restore network defaults Configure firewall settings Firewall features provide network-layer security on both IPv4 and IPv6 networks. The firewall provides simple control of IP addresses that are allowed access. NOTE: In addition to firewall protection at the network layer, the printer also supports open secure sockets layer (SSL) standards at the transport layer for secure client-server applications, such as clientserver authentication or HTTPS Web browsing. For firewall operation on the printer, you must configure a firewall policy to apply to specified IP traffic. Firewall policy pages are accessed through the Embedded Web Server and displayed by your Web browser. After a policy is configured, it is not activated until you click Apply in the Embedded Web Server. 28 Chapter 4 Personalizing the printer ENWW
-
 1
1 -
2
-
3
-
4
-
5
-
6
-
7
-
8
-
9
-
10
-
11
-
12
-
13
-
14
-
15
-
16
-
17
-
18
-
19
-
20
-
21
-
22
-
23
-
24
-
25
-
26
-
27
-
28
-
29
-
30
-
 31
31 -
 32
32 -
 33
33 -
 34
34 -
 35
35 -
 36
36 -
 37
37 -
 38
38 -
 39
39 -
 40
40 -
 41
41 -
42
-
43
-
44
-
45
-
46
-
47
-
48
-
49
-
50
-
51
-
52
-
53
-
54
-
55
-
56
-
57
-
58
-
59
-
60
-
61
-
62
-
63
-
64
-
65
-
66
-
67
-
68
-
69
-
70
-
71
-
72
-
73
-
74
-
75
-
76
-
77
-
78
-
79
-
80
-
81
-
82
-
83
-
84
-
85
-
86
-
87
-
88
-
89
-
90
-
91
-
92
-
93
-
94
-
95
-
96
-
97
-
98
-
99
-
100
-
101
-
102
-
103
-
104
-
105
-
106
-
107
-
108
-
109
-
110
-
111
-
112
-
113
-
114
-
115
-
116
-
117
-
118
-
119
-
120
-
121
-
122
-
123
-
124
-
125
-
126
-
127
-
128
-
129
-
130
-
131
-
132
-
133
-
134
-
135
-
136
-
137
-
138
-
139
-
140
-
141
-
142
-
143
-
144
-
145
-
146
-
147
-
148
-
149
-
150
-
151
-
152
-
153
-
154
-
155
-
156
 |
 |