HP Designjet T520 HP Designjet T120 and T520 ePrinter Series - User's Guide - Page 94
Clean the encoder strip - ink cartridge
 |
View all HP Designjet T520 manuals
Add to My Manuals
Save this manual to your list of manuals |
Page 94 highlights
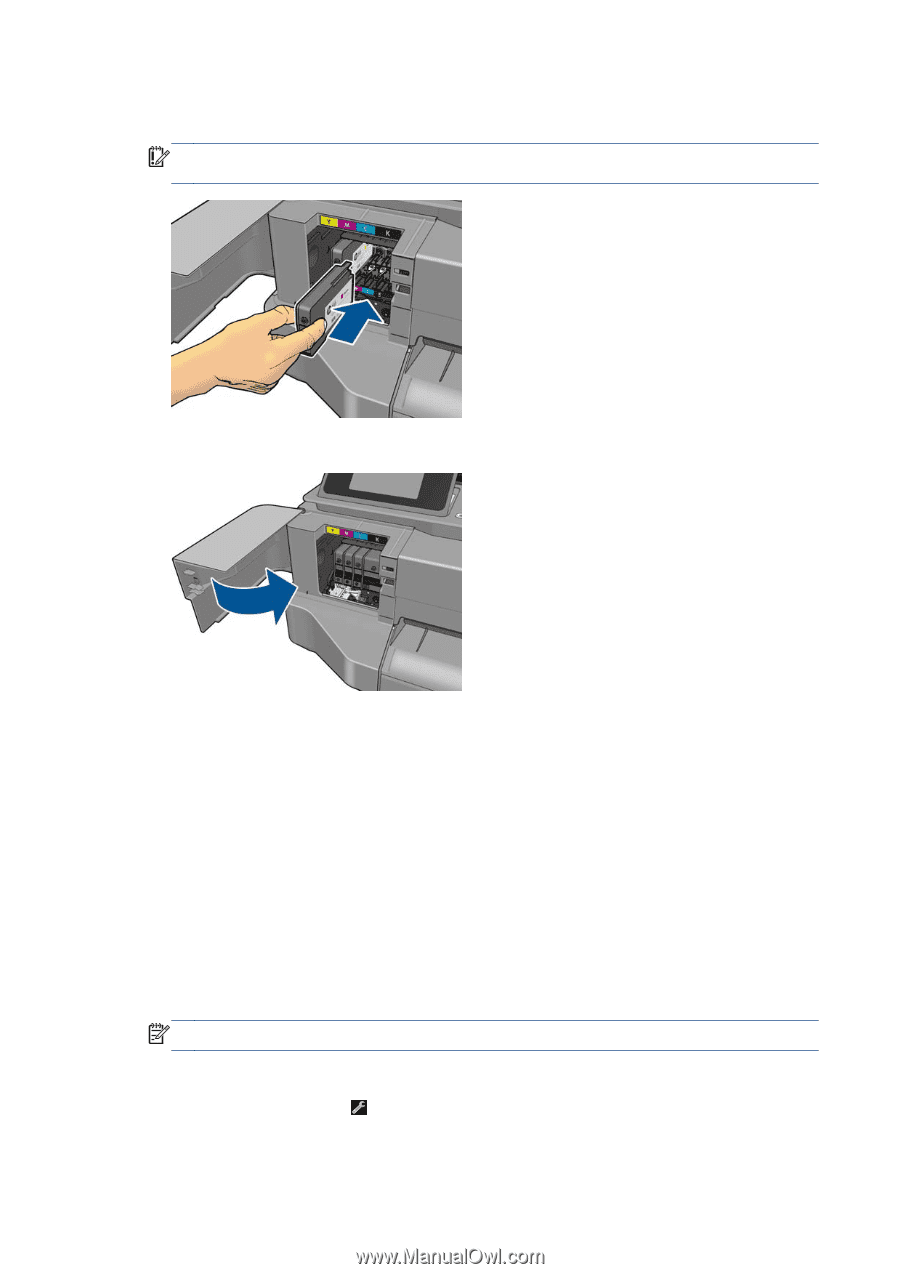
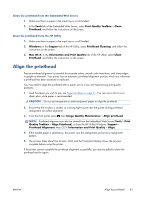
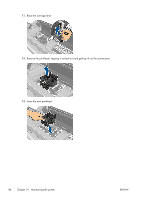
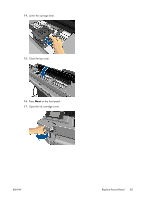
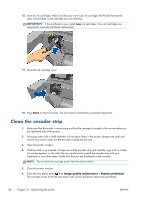
18. Insert the ink cartridges. Make sure that you insert each ink cartridge into the slot that has the same colored letter as the cartridge you are installing. IMPORTANT: If the printhead is new, install new ink cartridges. New ink cartridges are required for successful printhead replacement. 19. Close the ink cartridge cover. 20. Press Done on the front panel. The front panel recommends a printhead alignment. Clean the encoder strip 1. Make sure that the printer is not printing and that the carriage is located in the service station on the right-hand side of the printer. 2. Using tap water and a small cloth that will not leave fibers in the printer, dampen the cloth and remove any excess water, so that the cloth is damp but not wet. 3. Open the printer window. 4. Hold the cloth in an inverted U shape around the encoder strip and carefully wipe until no further ink residue appears on the cloth. Be very careful not to scratch the encoder strip with your fingernails or any other object. Make sure that you are holding the cloth correctly. NOTE: Do not move the carriage away from the service station. 5. Close the printer window. 6. From the front panel, press , then Image quality maintenance > Replace printhead. The carriage moves to the left and stops in the correct position to remove the printhead. 86 Chapter 10 Maintaining the printer ENWW
-
 1
1 -
2
-
3
-
4
-
5
-
6
-
7
-
8
-
9
-
10
-
11
-
12
-
13
-
14
-
15
-
16
-
17
-
18
-
19
-
20
-
21
-
22
-
23
-
24
-
25
-
26
-
27
-
28
-
29
-
30
-
31
-
32
-
33
-
34
-
35
-
36
-
37
-
38
-
39
-
40
-
41
-
42
-
43
-
44
-
45
-
46
-
47
-
48
-
49
-
50
-
51
-
52
-
53
-
54
-
55
-
56
-
57
-
58
-
59
-
60
-
61
-
62
-
63
-
64
-
65
-
66
-
67
-
68
-
69
-
70
-
71
-
72
-
73
-
74
-
75
-
76
-
77
-
78
-
79
-
80
-
81
-
82
-
83
-
84
-
85
-
86
-
87
-
88
-
 89
89 -
 90
90 -
 91
91 -
 92
92 -
 93
93 -
 94
94 -
 95
95 -
 96
96 -
 97
97 -
 98
98 -
 99
99 -
100
-
101
-
102
-
103
-
104
-
105
-
106
-
107
-
108
-
109
-
110
-
111
-
112
-
113
-
114
-
115
-
116
-
117
-
118
-
119
-
120
-
121
-
122
-
123
-
124
-
125
-
126
-
127
-
128
-
129
-
130
-
131
-
132
-
133
-
134
-
135
-
136
-
137
-
138
-
139
-
140
-
141
-
142
-
143
-
144
-
145
-
146
-
147
-
148
-
149
-
150
-
151
-
152
-
153
-
154
-
155
-
156
 |
 |