HP EliteBook 2760p Getting Started HP Notebook - Windows 7 - Page 60
Performing a recovery, Using the Windows recovery tools
 |
View all HP EliteBook 2760p manuals
Add to My Manuals
Save this manual to your list of manuals |
Page 60 highlights
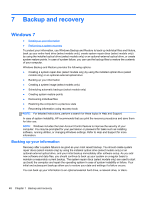
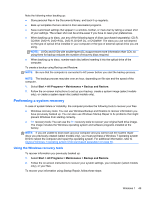
You can back up your information to an optional external hard drive, a network drive, or discs. Note the following when backing up: ● Store personal files in the Documents folder, and back it up regularly. ● Back up templates that are stored in their associated programs. ● Save customized settings that appear in a window, toolbar, or menu bar by taking a screen shot of your settings. The screen shot can be a time-saver if you have to reset your preferences. ● When backing up to discs, use any of the following types of discs (purchased separately): CD-R, CD-RW, DVD+R, DVD+R DL, DVD-R, DVD-R DL, or DVD±RW. The discs you use will depend on the type of optical drive installed in your computer. NOTE: DVDs and DVDs with double-layer (DL) support store more information than CDs, so using them for backup reduces the number of recovery discs required. ● When backing up to discs, number each disc before inserting it into the optical drive of the computer. To create a backup using Backup and Restore Center: NOTE: Be sure that the computer is connected to AC power before you start the backup process. NOTE: The backup process may take over an hour, depending on file size and the speed of the computer. 1. Select Start > All Programs > Maintenance > Backup and Restore Center. 2. Follow the on-screen instructions to back up your entire computer (select models only) or your files. Performing a recovery In case of system failure or instability, the computer provides the following tools to recover your files: ● Windows recovery tools: You can use the Backup and Restore Center to recover information you have previously backed up. You can also use Windows Startup Repair to fix problems that might prevent Windows from starting correctly. ● f11 recovery tools: You can use the f11 recovery tools to recover your original hard drive image. The image includes the Windows operating system and software programs installed at the factory. NOTE: If you are unable to boot (start up) your computer, you must purchase a Windows Vista® operating system DVD to reboot the computer and repair the operating system. For additional information, refer to Using a Windows Vista operating system DVD (purchased separately) on page 53. Using the Windows recovery tools To recover information you previously backed up: 1. Select Start > All Programs > Maintenance > Backup and Restore Center. 2. Follow the on-screen instructions to recover your entire computer (select models only) or your files. To recover your information using Startup Repair, follow these steps: 52 Chapter 7 Backup and recovery
-
 1
1 -
2
-
3
-
4
-
5
-
6
-
7
-
8
-
9
-
10
-
11
-
12
-
13
-
14
-
15
-
16
-
17
-
18
-
19
-
20
-
21
-
22
-
23
-
24
-
25
-
26
-
27
-
28
-
29
-
30
-
31
-
32
-
33
-
34
-
35
-
36
-
37
-
38
-
39
-
40
-
41
-
42
-
43
-
44
-
45
-
46
-
47
-
48
-
49
-
50
-
51
-
52
-
53
-
54
-
 55
55 -
 56
56 -
 57
57 -
 58
58 -
 59
59 -
 60
60 -
 61
61 -
 62
62 -
 63
63 -
 64
64 -
 65
65 -
66
-
67
-
68
 |
 |
