HP EliteDesk 800 G8 Maintenance and Service Guide - Page 55
System board
 |
View all HP EliteDesk 800 G8 manuals
Add to My Manuals
Save this manual to your list of manuals |
Page 55 highlights
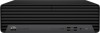
4. Press the release lever at the front of the power supply (7), slide the power supply toward the front of the computer, and then lift the power supply out of the chassis (8). To install the power supply, reverse the removal procedures. System board To remove the system board, use these procedures. NOTE: All system board spare part kits include replacement thermal material. Before removing the system board, follow these steps: 1. Prepare the computer for disassembly (see Preparation for disassembly on page 21). 2. Remove the access panel (see Access panel on page 21). 3. Remove the air duct (see Air duct on page 38. 4. Rotate the drive cage to the upright position (see Drive cage on page 23). 5. When replacing the system board, be sure that the following components are removed from the defective system board and installed on the replacement system board: - Memory modules (see Memory modules (DIMMs) on page 24) - Heat sink (see Heat sink on page 42) - Solid-state drive (see Solid-state drive on page 32) - WLAN module (see WLAN module on page 36) - Option board (see Option board on page 41) - Expansion cards (see Expansion card on page 33) - Processor (see Processor on page 43) Remove the system board: 1. Disconnect all cables from the system board, and make note of their locations for installation. System board 47
-
 1
1 -
2
-
3
-
4
-
5
-
6
-
7
-
8
-
9
-
10
-
11
-
12
-
13
-
14
-
15
-
16
-
17
-
18
-
19
-
20
-
21
-
22
-
23
-
24
-
25
-
26
-
27
-
28
-
29
-
30
-
31
-
32
-
33
-
34
-
35
-
36
-
37
-
38
-
39
-
40
-
41
-
42
-
43
-
44
-
45
-
46
-
47
-
48
-
49
-
 50
50 -
 51
51 -
 52
52 -
 53
53 -
 54
54 -
 55
55 -
 56
56 -
 57
57 -
 58
58 -
 59
59 -
 60
60 -
61
-
62
-
63
-
64
-
65
-
66
-
67
-
68
-
69
-
70
-
71
-
72
-
73
-
74
-
75
-
76
-
77
-
78
-
79
-
80
-
81
-
82
-
83
-
84
-
85
-
86
-
87
-
88
-
89
-
90
-
91
-
92
-
93
-
94
-
95
-
96
-
97
-
98
-
99
-
100
-
101
-
102
-
103
-
104
-
105
-
106
-
107
-
108
-
109
-
110
-
111
-
112
-
113
-
114
-
115
-
116
-
117
-
118
-
119
-
120
-
121
-
122
-
123
-
124
-
125
 |
 |
