HP LD4200tm HP LD4200tm LCD Monitor User Guide - Page 21
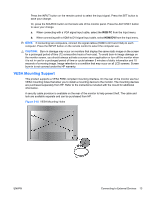
VESA Mounting Support, RGB PC, HDMI/DVI
 |
View all HP LD4200tm manuals
Add to My Manuals
Save this manual to your list of manuals |
Page 21 highlights
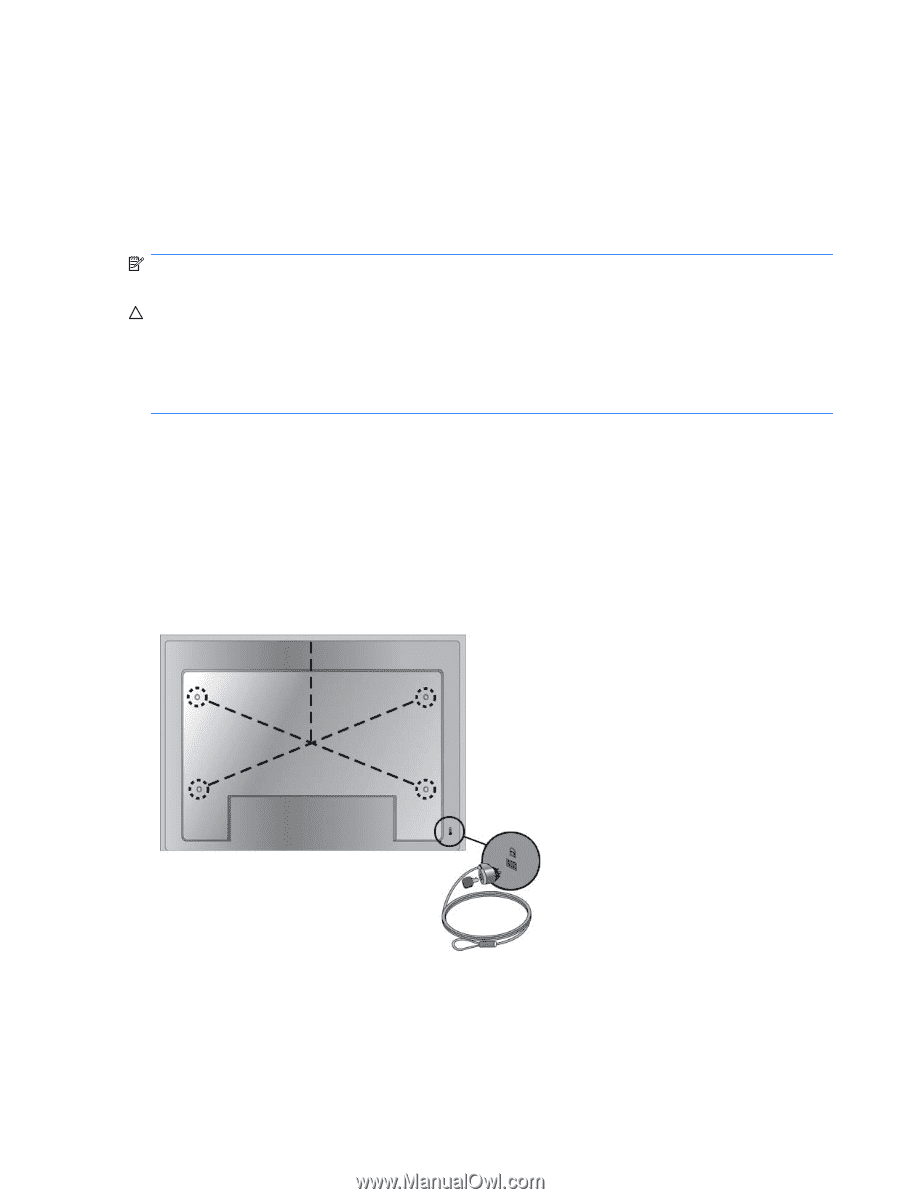
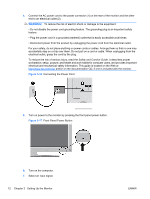
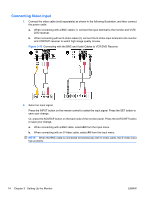
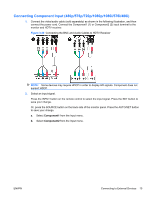
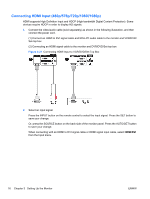
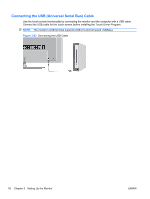
Press the INPUT button on the remote control to select the input signal. Press the SET button to save your change. Or, press the SOURCE button on the back side of the monitor panel. Press the AUTO/SET button to save your change. a. When connecting with a VGA signal input cable, select the RGB PC from the Input menu. b. When connecting with a HDMI to DVI signal input cable, select HDMI/DVI from the Input menu. NOTE: If connecting two computers, connect the signal cables (HDMI to DVI and VGA) to each computer. Press the INPUT button on the remote control to select the computer use. CAUTION: Burn-in damage may occur on monitors that display the same static image on the screen for a prolonged period of time (12 consecutive hours of non-use). To avoid burn-in image damage on the monitor screen, you should always activate a screen saver application or turn off the monitor when it is not in use for a prolonged period of time or cycle between 5 minutes of static information and 10 seconds of a moving image. Image retention is a condition that may occur on all LCD screens. Screen burn-in is not covered under the HP warranty. VESA Mounting Support This product supports a VESA FDMI compliant mounting interface. On the rear of the monitor are four VESA mounting holes that allow you to install a mounting device to the monitor. The mounting devices are purchased separately from HP. Refer to the instructions included with the mount for additional information. A security cable provision is available on the rear of the monitor to help prevent theft. The cable and lock are available separate and can be purchased from HP. Figure 3-18 VESA Mounting Holes ENWW Connecting to External Devices 13
-
 1
1 -
2
-
3
-
4
-
5
-
6
-
7
-
8
-
9
-
10
-
11
-
12
-
13
-
14
-
15
-
 16
16 -
 17
17 -
 18
18 -
 19
19 -
 20
20 -
 21
21 -
 22
22 -
 23
23 -
 24
24 -
 25
25 -
 26
26 -
27
-
28
-
29
-
30
-
31
-
32
-
33
-
34
-
35
-
36
-
37
-
38
-
39
-
40
-
41
-
42
-
43
-
44
-
45
-
46
-
47
-
48
-
49
-
50
-
51
-
52
-
53
-
54
-
55
-
56
-
57
-
58
-
59
-
60
-
61
-
62
-
63
-
64
-
65
-
66
-
67
-
68
-
69
-
70
-
71
-
72
-
73
-
74
-
75
-
76
-
77
-
78
-
79
-
80
-
81
-
82
-
83
-
84
 |
 |