HP LD4200tm HP LD4200tm LCD Monitor User Guide - Page 47
Multitouch View Second Touch active, Fine Coordinate Correction, Reset, Screen Shift Correction
 |
View all HP LD4200tm manuals
Add to My Manuals
Save this manual to your list of manuals |
Page 47 highlights
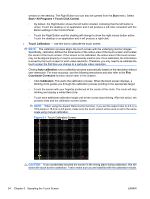
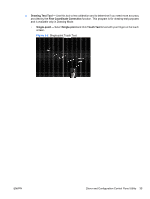
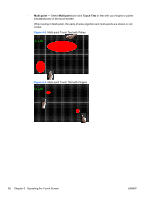
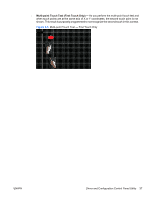
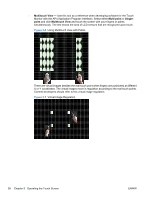
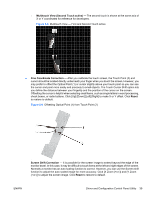
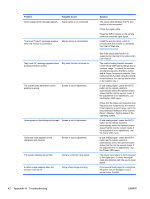
◦ Multitouch View (Second Touch active) - The second touch is shown at the same axis of X or Y coordinates for reference for developers. Figure 5-8 Multitouch View - First and Second Touch active ● Fine Coordinate Correction - After you calibrate the touch screen, the Touch Point (2) and cursor should be located directly underneath your finger when you touch the screen. However, you may prefer to offset the Optical Point (1) or cursor slightly above your touch point so you can see the cursor and point more easily and precisely to small objects. The Touch Cursor Shift option lets you define the distance between your fingertip and the position of the cursor on the screen. Offsetting the cursor is helpful when selecting small items, such as single letters in word processing, check boxes, or radio buttons. Click [Up] [Down] [Left] [Right] to make X or Y offset. Click Reset to restore to default. Figure 5-9 Offsetting Optical Point (1) from Touch Point (2) Screen Shift Correction - It is possible for the screen image to extend beyond the edge of the monitor bezel. In this case, it may be difficult to touch items at the left and right edges of the screen. Normally a monitor has an auto scaling function to correct. However, you can use the Screen shift function to adjust the auto scaled image for more accuracy. Click [X Zoom (+or-)] and [Y Zoom (+or-)] to adjust the screen image. Click Reset to restore to default. ENWW Driver and Configuration Control Panel Utility 39
-
 1
1 -
2
-
3
-
4
-
5
-
6
-
7
-
8
-
9
-
10
-
11
-
12
-
13
-
14
-
15
-
16
-
17
-
18
-
19
-
20
-
21
-
22
-
23
-
24
-
25
-
26
-
27
-
28
-
29
-
30
-
31
-
32
-
33
-
34
-
35
-
36
-
37
-
38
-
39
-
40
-
41
-
 42
42 -
 43
43 -
 44
44 -
 45
45 -
 46
46 -
 47
47 -
 48
48 -
 49
49 -
 50
50 -
 51
51 -
 52
52 -
53
-
54
-
55
-
56
-
57
-
58
-
59
-
60
-
61
-
62
-
63
-
64
-
65
-
66
-
67
-
68
-
69
-
70
-
71
-
72
-
73
-
74
-
75
-
76
-
77
-
78
-
79
-
80
-
81
-
82
-
83
-
84
 |
 |
