HP N7710 HP Scanjet N7710 Scanner Setup and Support Guide - Page 11
Clean - drivers
 |
UPC - 882780998599
View all HP N7710 manuals
Add to My Manuals
Save this manual to your list of manuals |
Page 11 highlights
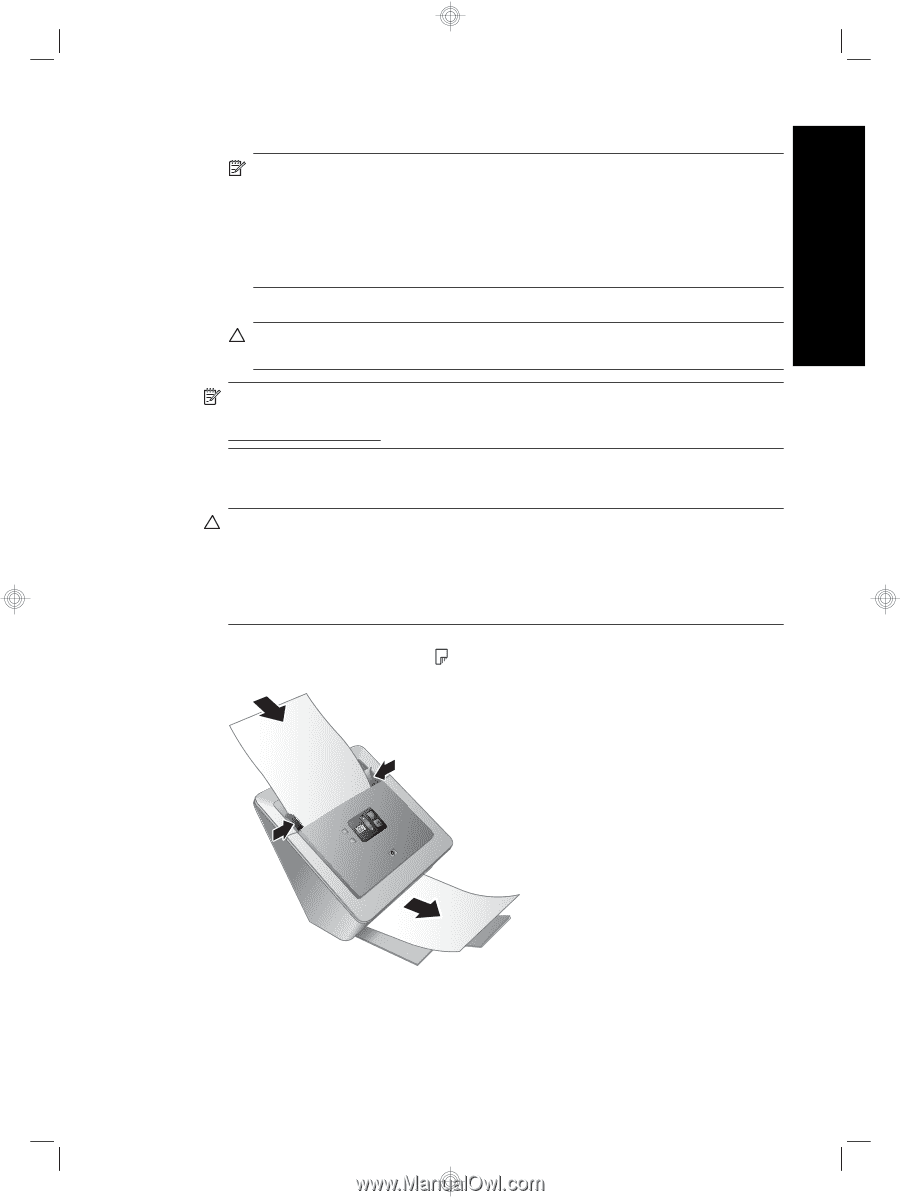
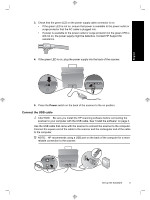
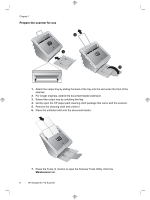
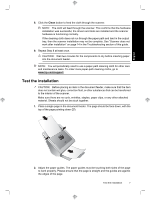
English 8. Click the Clean button to feed the cloth through the scanner. NOTE: The cloth will feed through the scanner. This confirms that the hardware installation was successful, the drivers and tools are installed and the scanner hardware is functioning normally. If the cleaning cloth does not run through the paper path and land in the output tray, then the scanner installation may not be complete. See "Scanner does not work after installation" on page 14 in the Troubleshooting section of this guide. 9. Repeat Step 8 at least once. CAUTION: Wait two minutes for the components to dry before inserting paper into the document feeder. NOTE: You will periodically need to use a paper-path cleaning cloth for other care and maintenance tasks. To order more paper-path cleaning cloths, go to www.hp.com/support. Test the installation CAUTION: Before placing an item in the document feeder, make sure that the item does not contain wet glue, correction fluid, or other substances that can be transferred to the interior of the scanner. Make sure there are no curls, wrinkles, staples, paper clips, or any other attached material. Sheets should not be stuck together. 1. Place a single page in the document feeder. The page should be face down, with the top of the page pointing down ( ). 2. Adjust the paper guides. The paper guides must be touching both sides of the page to work properly. Please ensure that the page is straight and the guides are against the edges of the page. Test the installation 7
-
 1
1 -
2
-
3
-
4
-
5
-
 6
6 -
 7
7 -
 8
8 -
 9
9 -
 10
10 -
 11
11 -
 12
12 -
 13
13 -
 14
14 -
 15
15 -
 16
16 -
17
-
18
-
19
-
20
-
21
-
22
-
23
-
24
-
25
-
26
-
27
-
28
-
29
-
30
-
31
-
32
-
33
-
34
-
35
-
36
-
37
-
38
-
39
-
40
-
41
-
42
-
43
-
44
-
45
-
46
-
47
-
48
 |
 |