HP N7710 HP Scanjet N7710 Scanner Setup and Support Guide - Page 12
Customizable profile labels - scanjet document sheet feed scanner
 |
UPC - 882780998599
View all HP N7710 manuals
Add to My Manuals
Save this manual to your list of manuals |
Page 12 highlights
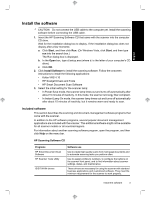
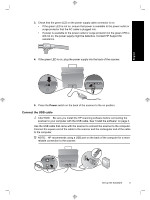
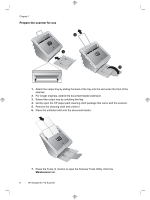
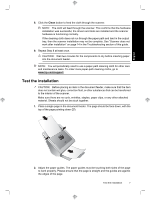
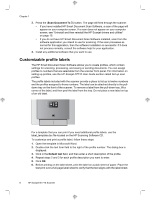
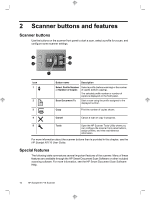
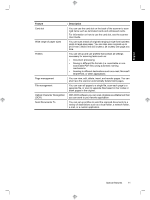
Chapter 1 3. Press the (Scan Document To ) button. The page will feed through the scanner. • If you have installed HP Smart Document Scan Software, a scan of the page will appear on your computer screen. If a scan does not appear on your computer screen, see "Uninstall and then reinstall the HP Scanjet drivers and utilities" on page 15. • If you do not have HP Smart Document Scan Software installed, scan from the software application you intend to use for scanning. If the scan processes as normal for this application, then the software installation is successful. If it does not process normally, consult the software help for your application. 4. Install any additional software that you want to use. Customizable profile labels The HP Smart Document Scan Software allows you to create profiles, which contain settings for scanning, processing, and saving or sending documents. You can assign profiles to numbers that are selectable from the scanner front panel. For information on setting up profiles, see the HP Scanjet N7710 User Guide section called Set up scan profiles. The profile labels included with the scanner provide a place to list up to twelve numbers and the profiles assigned to those numbers. The label can be attached directly to the pulldown tray on the front of the scanner. To remove a label from the pull-down tray, lift a corner of the label, and then peel the label from the tray. Do not place a new label on top of an old label. For a template that you can print if you need additional profile labels, use the label_template.doc file located on the HP Scanning Software CD. To customize and print a profile label, follow these steps: 1. Open the template in Microsoft Word. 2. Double-click the text form field to the right of the profile number. The dialog box is displayed. 3. Click in the Default text field, and then enter a short description of the profile. 4. Repeat steps 2 and 3 for each profile description you want to enter. 5. Click OK. 6. Before printing on the label sheet, print the label on a plain sheet of paper. Place the test print over a full-page label sheet to verify that the text aligns with the label sheet. 8 HP Scanjet N7710 Scanner
-
 1
1 -
2
-
3
-
4
-
5
-
6
-
 7
7 -
 8
8 -
 9
9 -
 10
10 -
 11
11 -
 12
12 -
 13
13 -
 14
14 -
 15
15 -
 16
16 -
 17
17 -
18
-
19
-
20
-
21
-
22
-
23
-
24
-
25
-
26
-
27
-
28
-
29
-
30
-
31
-
32
-
33
-
34
-
35
-
36
-
37
-
38
-
39
-
40
-
41
-
42
-
43
-
44
-
45
-
46
-
47
-
48
 |
 |
