HP OMEN 15.6 Maintenance and Service Guide - Page 62
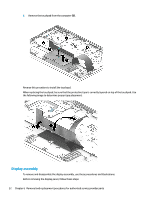
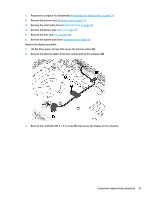
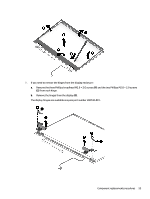
Display assembly, Before removing the display panel, follow these steps
 |
View all HP OMEN 15.6 manuals
Add to My Manuals
Save this manual to your list of manuals |
Page 62 highlights
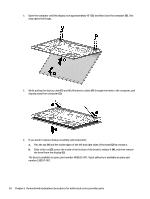
6. Remove the touchpad from the computer (5). Reverse this procedure to install the touchpad. When replacing the touchpad, be sure that the protective tape is correctly layered on top of the touchpad. Use the following image to determine proper tape placement. Display assembly To remove and disassemble the display assembly, use these procedures and illustrations. Before removing the display panel, follow these steps: 52 Chapter 6 Removal and replacement procedures for authorized service provider parts
-
 1
1 -
2
-
3
-
4
-
5
-
6
-
7
-
8
-
9
-
10
-
11
-
12
-
13
-
14
-
15
-
16
-
17
-
18
-
19
-
20
-
21
-
22
-
23
-
24
-
25
-
26
-
27
-
28
-
29
-
30
-
31
-
32
-
33
-
34
-
35
-
36
-
37
-
38
-
39
-
40
-
41
-
42
-
43
-
44
-
45
-
46
-
47
-
48
-
49
-
50
-
51
-
52
-
53
-
54
-
55
-
56
-
 57
57 -
 58
58 -
 59
59 -
 60
60 -
 61
61 -
 62
62 -
 63
63 -
 64
64 -
 65
65 -
 66
66 -
 67
67 -
68
-
69
-
70
-
71
-
72
-
73
-
74
-
75
-
76
-
77
-
78
-
79
-
80
-
81
-
82
-
83
-
84
-
85
-
86
-
87
-
88
-
89
-
90
-
91
-
92
-
93
-
94
-
95
-
96
-
97
-
98
 |
 |
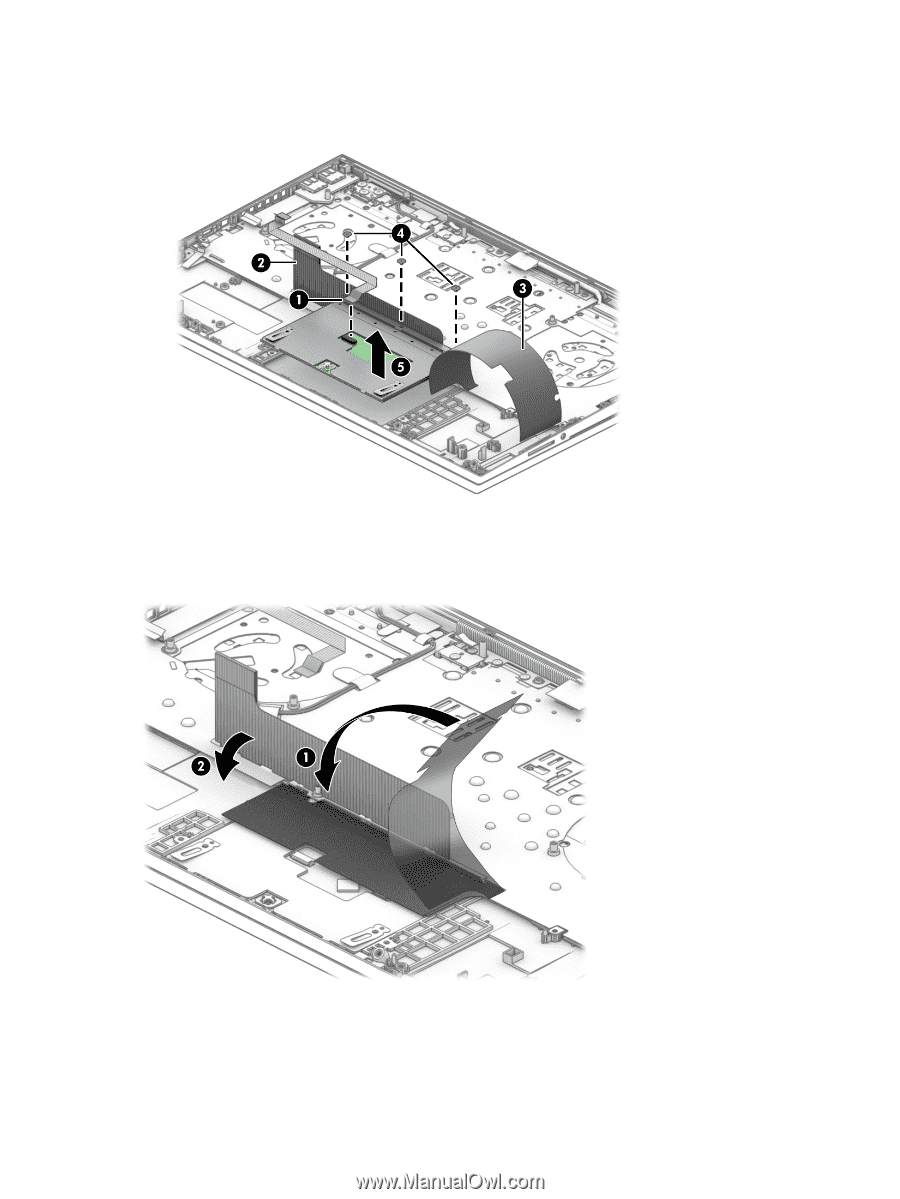
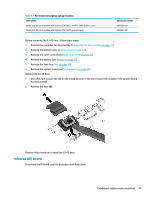
6.
Remove the touchpad from the computer
(5)
.
Reverse this procedure to install the touchpad.
When replacing the touchpad, be sure that the protective tape is correctly layered on top of the touchpad. Use
the following image to determine proper tape placement.
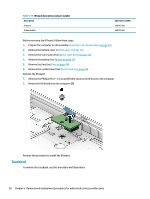
Display assembly
To remove and disassemble the display assembly, use these procedures and illustrations.
Before removing the display panel, follow these steps:
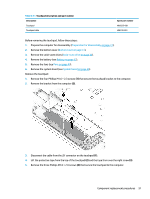
52
Chapter 6
Removal and replacement procedures for authorized service provider parts