HP PSC 2350 User Guide - Page 50
Use the slide show feature, View or print photos in a slide show
 |
View all HP PSC 2350 manuals
Add to My Manuals
Save this manual to your list of manuals |
Page 50 highlights
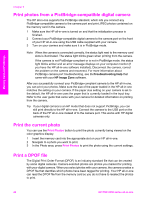
Memory Card and PictBridge Note Not all digital cameras allow you to tag your photos for printing. See your digital camera documentation to see if it supports DPOF. Your HP all-in-one supports DPOF file format 1.1. When you print camera-selected photos, the HP all-in-one print settings do not apply; the settings in the DPOF file for photo layout and number of copies override those of your HP all-in-one. The DPOF file is stored by the digital camera on a memory card and specifies the following information: ● Which photos to print ● The quantity of each photo to print ● Rotation applied to a photo ● Cropping applied to a photo ● Index printing (thumbnails of selected photos) To print camera-selected photos 1 Insert the memory card into the appropriate slot on your HP all-in-one. If there are DPOF-tagged photos, the Print DPOF Photos prompt appears on the color graphics display. 2 Do one of the following: - Press 1 to print all DPOF-tagged photos on the memory card. - Press 2 to bypass DPOF printing. Use the slide show feature You can use the Slide Show option on the Photo Menu to view all the photos on a memory card as a slide show. View or print photos in a slide show You can view or print photos displayed in a slide show using the Slide Show feature of the HP all-in-one. To view a slide show 1 Insert the memory card into the appropriate slot on your HP all-in-one. The status light next to the memory card slots lights up. 2 In the Photo area, press Photo Menu to display the Photo Menu. 3 Press 3 to start the slide show. 4 Press Cancel to end the slide show. To print the currently displayed photo in a slide show 1 When the photo you want to print appears on the color graphics display, press Cancel to cancel the slide show. 2 In the Photo area, press Print Photos to print the photo using the current settings. User Guide 47
-
 1
1 -
2
-
3
-
4
-
5
-
6
-
7
-
8
-
9
-
10
-
11
-
12
-
13
-
14
-
15
-
16
-
17
-
18
-
19
-
20
-
21
-
22
-
23
-
24
-
25
-
26
-
27
-
28
-
29
-
30
-
31
-
32
-
33
-
34
-
35
-
36
-
37
-
38
-
39
-
40
-
41
-
42
-
43
-
44
-
 45
45 -
 46
46 -
 47
47 -
 48
48 -
 49
49 -
 50
50 -
 51
51 -
 52
52 -
 53
53 -
 54
54 -
 55
55 -
56
-
57
-
58
-
59
-
60
-
61
-
62
-
63
-
64
-
65
-
66
-
67
-
68
-
69
-
70
-
71
-
72
-
73
-
74
-
75
-
76
-
77
-
78
-
79
-
80
-
81
-
82
-
83
-
84
-
85
-
86
-
87
-
88
-
89
-
90
-
91
-
92
-
93
-
94
-
95
-
96
-
97
-
98
-
99
-
100
-
101
-
102
-
103
-
104
-
105
-
106
-
107
-
108
-
109
-
110
-
111
-
112
-
113
-
114
-
115
-
116
-
117
-
118
-
119
-
120
-
121
-
122
-
123
-
124
-
125
-
126
-
127
-
128
-
129
-
130
-
131
-
132
-
133
-
134
-
135
-
136
 |
 |