HP Pavilion a1300 Getting Started Guide - Page 47
Configuring Audio Output with Realtek HD Sound Effect Manager
 |
View all HP Pavilion a1300 manuals
Add to My Manuals
Save this manual to your list of manuals |
Page 47 highlights
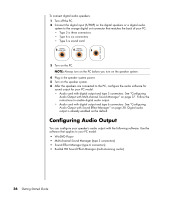
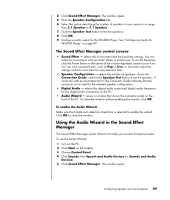
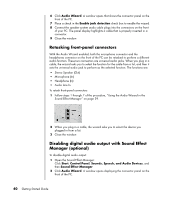
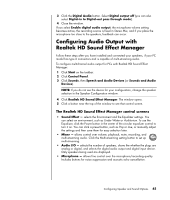
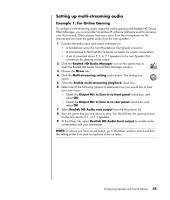
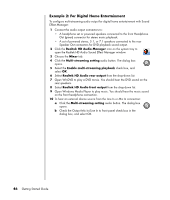
3 Click the Digital Audio button. Select Digital output off (you can also select Digital-in to Digital-out pass through mode). 4 Close the window. If you select Enable digital audio output, the microphone volume setting becomes active, the recording source is fixed in Stereo Mix, and if you place the microphone too close to the speakers, feedback can occur. Configuring Audio Output with Realtek HD Sound Effect Manager Follow these steps after you have installed and connected your speakers, if your PC model has type 6 connectors and is capable of multi-streaming audio. To configure multichannel audio output for PCs with Realtek HD Sound Effect Manager: 1 Click Start on the taskbar. 2 Click Control Panel. 3 Click Sounds, then Speech and Audio Devices (or Sounds and Audio Devices). NOTE: If you do not see the device for your configuration, change the speaker selection in the Speaker Configuration window. 4 Click Realtek HD Sound Effect Manager. The window opens. 5 Click a button near the top of the window to see that control screen. The Realtek HD Sound Effect Manager control screens • Sound Effect - selects the Environment and the Equalizer settings. You can select an environment, such as Under Water or Auditorium. To use the Equalizer, click the Power button in the center of the circular equalizer control to turn it on. You can click a preset button, such as Pop or Live, or manually adjust the settings and then save them for easy selection later. • Mixer - allows control over volume, playback, mute, recording, and multi-streaming audio. Click the Multi-streaming setting button to set up multi-streaming. • Audio I/O - selects the number of speakers, shows the whether the plugs are analog or digital, and selects the digital audio output and digital input device. Only speakers being used are displayed. • Microphone - allows fine control over the microphone/recording quality. Includes buttons for noise suppression and acoustic echo cancellation. Configuring Speaker and Sound Options 41
-
 1
1 -
2
-
3
-
4
-
5
-
6
-
7
-
8
-
9
-
10
-
11
-
12
-
13
-
14
-
15
-
16
-
17
-
18
-
19
-
20
-
21
-
22
-
23
-
24
-
25
-
26
-
27
-
28
-
29
-
30
-
31
-
32
-
33
-
34
-
35
-
36
-
37
-
38
-
39
-
40
-
41
-
 42
42 -
 43
43 -
 44
44 -
 45
45 -
 46
46 -
 47
47 -
 48
48 -
 49
49 -
 50
50 -
 51
51 -
 52
52 -
53
-
54
-
55
-
56
-
57
-
58
-
59
-
60
-
61
-
62
-
63
-
64
-
65
-
66
-
67
-
68
-
69
-
70
-
71
-
72
-
73
-
74
-
75
-
76
-
77
-
78
-
79
-
80
-
81
-
82
-
83
-
84
-
85
-
86
-
87
-
88
-
89
-
90
-
91
-
92
-
93
-
94
-
95
-
96
-
97
-
98
-
99
-
100
-
101
-
102
-
103
-
104
-
105
-
106
-
107
-
108
-
109
-
110
-
111
-
112
-
113
-
114
-
115
-
116
 |
 |