HP ProBook 4446s HP ProBook 4445s Notebook PC HP ProBook 4446s Notebook PC - M - Page 73
that secure the heat sink to the system board., and then pull it out of the computer
 |
View all HP ProBook 4446s manuals
Add to My Manuals
Save this manual to your list of manuals |
Page 73 highlights
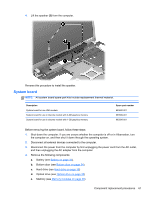
3. Lift the heat sink up (2), and then pull it off the system board (3). Remove the UMA heat sink. 1. To remove the UMA heat sink, in the order indicated on the heat sink, loosen the four captive Phillips screws (1) that secure the heat sink to the system board. 2. Lift the heat sink up (2), and then pull it out of the computer (3). Remove the UMA heat sink. Component replacement procedures 65
-
 1
1 -
2
-
3
-
4
-
5
-
6
-
7
-
8
-
9
-
10
-
11
-
12
-
13
-
14
-
15
-
16
-
17
-
18
-
19
-
20
-
21
-
22
-
23
-
24
-
25
-
26
-
27
-
28
-
29
-
30
-
31
-
32
-
33
-
34
-
35
-
36
-
37
-
38
-
39
-
40
-
41
-
42
-
43
-
44
-
45
-
46
-
47
-
48
-
49
-
50
-
51
-
52
-
53
-
54
-
55
-
56
-
57
-
58
-
59
-
60
-
61
-
62
-
63
-
64
-
65
-
66
-
67
-
 68
68 -
 69
69 -
 70
70 -
 71
71 -
 72
72 -
 73
73 -
 74
74 -
 75
75 -
 76
76 -
 77
77 -
 78
78 -
79
-
80
-
81
-
82
-
83
-
84
-
85
-
86
-
87
-
88
-
89
-
90
-
91
-
92
-
93
-
94
-
95
-
96
-
97
-
98
-
99
-
100
-
101
-
102
-
103
-
104
-
105
-
106
-
107
-
108
-
109
-
110
-
111
-
112
-
113
-
114
 |
 |
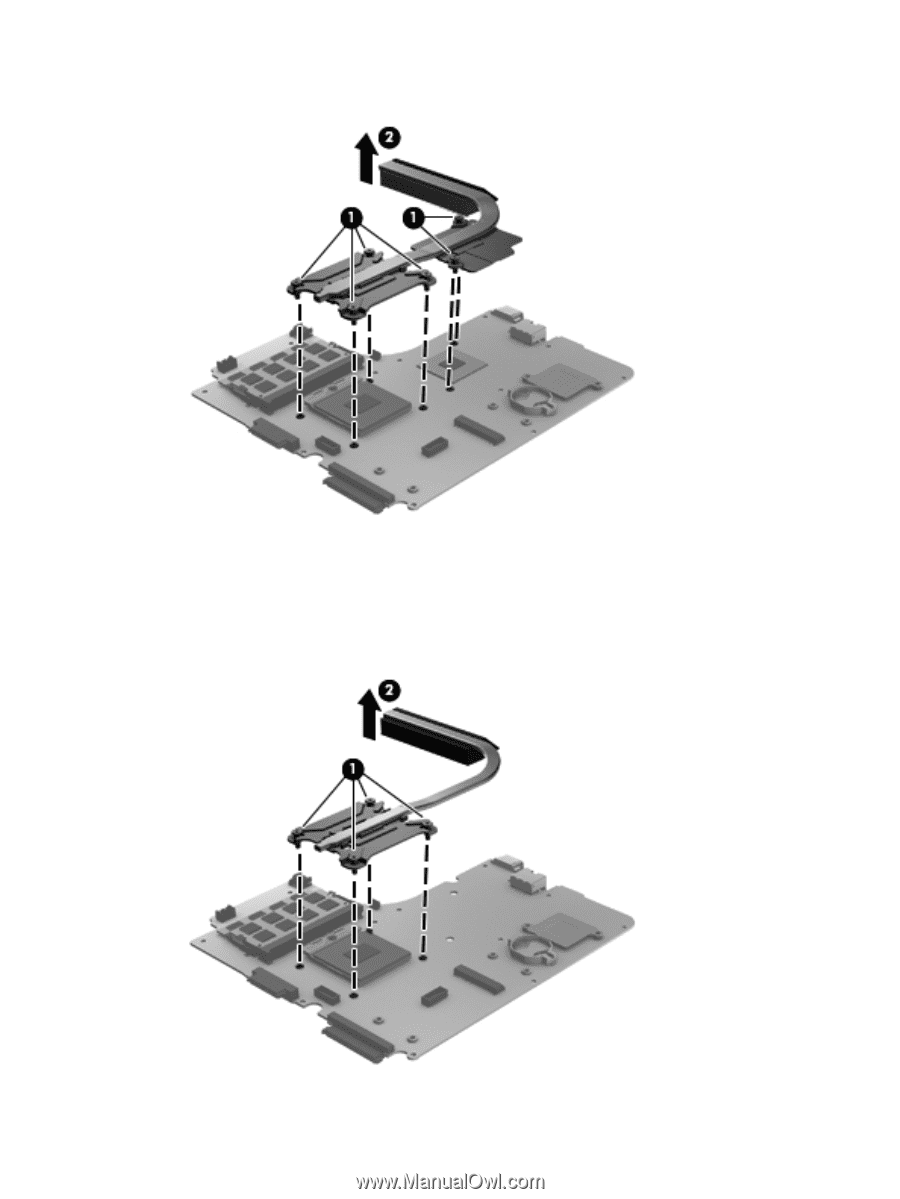
3.
Lift the heat sink up
(2)
, and then pull it off the system board
(3)
.
Remove the UMA heat sink.
1.
To remove the UMA heat sink, in the order indicated on the heat sink, loosen the four captive
Phillips screws
(1)
that secure the heat sink to the system board.
2.
Lift the heat sink up
(2)
, and then pull it out of the computer
(3)
.
Remove the UMA heat sink.
Component replacement procedures
65