HP ProBook 6360b HP ProtectTools Getting Started - Windows 7 and Windows Vista - Page 45
Advanced User Settings, Create PIN
 |
View all HP ProBook 6360b manuals
Add to My Manuals
Save this manual to your list of manuals |
Page 45 highlights
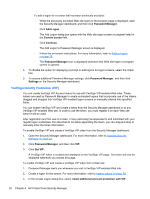
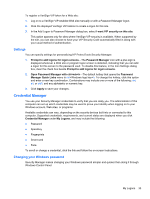
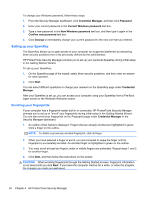
5. Click the Camera icon, and then follow the on-screen instructions to enroll your scene. Follow the on-screen instructions, and be sure to look at your image while the scenes are being captured. 6. Click Next. 7. Click Finish. You can also enroll scenes from the Security Manager dashboard: 1. Open the Security Manager dashboard. For more information, refer to Opening Security Manager on page 24. 2. Under My Logons, click Credential Manager, and then click Face. 3. Click Advanced, and then configure additional security. For more information, refer to Advanced User Settings on page 37. 4. Click OK. 5. Click Start, or if you have enrolled scenes previously, click Enroll a new scene. 6. If you did not select any additional security options, you are prompted to select an additional security option. Follow the on-screen instructions, and then click Next. For more information, refer to Advanced User Settings on page 37. 7. Click the Camera icon, and then follow the on-screen instructions to enroll your scene. Follow the on-screen instructions, and be sure to look at your image while the scenes are being captured. For more information, refer to the Face Recognition software Help by clicking the blue ? icon at the top right of the Face logon page. Advanced User Settings These options are also displayed on the Additional Security page if no additional security has been selected. 1. Open the Security Manager dashboard. For more information, refer to Opening Security Manager on page 24. 2. Under My Logons, click Credential Manager, and then click Face. 3. Click Advanced to configure the following security options: a. Security tab-Select one of the following options: ● No additional security-Select this option if you do not wish to add additional security for face logon. ● Use PIN for additional security-Select this option to require a user-specific PIN for face logon. ◦ Click Create PIN. ◦ Enter your Windows password. ◦ Enter the new PIN, and then confirm the new PIN by reentering it. My Logons 37
-
 1
1 -
2
-
3
-
4
-
5
-
6
-
7
-
8
-
9
-
10
-
11
-
12
-
13
-
14
-
15
-
16
-
17
-
18
-
19
-
20
-
21
-
22
-
23
-
24
-
25
-
26
-
27
-
28
-
29
-
30
-
31
-
32
-
33
-
34
-
35
-
36
-
37
-
38
-
39
-
 40
40 -
 41
41 -
 42
42 -
 43
43 -
 44
44 -
 45
45 -
 46
46 -
 47
47 -
 48
48 -
 49
49 -
 50
50 -
51
-
52
-
53
-
54
-
55
-
56
-
57
-
58
-
59
-
60
-
61
-
62
-
63
-
64
-
65
-
66
-
67
-
68
-
69
-
70
-
71
-
72
-
73
-
74
-
75
-
76
-
77
-
78
-
79
-
80
-
81
-
82
-
83
-
84
-
85
-
86
-
87
-
88
-
89
-
90
-
91
-
92
-
93
-
94
-
95
-
96
-
97
-
98
-
99
-
100
-
101
-
102
-
103
-
104
-
105
-
106
-
107
-
108
-
109
-
110
-
111
-
112
-
113
-
114
-
115
-
116
-
117
-
118
-
119
-
120
-
121
-
122
-
123
-
124
 |
 |